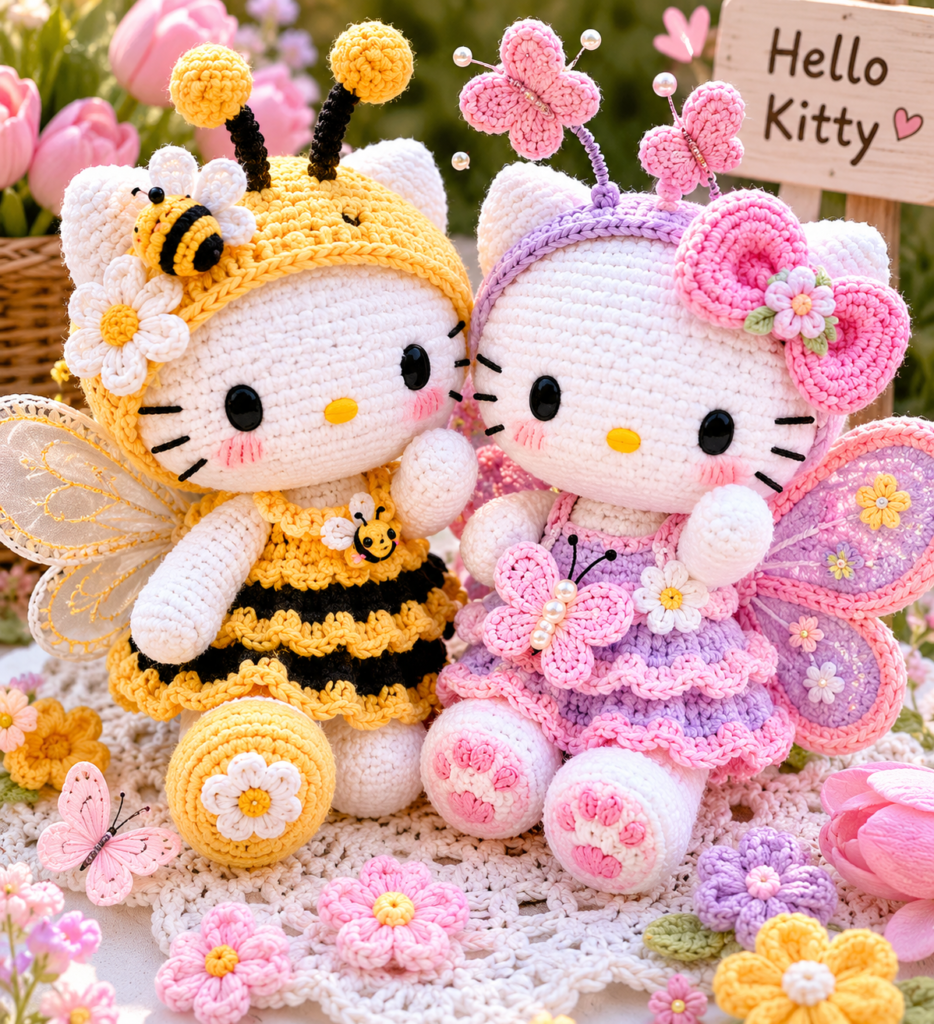
Spring Hello Kitty Crochet Pattern – Adorable Amigurumi Tutorial for Beginners
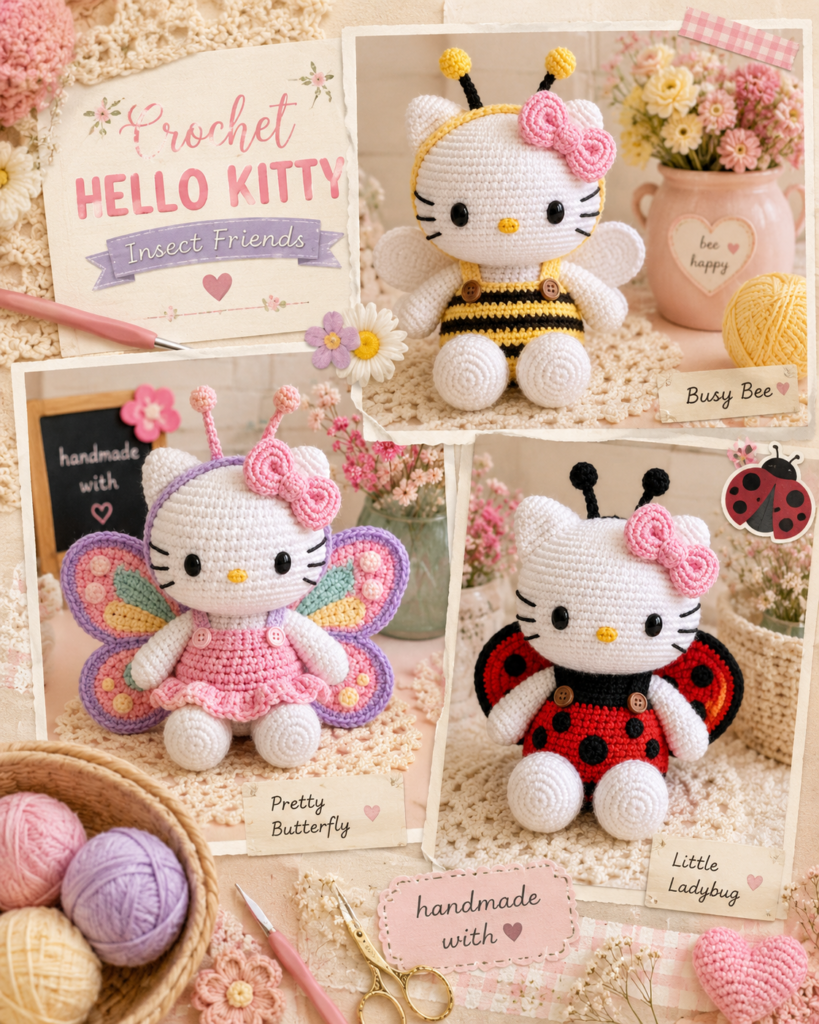
If you love cute amigurumi projects, this Spring Hello Kitty crochet pattern is the perfect handmade toy to add to your collection. Featuring adorable bee, butterfly, and ladybug-inspired outfits, this crochet project is ideal for beginners and intermediate crocheters looking for a fun and creative DIY toy.
This detailed tutorial walks you through the basics of creating a soft crochet Hello Kitty plush using simple stitches, colorful yarn, and beginner-friendly shaping techniques. Whether you’re making it as a gift, nursery decoration, or collectible plushie, this crochet pattern is designed to be easy to follow and Pinterest-worthy.
Materials You Need for This Crochet Hello Kitty Pattern
Before starting your crochet Hello Kitty plush, gather all the essential materials and tools. The original pattern uses YarnArt Jeans yarn in soft pastel shades along with a 2 mm crochet hook for detailed stitching.
You’ll also need fiberfill stuffing, stitch markers, embroidery thread, safety eyes or felt pieces, sewing needles, and scissors. Small pieces of wire can also help strengthen the cute spring antennae for butterfly or bee variations.
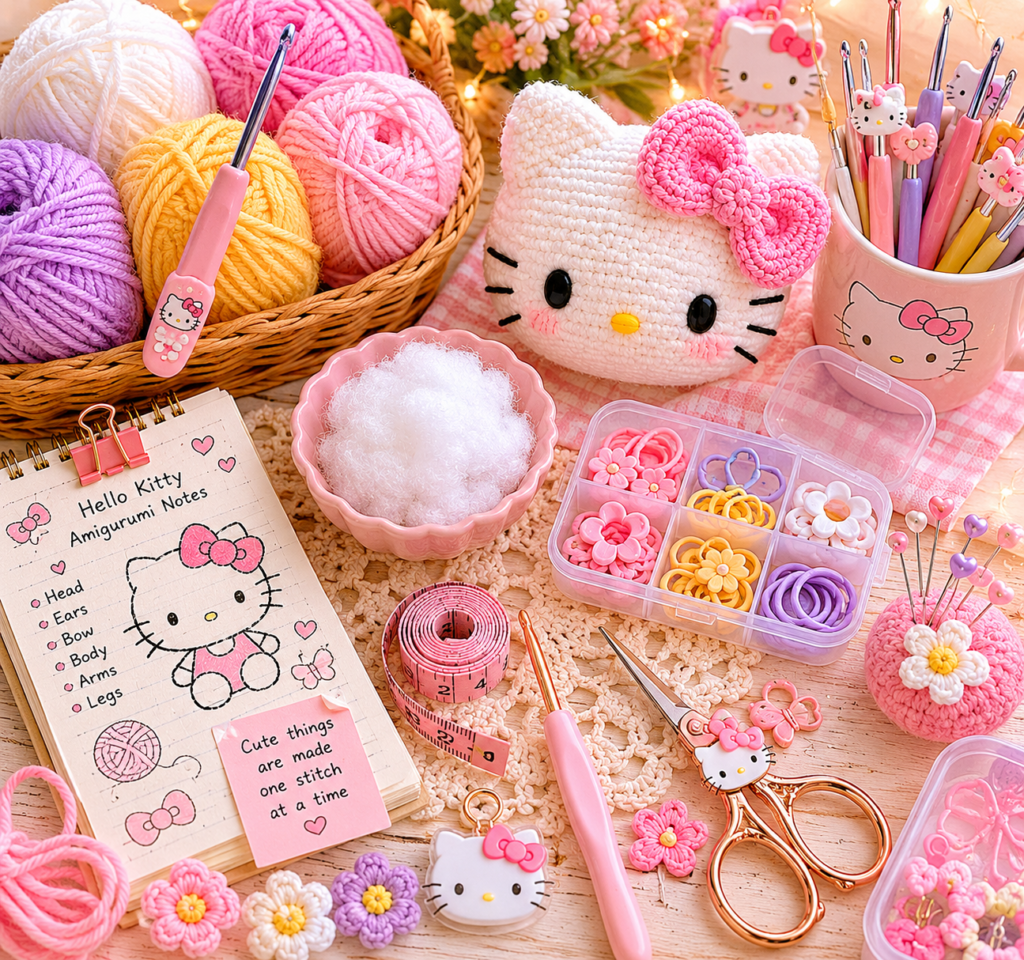
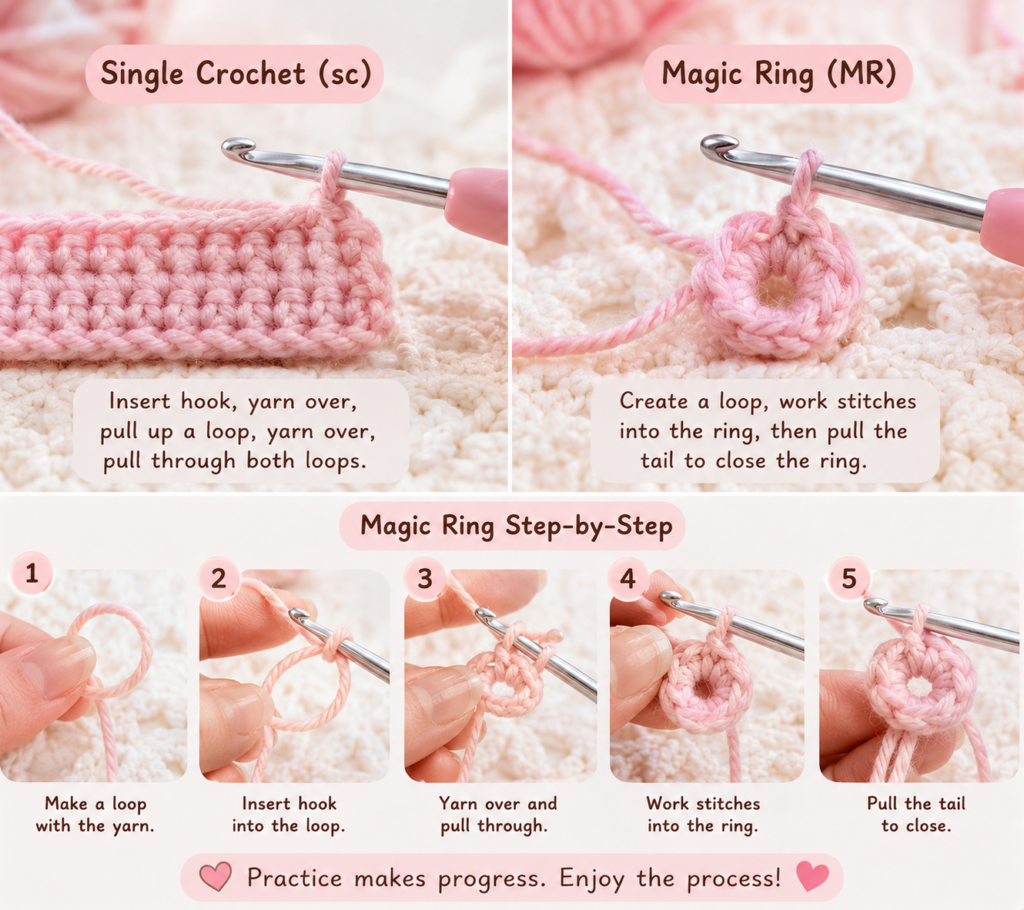
Crochet Abbreviations and Basic Stitches
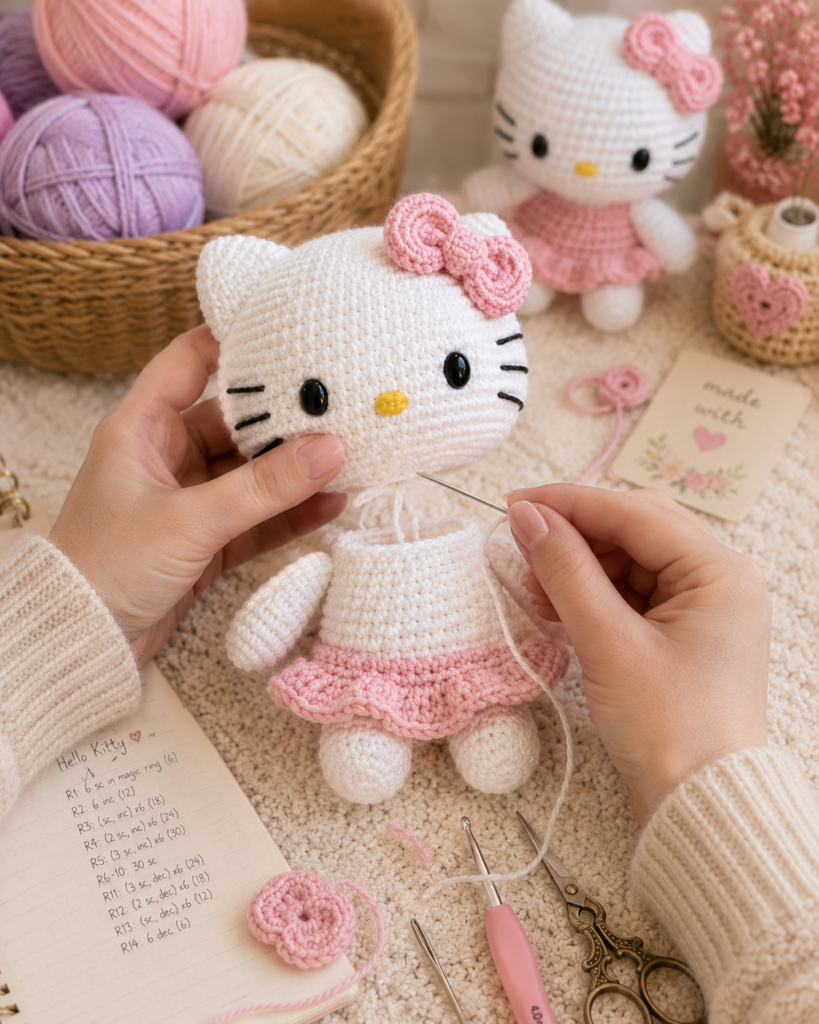
This amigurumi Hello Kitty pattern uses common crochet abbreviations such as single crochet (sc), increase (inc), decrease (dec), magic ring (MR), slip stitch (sl st), and chain (ch). These stitches help shape the plush toy smoothly while maintaining a soft and polished appearance.
If you’re new to amigurumi crochet patterns, practicing these basic stitches before starting will make the project much easier. Working in continuous spiral rounds is especially important for creating a seamless finish.
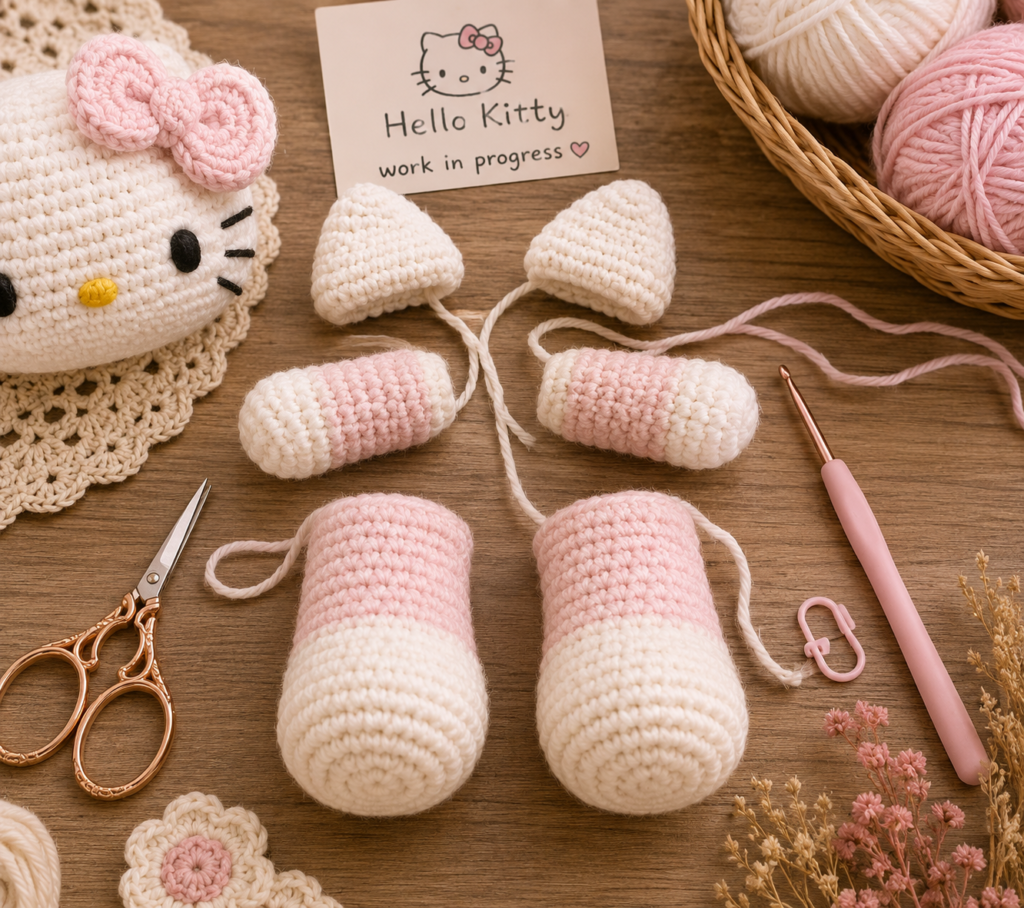
How to Crochet the Arms, Legs, and Ears
The Hello Kitty plush starts with small pieces like the arms, legs, and ears. Each section is crocheted separately using simple increases and decreases to create the rounded amigurumi shape.
The arms are lightly stuffed for flexibility, while the ears are shaped carefully to keep the classic Hello Kitty appearance. Taking your time with these details helps create a more professional-looking crochet toy.
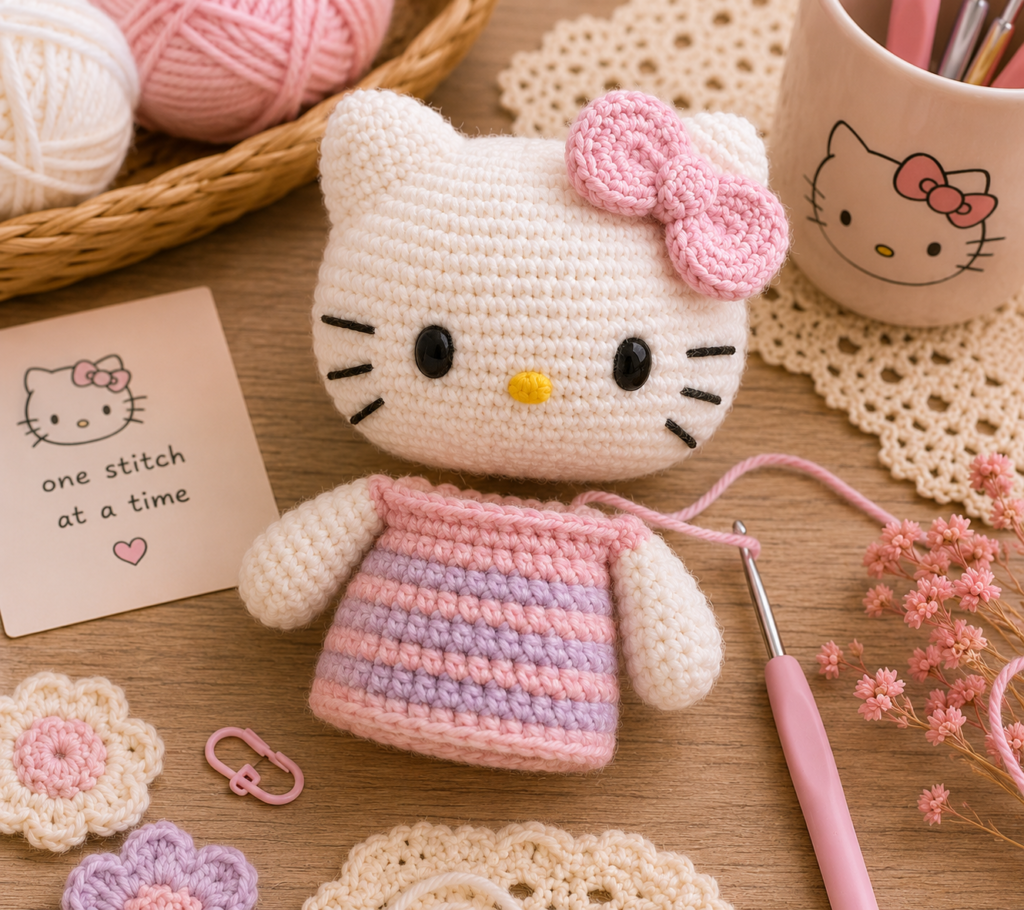
Creating the Hello Kitty Head and Body
The head is the largest section of this crochet pattern and is worked in continuous rounds with gradual increases to form a smooth rounded shape. Stuff the head evenly to maintain a balanced plush structure.
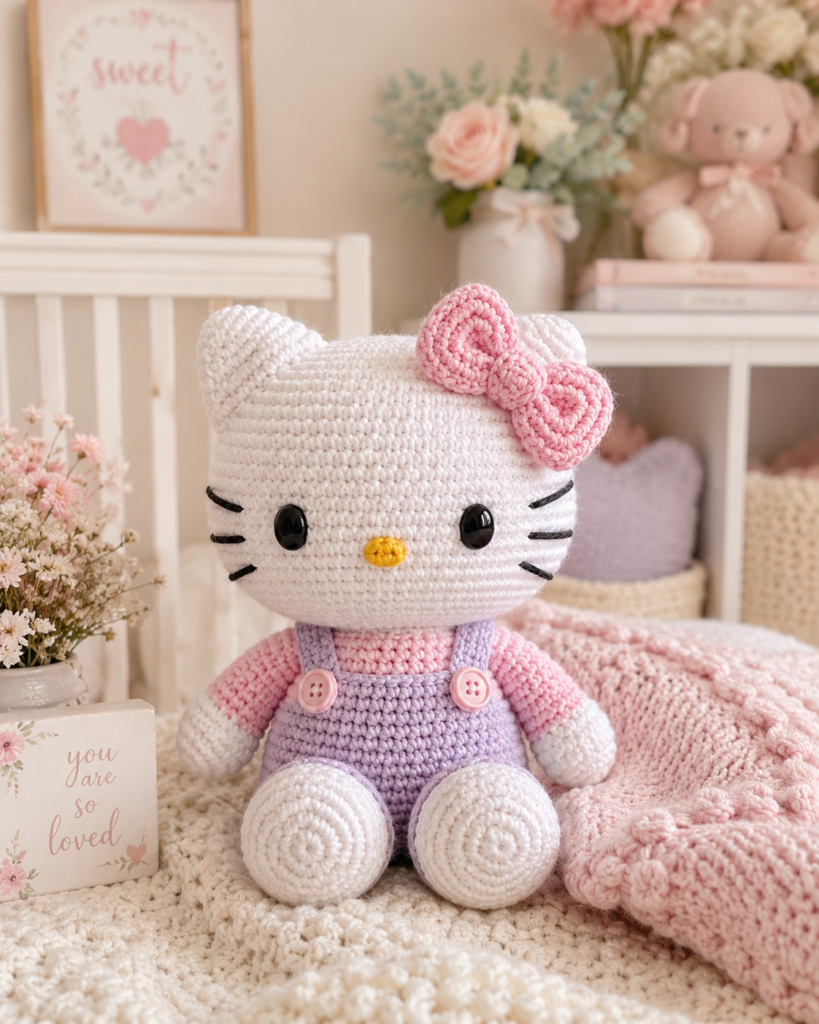
The body features colorful striped sections inspired by spring insects like butterflies, bees, and ladybugs. These color changes give the finished toy a cheerful and playful appearance that stands out beautifully in photos and Pinterest pins.
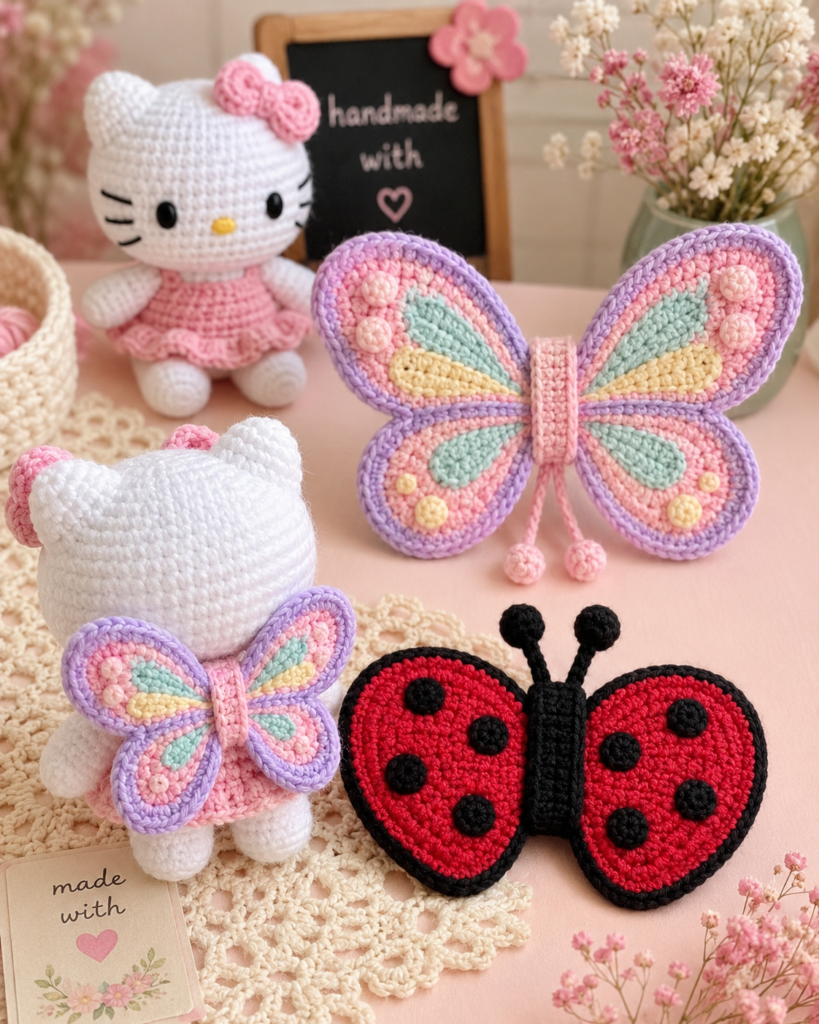
Adding Butterfly, Bee, and Ladybug Wings
One of the cutest parts of this crochet Hello Kitty pattern is customizing the wings and accessories. The bee and ladybug wings are crocheted separately and sewn onto the body after assembly.
The butterfly wings combine upper and lower wing sections to create a fuller and more decorative shape. These colorful details instantly make the plush look more whimsical and perfect for spring-themed decor.
Assembling Your Crochet Hello Kitty Plush
Once all the pieces are finished, assemble the toy by sewing the head securely to the body and attaching the ears, arms, legs, and wings. Positioning the facial features evenly is key to achieving the classic Hello Kitty expression.
Use black embroidery thread for the whiskers and eyelashes, then add a small yellow nose to complete the adorable face. Small finishing details make a huge difference in the final look of your amigurumi plush.
Tips for Making Your Crochet Plush Look Professional
For the best results, keep your crochet tension even throughout the project. Using stitch markers will help you track rounds accurately and maintain symmetrical shaping.
You can also personalize this crochet Hello Kitty pattern by experimenting with different yarn colors, flower embellishments, bows, or seasonal themes. Handmade amigurumi toys are wonderful gifts for birthdays, baby showers, and holiday decorations.
Why This Spring Hello Kitty Crochet Pattern Is Perfect for Pinterest
Cute crochet toys perform extremely well on Pinterest because they combine bright colors, handmade charm, and beginner-friendly creativity. This Spring Hello Kitty crochet pattern is especially eye-catching thanks to its seasonal insect-inspired outfits and adorable facial features.
By sharing high-quality images, helpful crochet tips, and a downloadable PDF pattern, you can attract crochet lovers searching for amigurumi tutorials, Hello Kitty crochet ideas, and DIY plush toy inspiration.
Conclusion
This Spring Hello Kitty crochet pattern is a fun and creative amigurumi project that combines adorable character design with seasonal charm. From the detailed wings to the cute embroidered face, every step helps bring this handmade plush toy to life.
Whether you’re creating content for your crochet blog, growing your Pinterest traffic, or simply making a thoughtful handmade gift, this crochet Hello Kitty tutorial is guaranteed to inspire your audience and encourage PDF downloads.