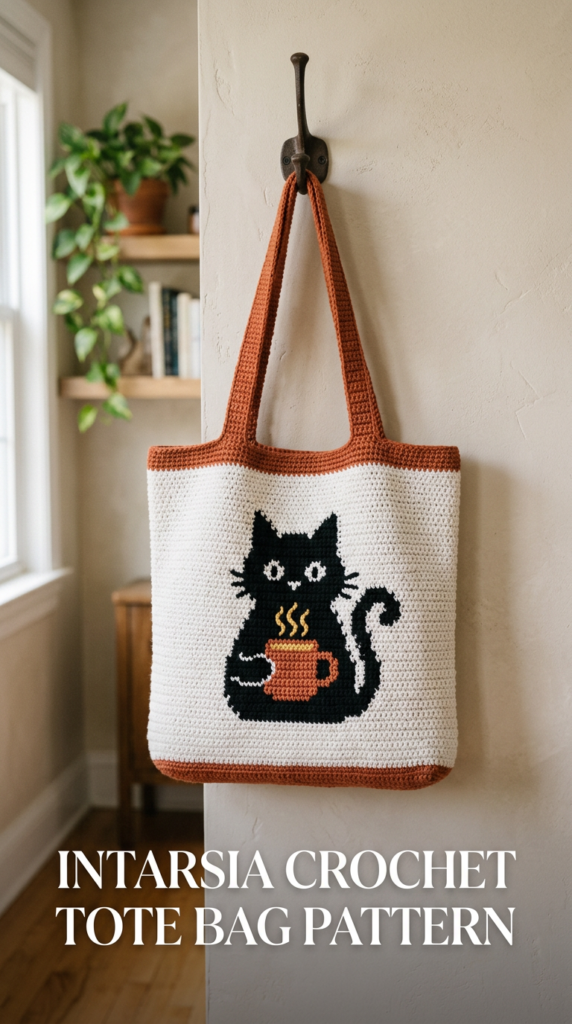
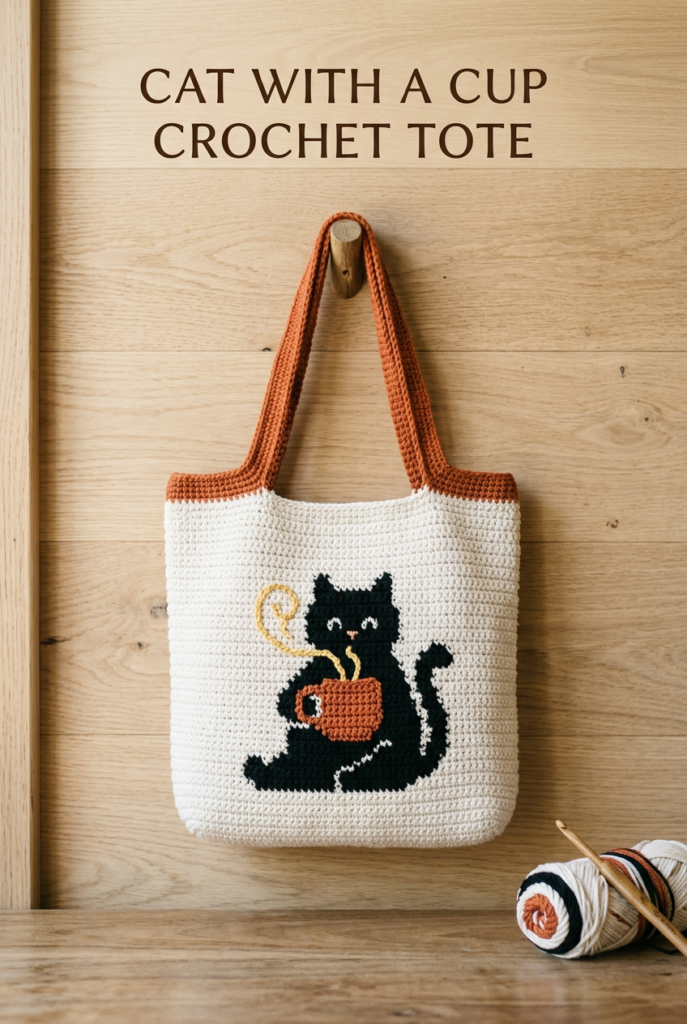
Cat With a Cup Crochet Tote Bag Pattern (Intarsia + Single Crochet)
This cat with a cup crochet tote bag is a bold, modern make that’s perfect for coffee lovers and cat people alike. The bag is worked mostly in single crochet, with the front panel made using intarsia crochet so the cat-and-cup design looks clean on the right side. Using the suggested materials, the finished size is about 30 cm (11.8″) tall and 34 cm (13.4″) wide—great as an everyday crochet shoulder bag or a cute project bag.
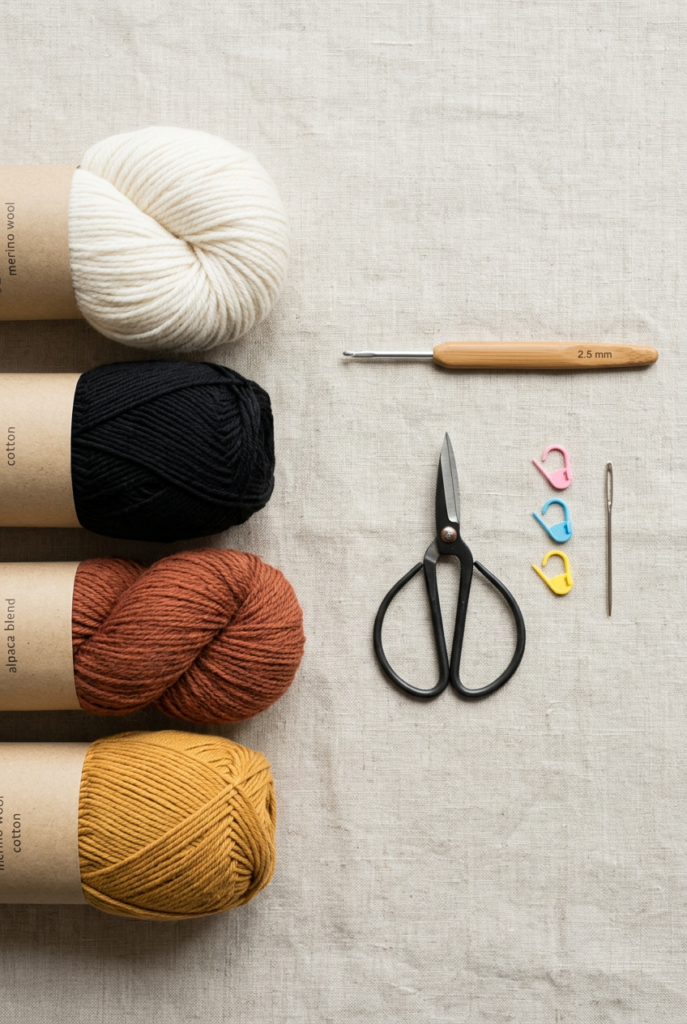
Materials + Tools (What You Need to Start)
To match the look in the PDF, use sport/light DK yarn in white, black, light terracotta, and a small amount of yellow for the steam, plus a 2.5 mm crochet hook, scissors, and a tapestry needle for weaving in ends. The original yarn choices are Gazzal Baby Bamboo (white/yellow/light terracotta) and Gazzal Baby Love (black), but any smooth yarn with similar thickness will work well for crisp colorwork. Since this is a single crochet bag, choose a yarn that won’t pill easily and feels sturdy for everyday use.
Before You Crochet: Intarsia Tips for Neat Color Changes
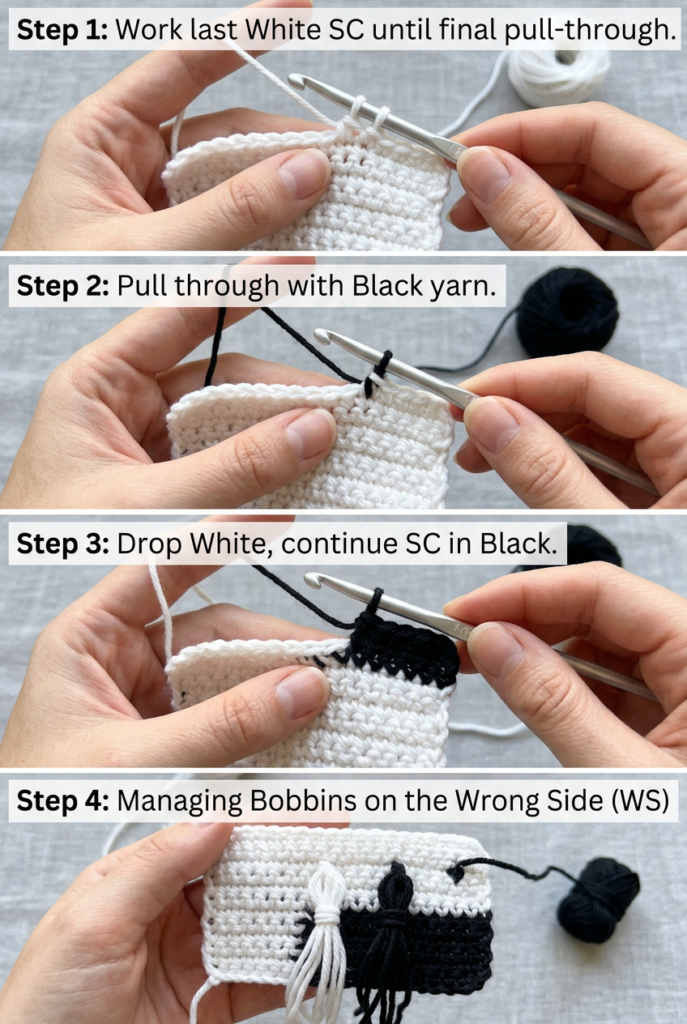
The front panel uses intarsia crochet (not tapestry crochet), meaning you’ll work with separate yarn sources for each color block and keep the unused colors parked at the back. Wind yarn onto bobbins (or small pieces of cardboard) so color changes feel controlled, and keep your tension even—too tight causes puckering, too loose creates gaps. The key tip from the PDF: keep yarn tails on the wrong side, then use a needle to hide them neatly once the panel is finished.
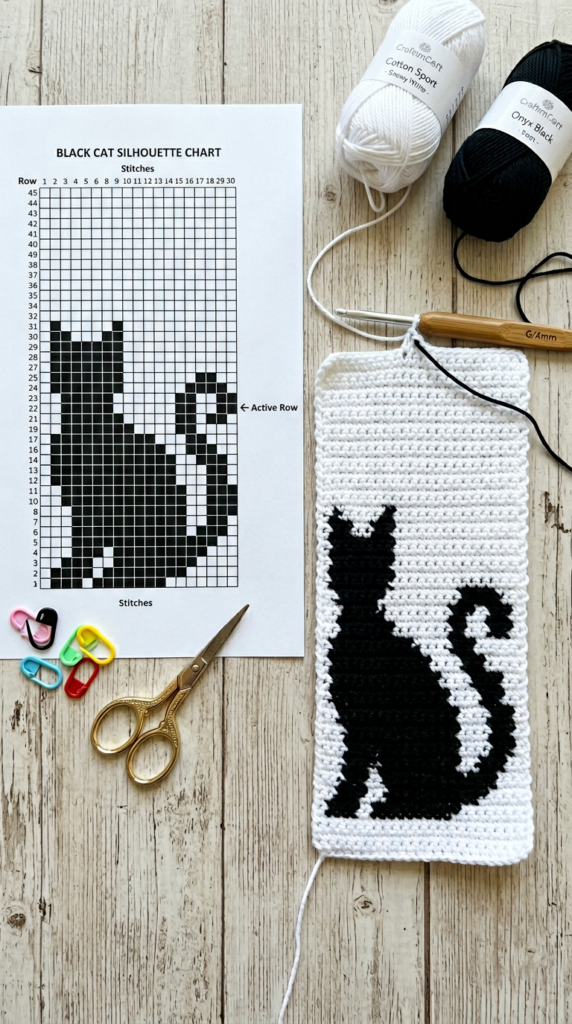
Crochet the Front Panel (Cat Graph) in Single Crochet Rows
You’ll start with a long foundation chain and crochet back-and-forth rows in single crochet, following the graph chart from bottom to top. Each square on the chart equals one single crochet stitch, and you’ll turn at the end of every row with a turning chain (ch 1) that does not count as a stitch. The chart also shows when to work on the right side (RS) versus the wrong side (WS)—download the PDF to follow the exact color placement row by row.
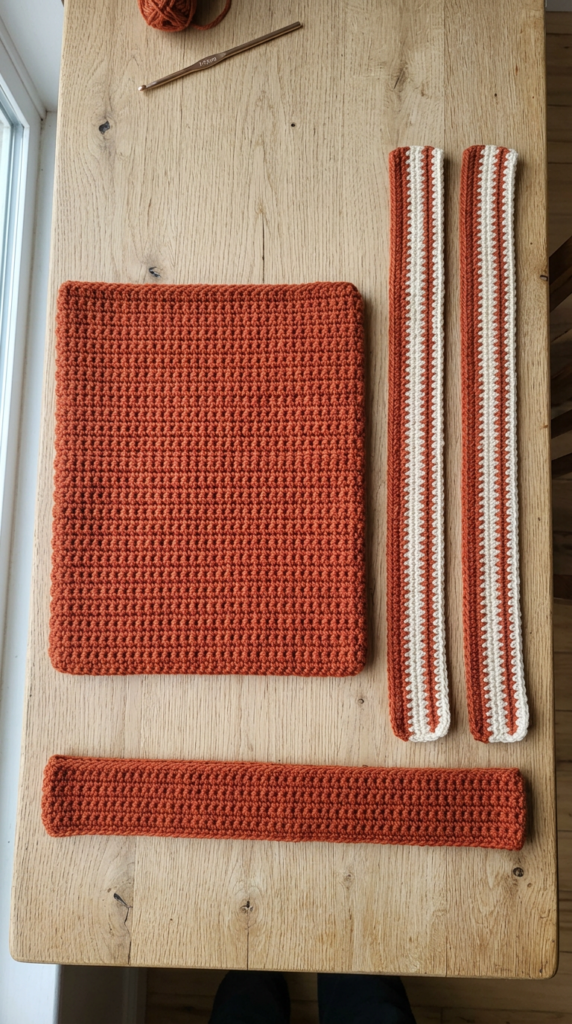
Crochet the Back Panel, Bottom Strip, and Handles
The back is a simple, sturdy rectangle in solid light terracotta worked in single crochet rows, making it beginner-friendly after you finish the intarsia front. The handles are long straps worked in narrow rows, then finished with a single crochet round edging to make them look polished and help them hold their shape; you can adjust handle length for a shoulder tote or a shorter handbag style. The bottom is a long strip in light terracotta that gets crocheted to the front and back to form a structured base.
Assembly: Joining the Bag + Finishing for a Store-Bought Look
To assemble, place pieces with wrong sides together and single crochet them together along the edges so the seam becomes a clean design detail on the outside. The PDF construction joins the bottom to the back with light terracotta, then joins the bottom to the front with white, and finishes by sewing on the handles securely. After weaving in ends, consider adding an optional fabric lining (especially if you’ll carry keys or pens) to make your crochet tote bag extra durable.