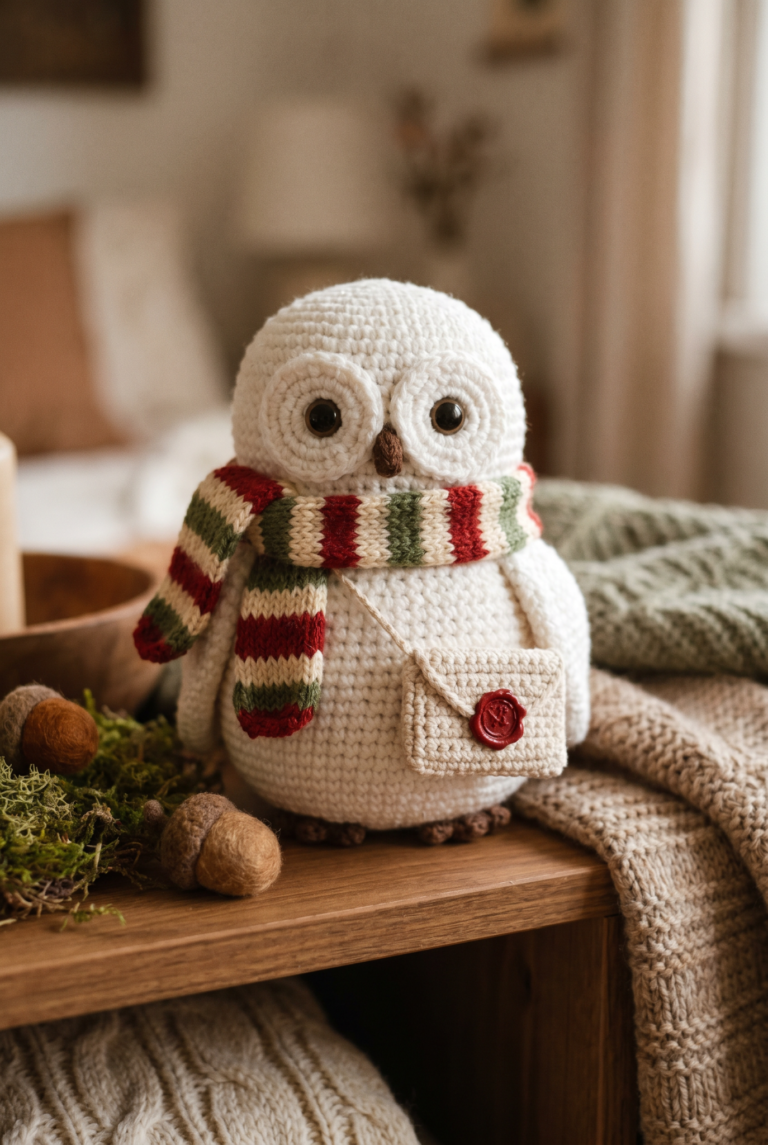
Hedwig the Owl Crochet Pattern (Beginner-Friendly Amigurumi Tutorial)
If you love magical-inspired crochet projects, this adorable Hedwig owl amigurumi pattern is the perfect weekend make. Inspired by the famous snowy owl, this crochet owl pattern combines simple stitches, cozy textures, and beginner-friendly shaping techniques to create a soft handmade companion that looks beautiful in nurseries, bookshelves, or gift baskets.
Whether you’re new to amigurumi crochet or already obsessed with making cute crochet animals, this fluffy owl project is easy to customize and fun to stitch together.
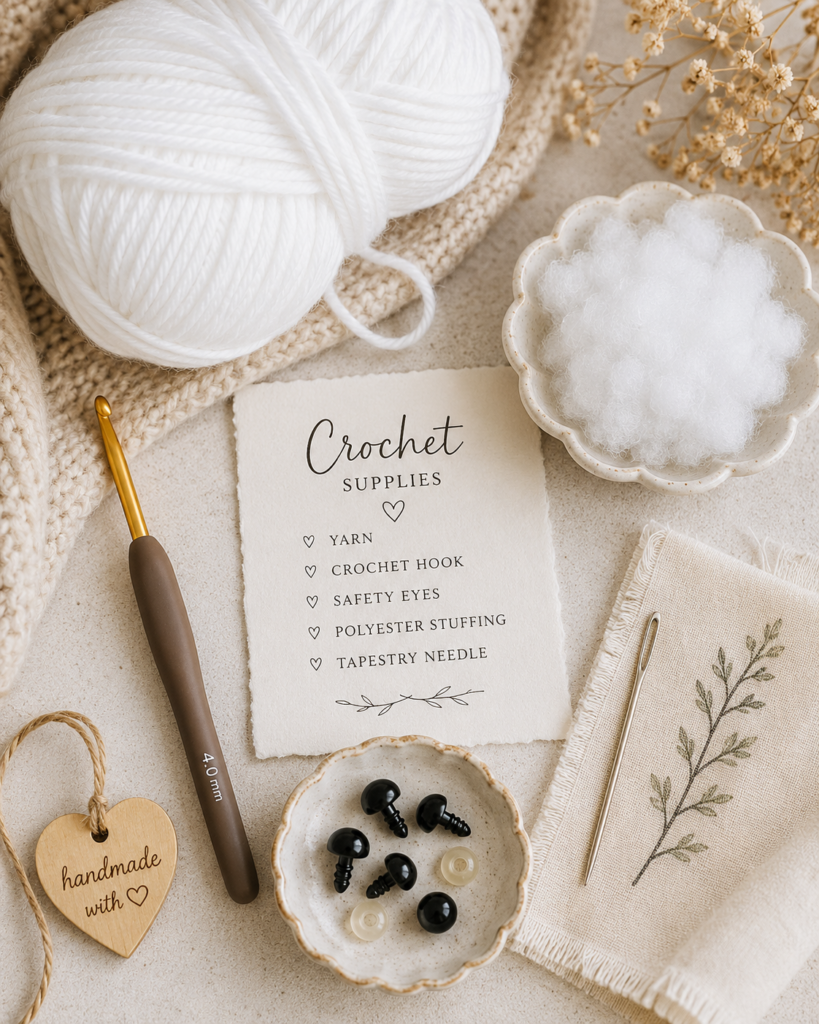
Supplies You’ll Need for This Crochet Owl
Before starting your crochet Hedwig owl, gather all the materials needed for the project. The pattern uses worsted-weight yarn and basic amigurumi supplies, making it affordable and beginner-friendly.
Materials List
- G/6 4.25mm crochet hook
- White worsted-weight yarn
- Small amount of black yarn
- 8–12 mm black safety eyes
- Poly-fil stuffing
- Yarn needle or tapestry needle
- Stitch marker
This project mainly uses single crochet stitches worked in continuous rounds, so keeping track of your rows with a stitch marker will make the process much easier.
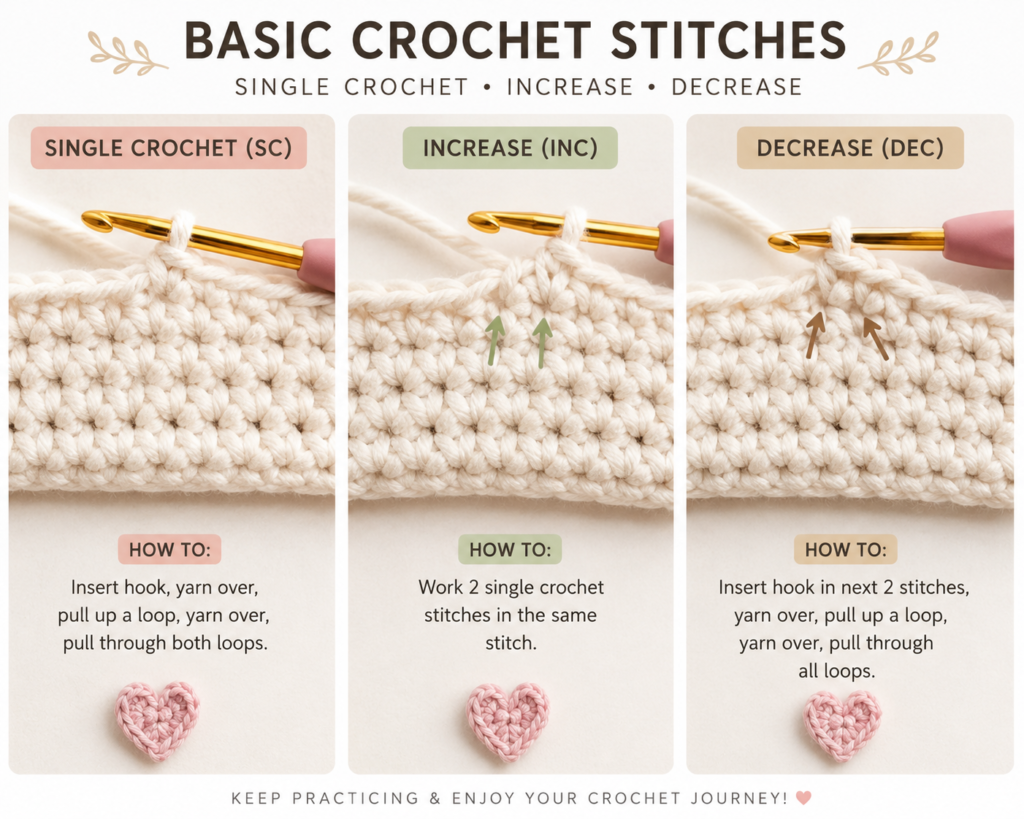
Crochet Stitches Used in the Owl Pattern
This owl crochet pattern focuses on beginner-friendly amigurumi stitches that are simple to master. The body is worked in continuous rounds using increases and invisible decreases for smooth shaping.
Common Crochet Abbreviations
- MR – Magic Ring
- SC – Single Crochet
- INC / 2SC – Increase
- DEC – Invisible Decrease
- FLO – Front Loop Only
- SC3TOG – Single Crochet 3 Together
If you’ve already made small crochet plushies or amigurumi animals, these stitches will feel very familiar.
How to Crochet the Owl Body
The owl body begins with a magic ring and gradually increases to create a rounded base. The shaping transitions smoothly into the chest and head sections, giving the owl its signature fluffy silhouette.
As you continue through the rounds, the pattern carefully balances increases and decreases to create natural curves. Using a stitch marker is highly recommended because the body is worked continuously without joining rounds.
Beginner Tip
Take time to count your stitches after every round. This helps maintain the owl’s shape and prevents uneven tension.
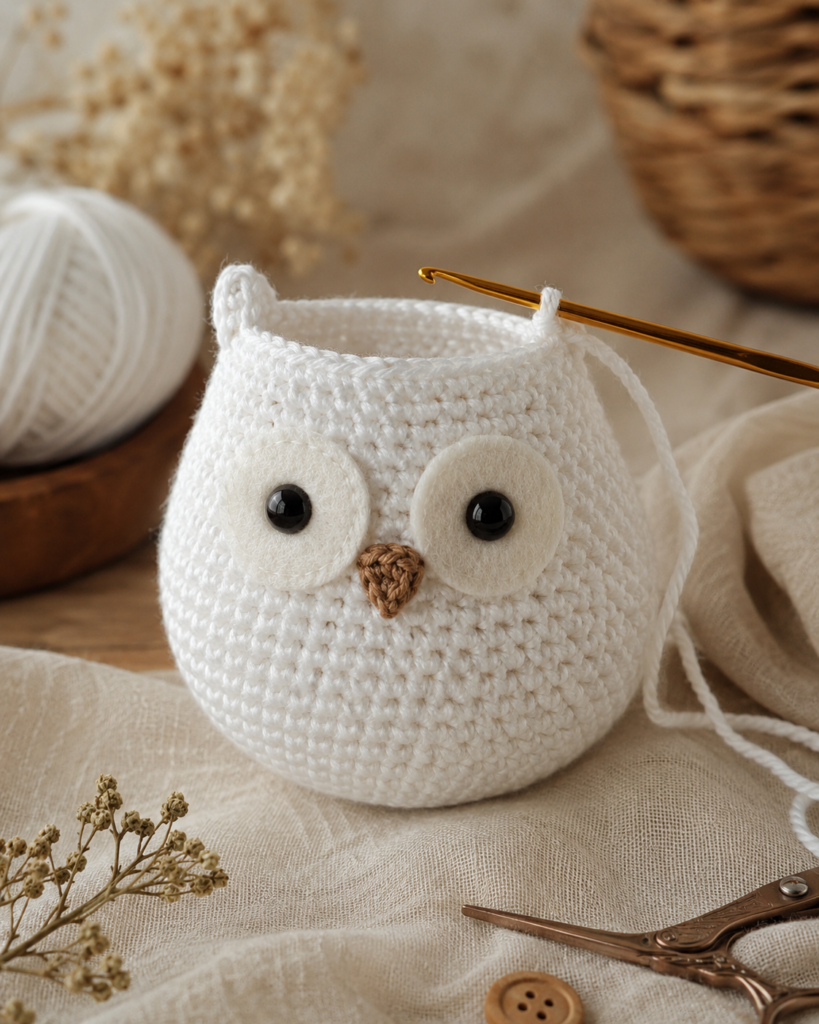
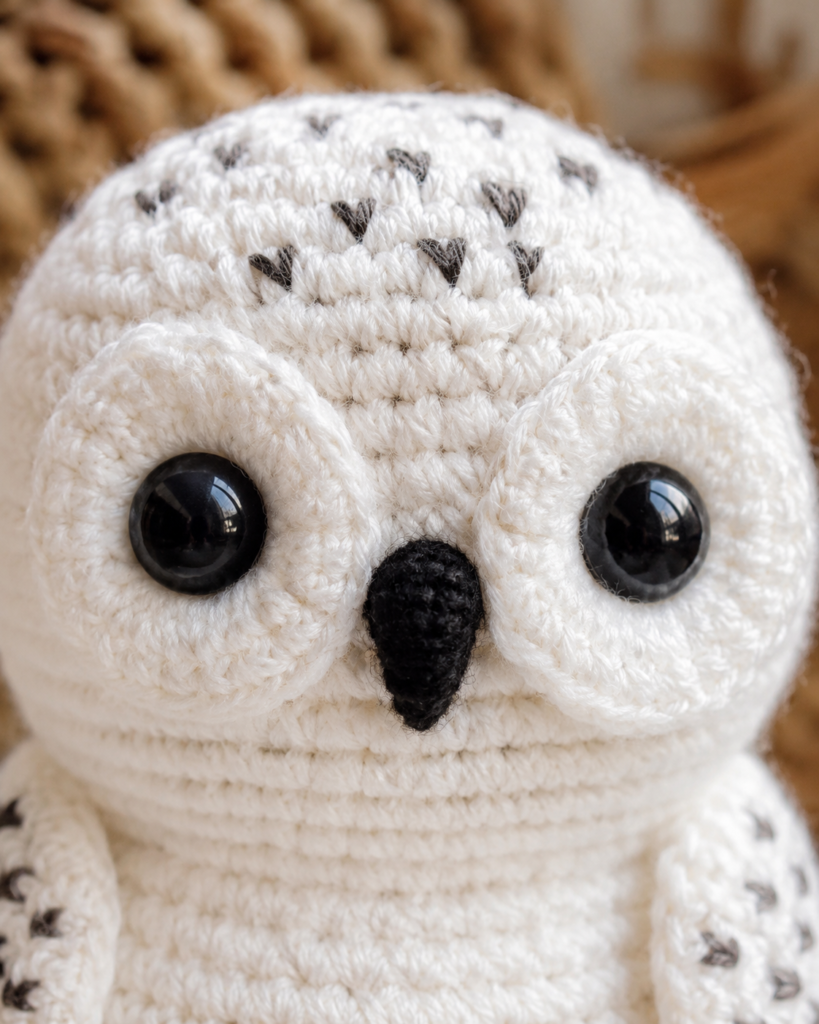
Adding the Safety Eyes and Beak
One of the cutest parts of this crochet owl pattern is the slightly off-centered eyes. Unlike many amigurumi projects, the eyes do not need to be perfectly symmetrical, which gives the owl a charming personality.
The beak is stitched using black yarn and only takes a few minutes to complete. A few simple passes with a yarn needle create a tiny beak that perfectly complements the snowy owl look.
Pro Styling Tip
Position the eyes slightly toward one side so the owl appears to tilt its head naturally.
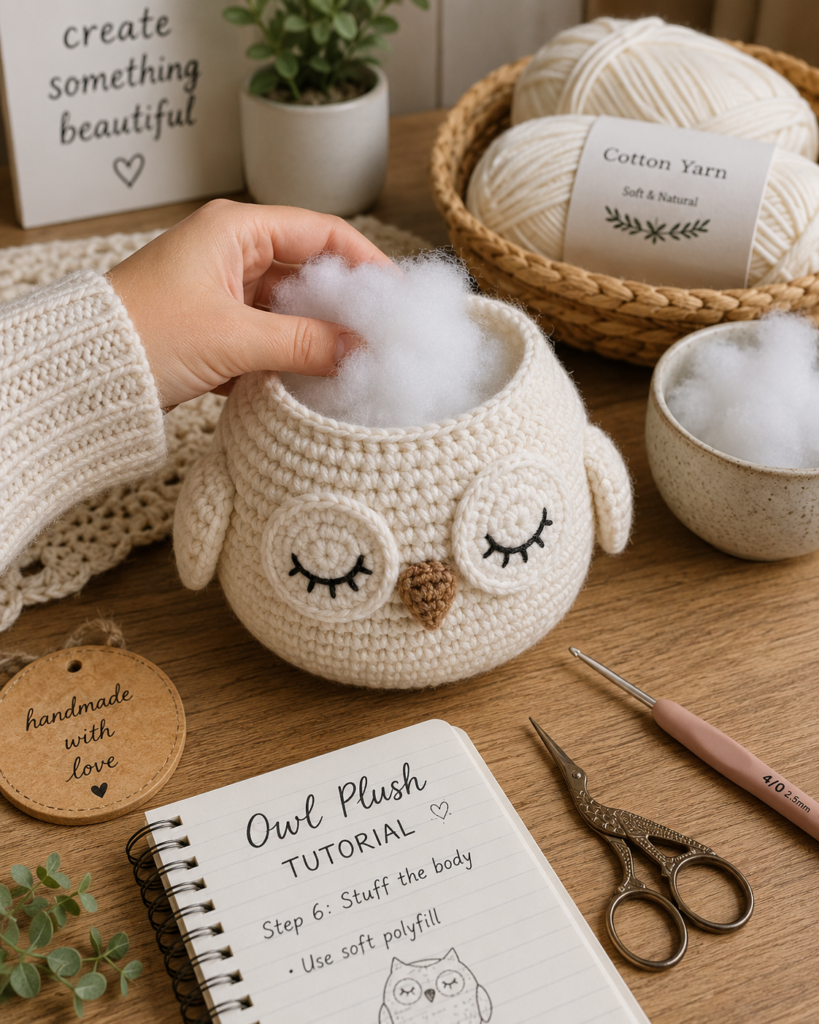
Stuffing and Closing the Owl
Once the body shaping is complete, the owl is stuffed firmly with poly-fil to help it hold its rounded shape. The final rounds close the opening neatly while maintaining a smooth finish.
Make sure to add enough stuffing to support the head area without overfilling. Proper stuffing gives your crochet owl a soft but structured appearance.
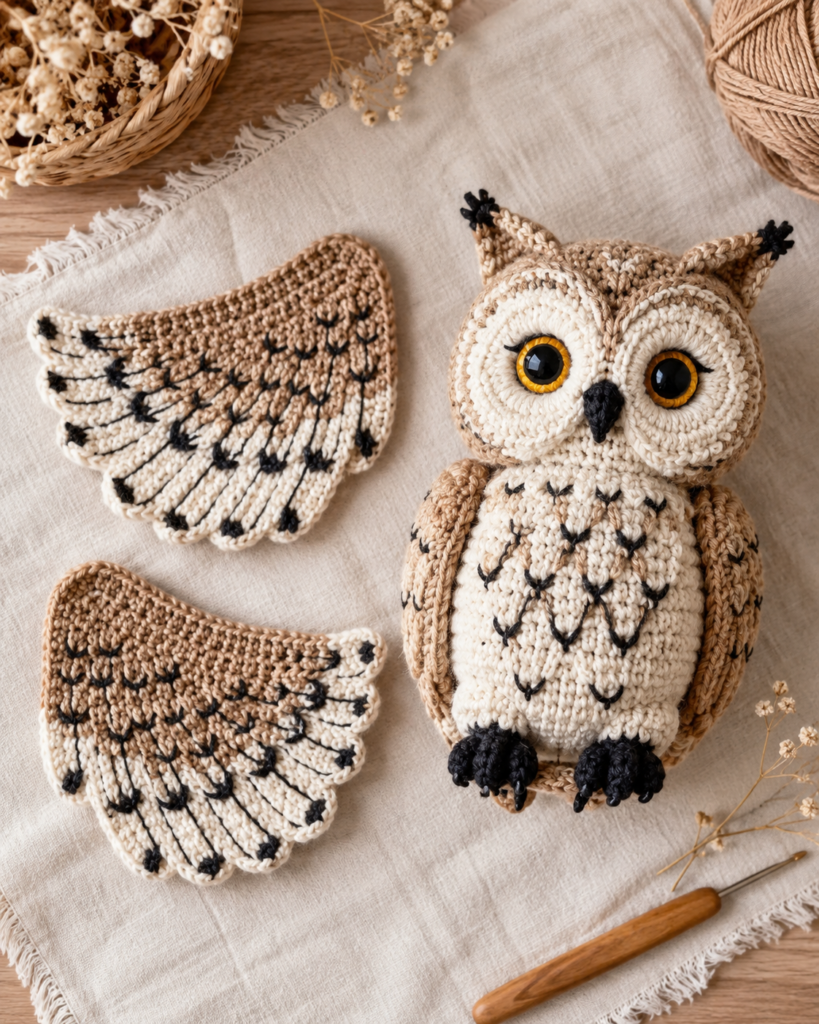
How to Crochet the Owl Wings
The wings are worked separately in rows and then sewn onto the finished body. This part of the pattern adds texture and personality through small black accents that mimic snowy owl feathers.
You can create the feather details using black yarn pull-through stitches or embroider them afterward with a yarn needle. Both methods create a beautiful speckled effect that makes the owl look realistic and whimsical at the same time.
Customization Ideas
- Use brown yarn for woodland owls
- Add blush cheeks for kawaii style
- Turn the owl into a nursery mobile
- Make mini versions for keychains
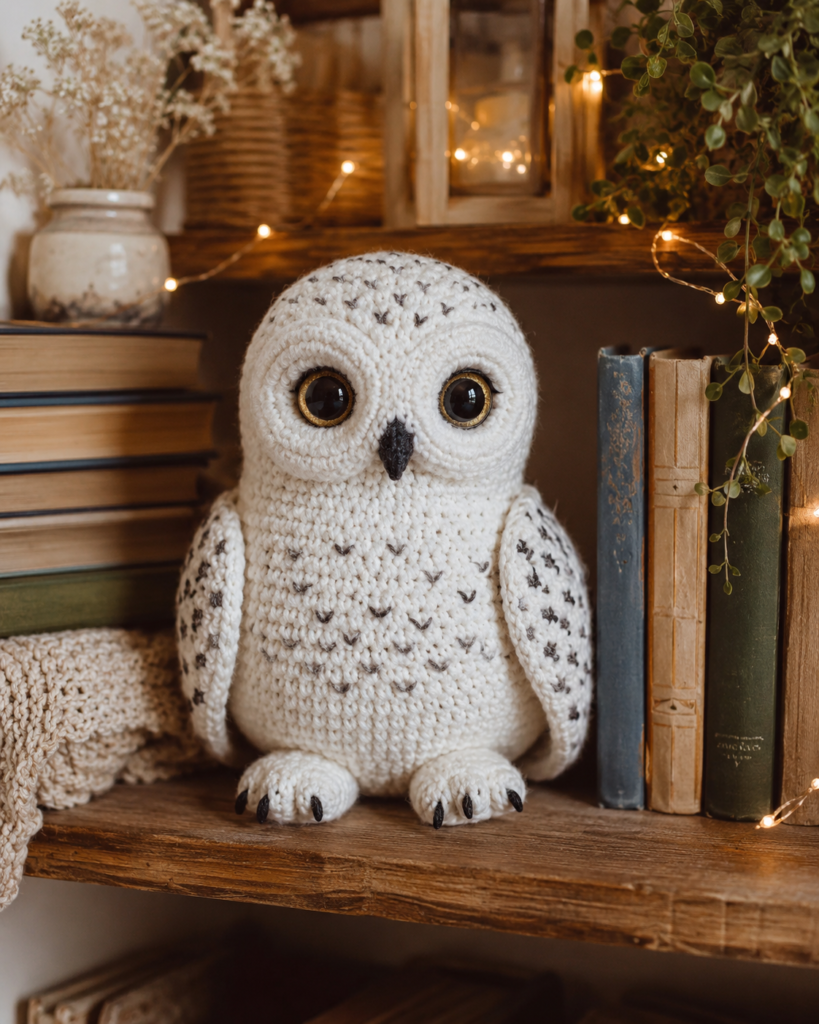
Finishing Your Hedwig Crochet Owl
After sewing both wings onto the body, your crochet snowy owl is complete. This project makes an adorable handmade gift for Harry Potter fans, nursery decor lovers, or anyone who enjoys cute crochet animals.
Because the pattern is highly customizable, you can experiment with different yarn textures, eye sizes, and color combinations to create unique owl designs for every season.
Why Crocheters Love This Pattern
- Beginner-friendly construction
- Minimal sewing required
- Quick weekend crochet project
- Perfect for gifting and selling at craft fairs
- Pinterest-friendly amigurumi design
Final Thoughts
This Hedwig owl crochet pattern is a fun and relaxing amigurumi project that combines simple stitches with adorable character details. The beginner-friendly instructions, customizable wing accents, and soft plush shape make it a perfect crochet project for cozy crafting sessions.
If you enjoy making crochet animals, save this tutorial to Pinterest and bookmark the page for future owl-inspired creations.