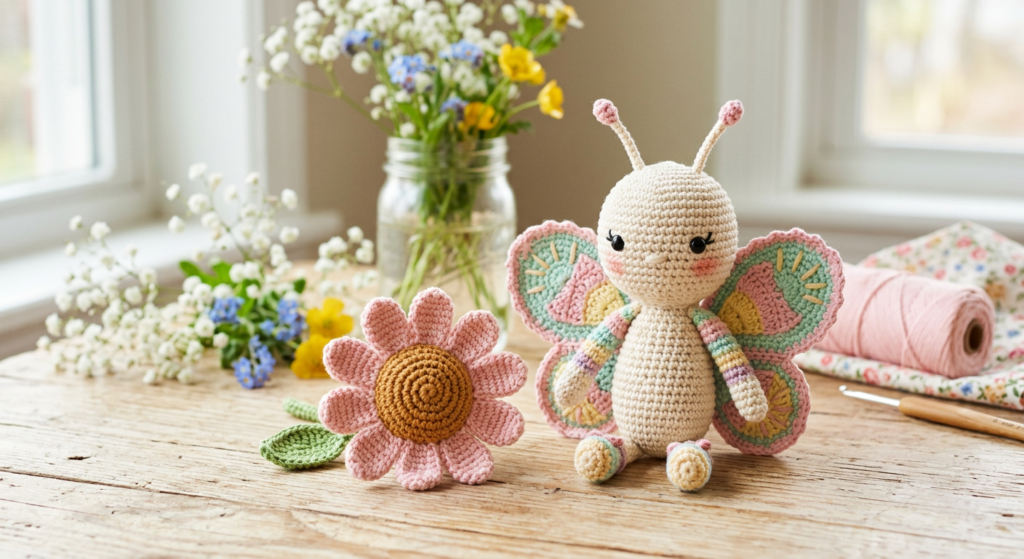
🦋 Elvina the Crochet Butterfly (Free Amigurumi Pattern + PDF)
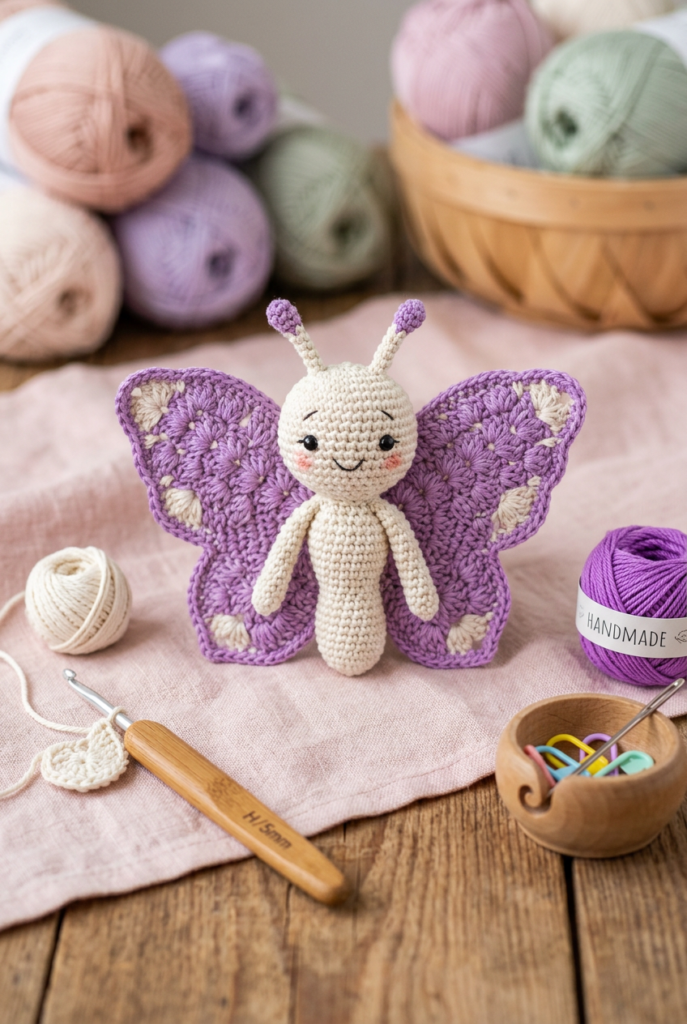
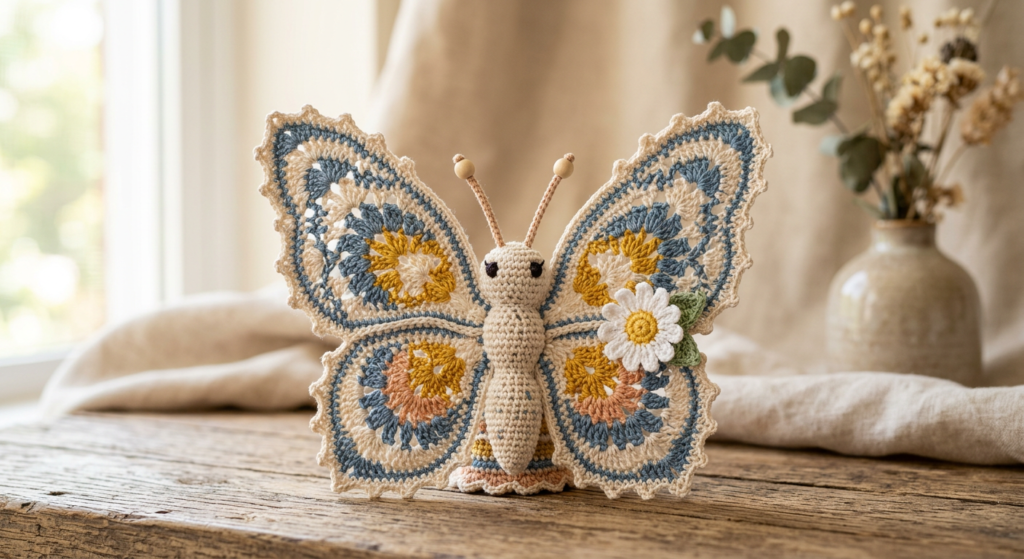
Looking for a delicate and adorable crochet butterfly amigurumi pattern? Meet Elvina, a tiny 11 cm handmade butterfly that’s perfect for gifts, nursery decor, or spring crochet collections.
This step-by-step tutorial walks you through the highlights of the pattern, and you can download the full printable PDF to follow along easily.
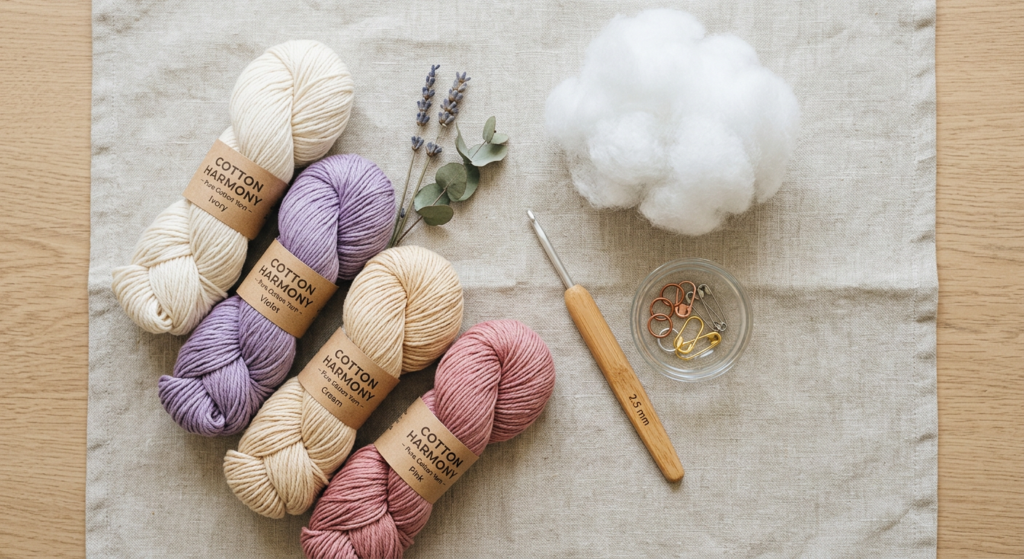
🧶 Materials & Crochet Supplies
Elvina is crocheted with a 2.5 mm hook and cotton yarn (50g / 115m). When finished, she measures approximately 11 cm tall (13 cm including antennae) — making her the perfect mini amigurumi project.
Yarn Colors Used:
- Ivory
- Violet
- Cream
- Pastel Pink
- Caramel
- Black embroidery yarn
You’ll also need fiberfill stuffing, stitch markers, scissors, pins, and a yarn needle.
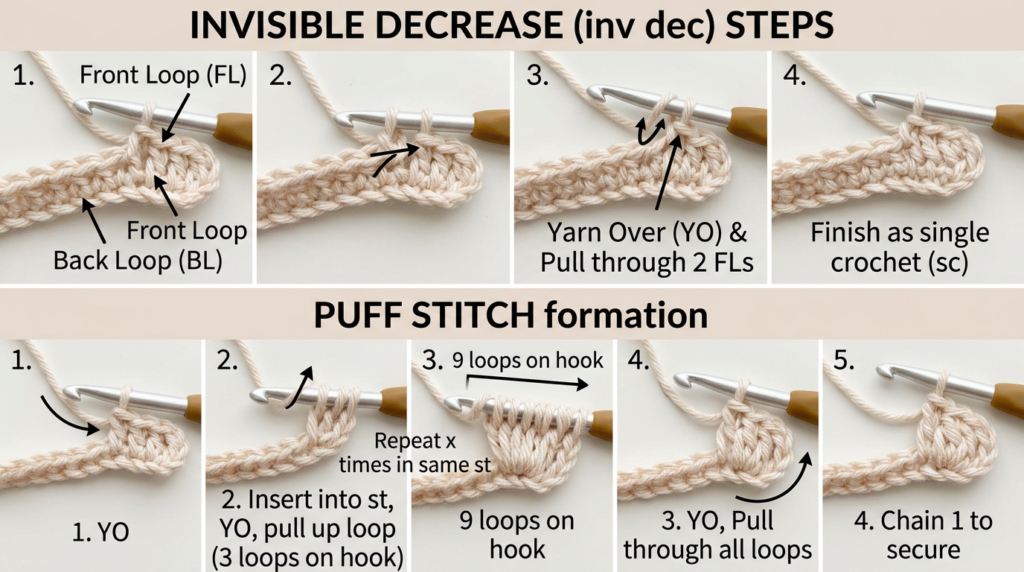
✨ Stitch Techniques Used in This Pattern
This butterfly crochet pattern uses beginner-to-intermediate techniques worked mostly in spiral rounds.
You’ll use:
- Magic ring (mr)
- Single crochet (sc)
- Invisible decrease
- Color change technique
- Puff stitch (3 incomplete dc joined together)
- Front loop only (flo) and back loop only (blo)
The puff stitch creates the soft, textured butterfly wings that make this design so unique.
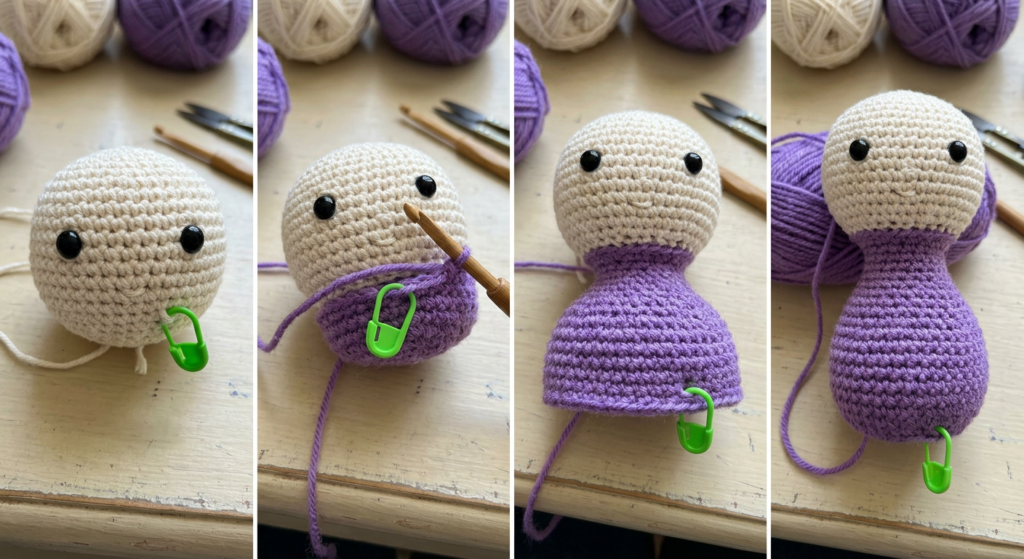
🦋 Head & Body (Worked in One Piece)
The head begins in ivory yarn, increasing gradually to shape a smooth round sphere. After round 19, you stuff the head and transition into the violet body.
The body is shaped with gentle increases and invisible decreases, creating a delicate tapered silhouette. French knot embroidery adds tiny decorative details to the torso.
The entire head and body are crocheted continuously in spiral rounds for a seamless finish.
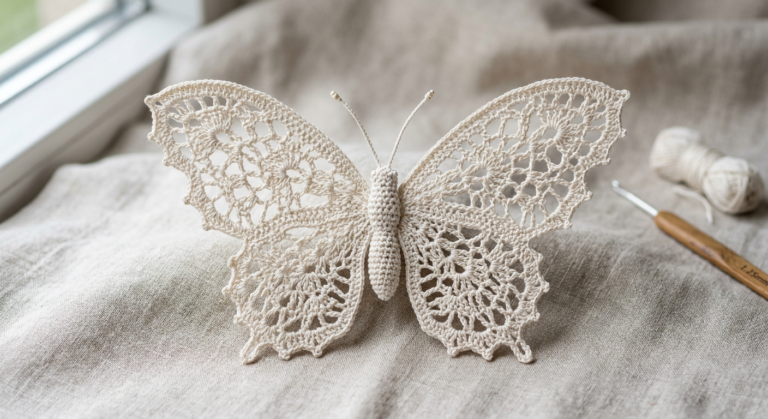
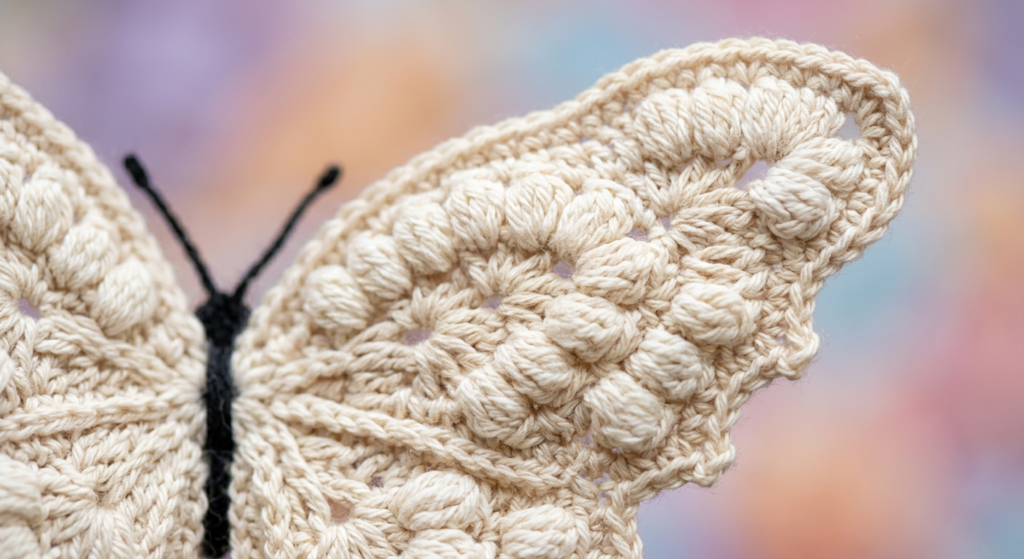
🌸 Delicate Butterfly Wings with Puff Stitch
The wings are the showstopper of this crochet butterfly pattern. They’re made in two parts — a larger half-wing and a smaller half-wing — then sewn together to form one dimensional wing.
The design uses:
- Puff stitches
- Chain spaces
- Double crochet shaping
- Drop-style assembly
Each wing is sewn carefully so the second one is mirrored, creating perfect symmetry.
🧵 Antennae, Arms & Facial Embroidery
The tiny violet antennae are made with chain stitches and attached to round 4 of the head. The fluffy yarn ends create a whimsical touch.
Arms are crocheted separately in ivory, lightly stuffed, folded flat, and sewn between the head and body — slightly tilted forward for a sweet pose.
Facial details include:
- Embroidered eyes (round 14)
- Eyebrows (round 10)
- Small embroidered nose
- French knot body dots
These details bring Elvina to life.
🌼 Bonus: Crochet Daisy Accessory
This pattern also includes a tiny crocheted daisy accessory made in caramel and pastel pink.
The flower is worked in closed rounds:
- Caramel center (magic ring + dc increases)
- Pink petal loops made with chains and double crochet
It’s the perfect spring-themed detail for styling your butterfly.
Final Assembly Tips
To assemble your butterfly:
- Sew arms between head and body
- Attach wings behind the arms
- Add embroidered facial features
- Secure antennae evenly
- Adjust stuffing for balance
Take your time with embroidery — it makes a huge difference in the final look.
🦋 Why Crocheters Love This Butterfly Pattern
✔ Perfect mini amigurumi project
✔ Unique puff stitch wings
✔ Beginner-friendly shaping
✔ Ideal handmade gift idea
✔ Great spring crochet project
If you’re searching for:
- small crochet butterfly pattern
- amigurumi butterfly tutorial
- crochet butterfly doll PDF
- mini crochet spring decor pattern
This design is a beautiful addition to your handmade collection.