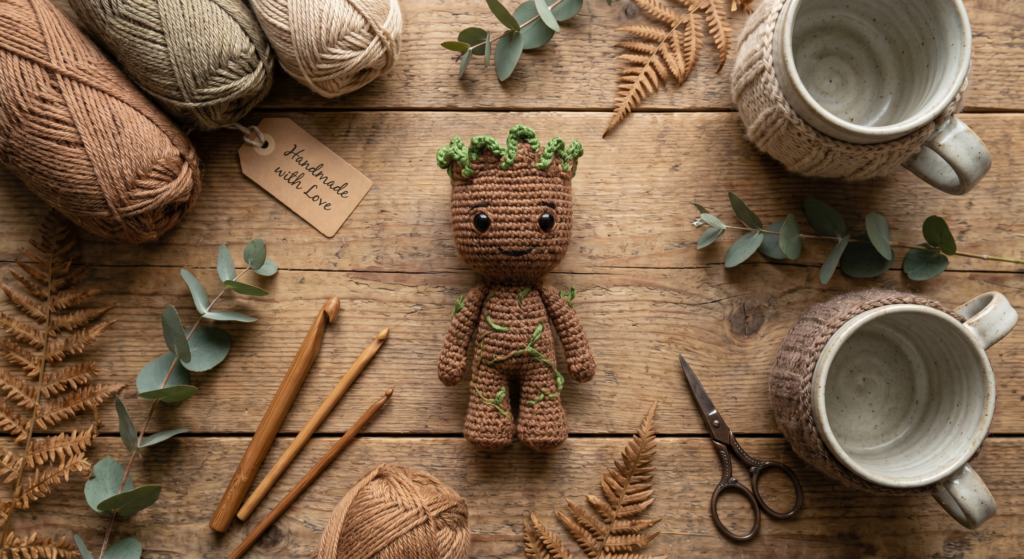
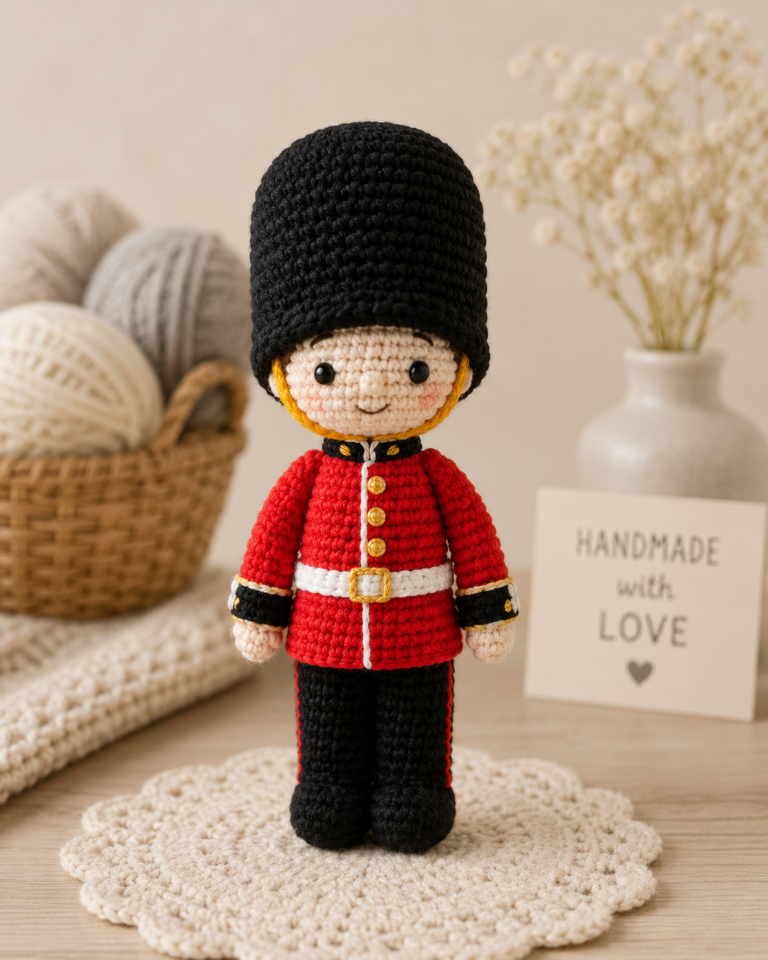
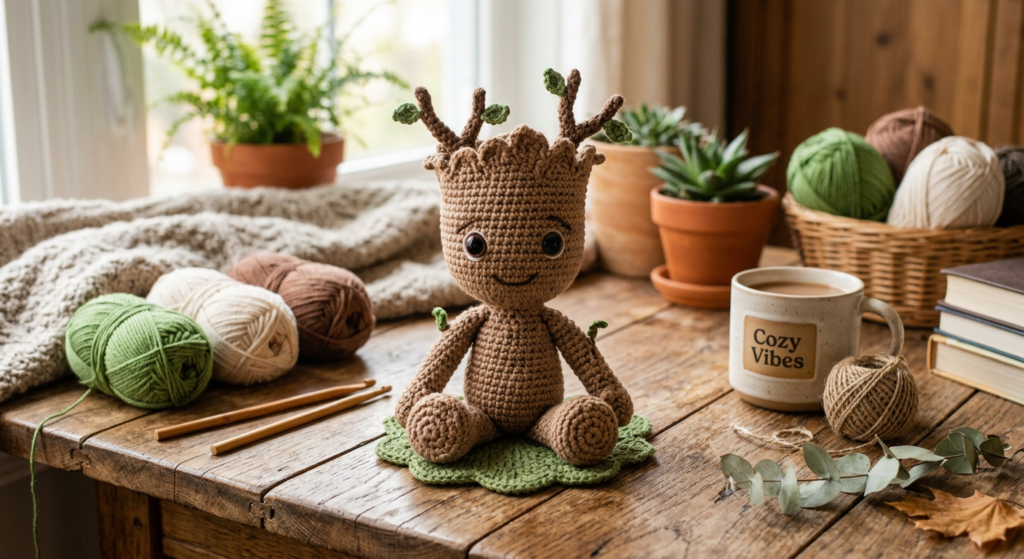
Crochet Groot Amigurumi Pattern: Adorable Baby Groot Tutorial for Beginners
If you’ve been searching for the perfect Groot amigurumi crochet pattern, this adorable project is a must-try. Inspired by the beloved Marvel character, this handmade crochet Groot combines cute details, beginner-friendly stitches, and fun accessories to create a collectible plush you’ll love displaying or gifting.
This crochet tutorial walks you through the essential materials, body shaping, accessories, and finishing touches needed to make your own Baby Groot plushie at home. Whether you’re creating content for Pinterest or looking for your next crochet obsession, this pattern is packed with creative inspiration.
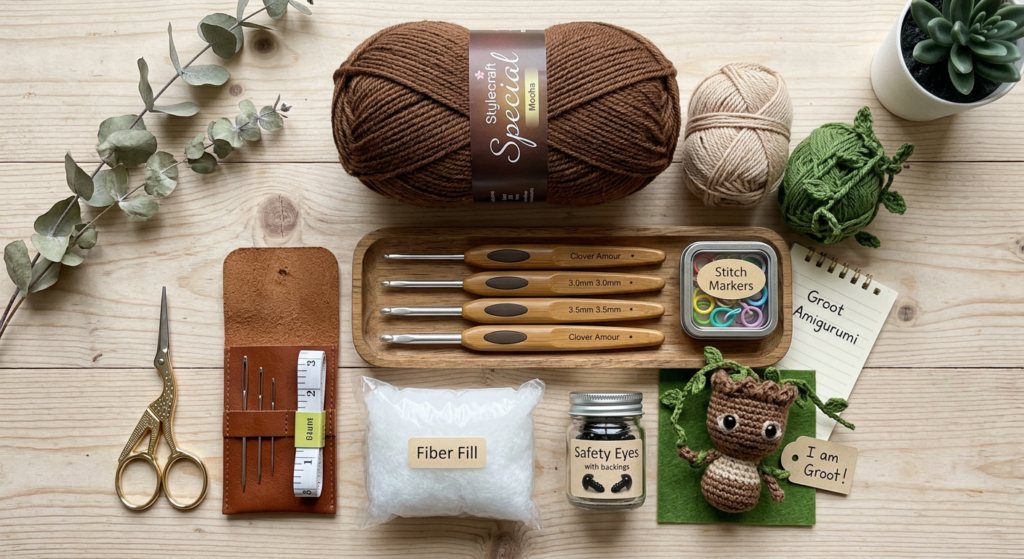
Materials Needed for Crochet Groot
Before starting your Groot crochet project, gather all the recommended supplies. The original pattern uses fine cotton-acrylic yarn in shades of brown, green, gray, black, blue, white, and red along with a 2.5mm crochet hook. Safety eyes, stuffing, scissors, and embroidery needles are also essential for assembly.
Using lightweight yarn helps achieve the detailed amigurumi texture that makes Groot look expressive and realistic. If you’re a beginner, choosing soft cotton-blend yarn will make stitching easier and cleaner.
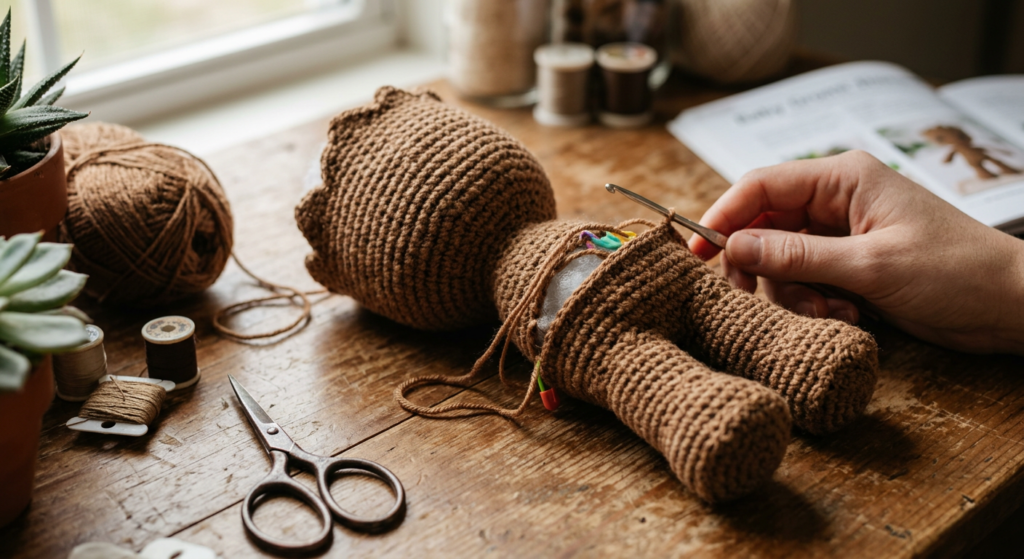
How to Crochet Groot’s Legs and Body
The pattern begins with crocheting two small legs using basic amigurumi stitches like magic ring, single crochet, increases, and decreases. After both legs are completed, they’re joined together to build Groot’s body seamlessly.
This technique creates a sturdy structure while keeping the plush balanced and symmetrical. Remember to add stuffing gradually while crocheting to maintain a smooth shape and prevent lumps inside the toy.
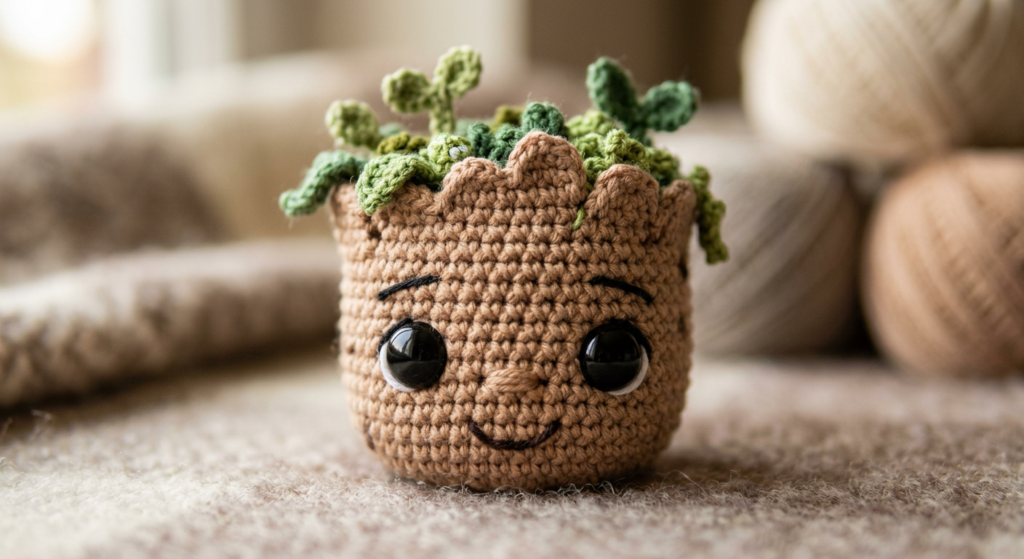
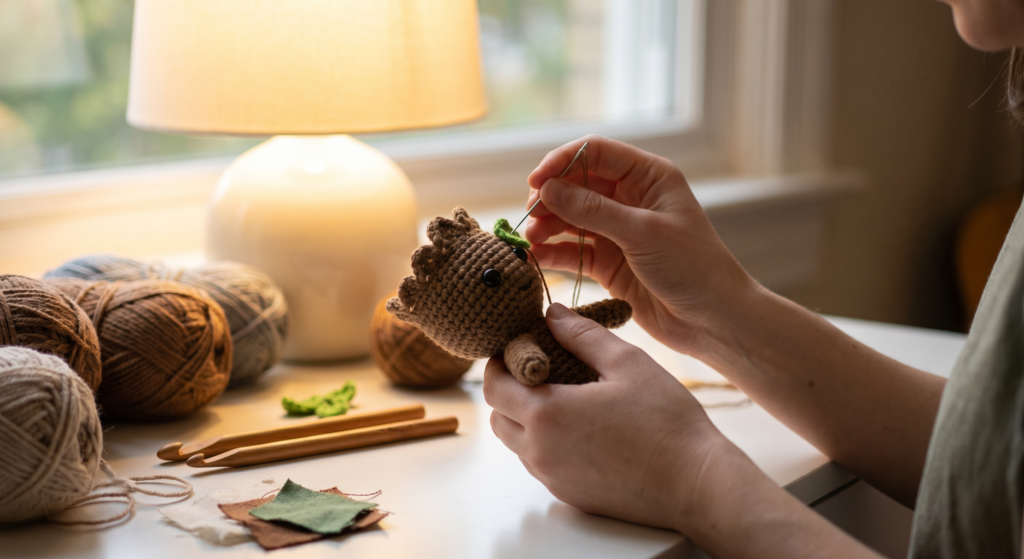
Creating Groot’s Head and Facial Features
One of the cutest parts of this pattern is Groot’s oversized expressive head. The design uses carefully placed increases to shape the rounded face and create space for the safety eyes. The eyes are inserted around row 37 with spacing between them for the signature Groot expression.
The pattern also includes embroidered eyebrows and a tiny stitched smile to bring personality to the plush. These small details make a huge difference in the final appearance and help your crochet Groot feel more lifelike.
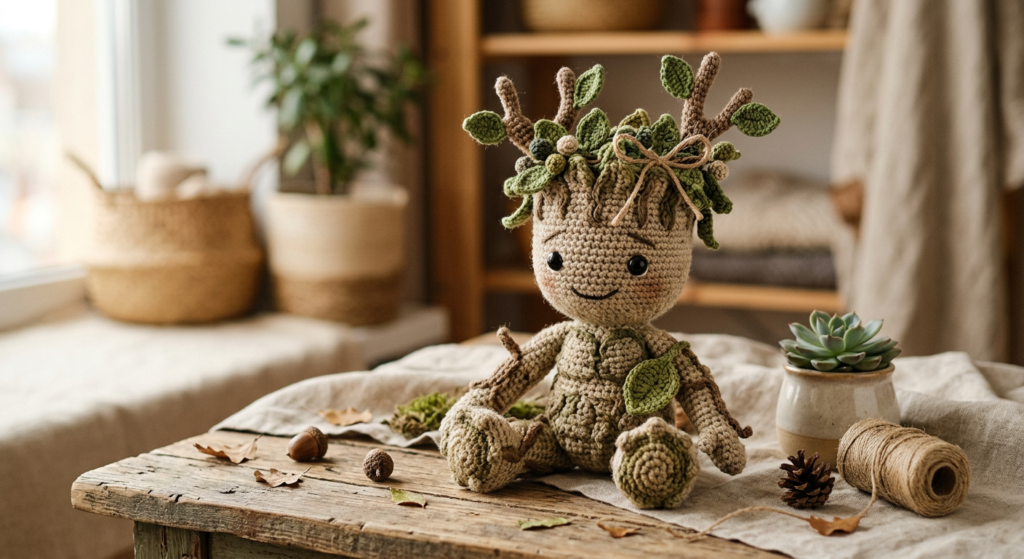
Adding Groot’s Crown and Leaf Details
The crown section gives Groot his iconic tree-like appearance. Using front-loop crochet techniques, the pattern creates textured branch shapes around the top of the head. Small green accents are then added to resemble leaves and new growth.
These leafy details make the plush more visually interesting and create beautiful contrast against the brown yarn. This is also the perfect stage to personalize your Groot with extra vines or embroidered textures.
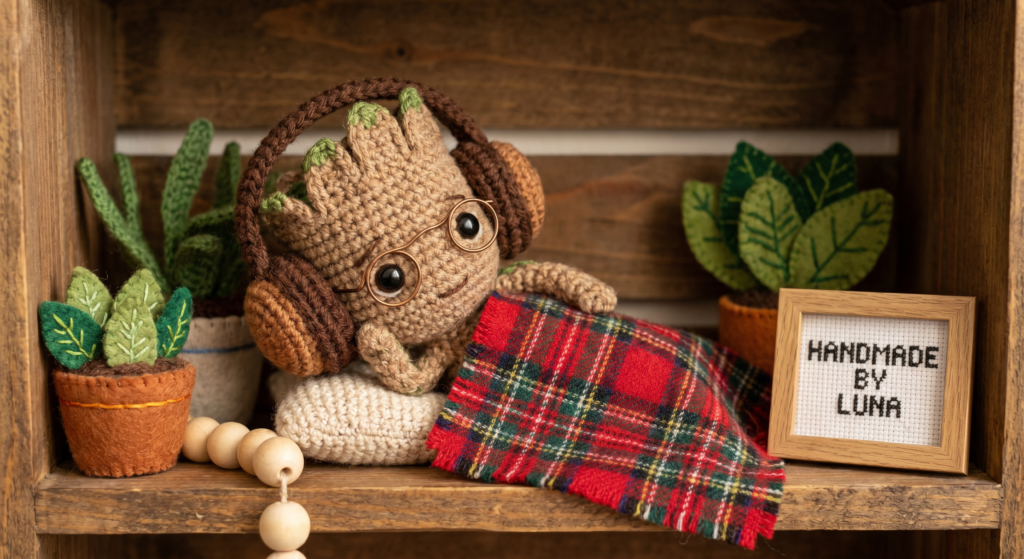
Crochet Accessories: Headphones, Glasses, and Plaid
What makes this Groot amigurumi extra special is the collection of adorable accessories included in the pattern. The PDF contains instructions for miniature headphones, glasses, and even a striped plaid blanket.
These accessories transform the plush into a fun decorative piece perfect for desks, gaming setups, or nursery shelves. The tiny glasses and retro-style headphones add personality and make the final project highly shareable on Pinterest and social media.
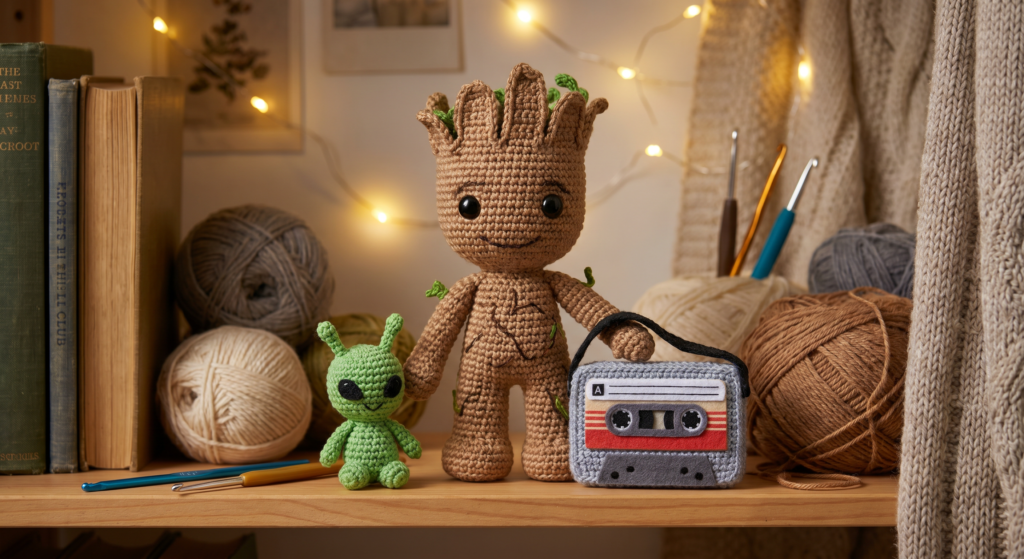
Bonus Mini Alien and Audio Player Accessories
The crochet PDF also includes bonus mini projects like a tiny alien companion and a retro-inspired audio player accessory. These extra details add storytelling and creativity to the overall display.
If you love making themed crochet displays, these add-ons are a fantastic way to create a complete Groot-inspired scene. They also make your finished amigurumi look more professional and unique.
Tips for Perfect Amigurumi Results
To achieve clean and professional-looking stitches, use a smaller hook size than recommended on your yarn label. This prevents gaps and keeps stuffing from showing through the fabric. Consistent tension is also key for smooth shaping throughout the project.
Take your time when sewing pieces together, especially the arms, glasses, and headphones. Proper placement helps balance the character and gives your Groot a polished final appearance.
Why This Groot Crochet Pattern Is Perfect for Pinterest
This Groot amigurumi project combines everything Pinterest users love: cute characters, cozy handmade aesthetics, collectible decor, and beginner-friendly creativity. The finished plush photographs beautifully and performs well in crochet-related searches and seasonal gift content.
Whether you’re making this for yourself, selling finished plushies, or sharing on your crochet blog, this Baby Groot pattern is highly engaging and visually appealing for social media audiences.