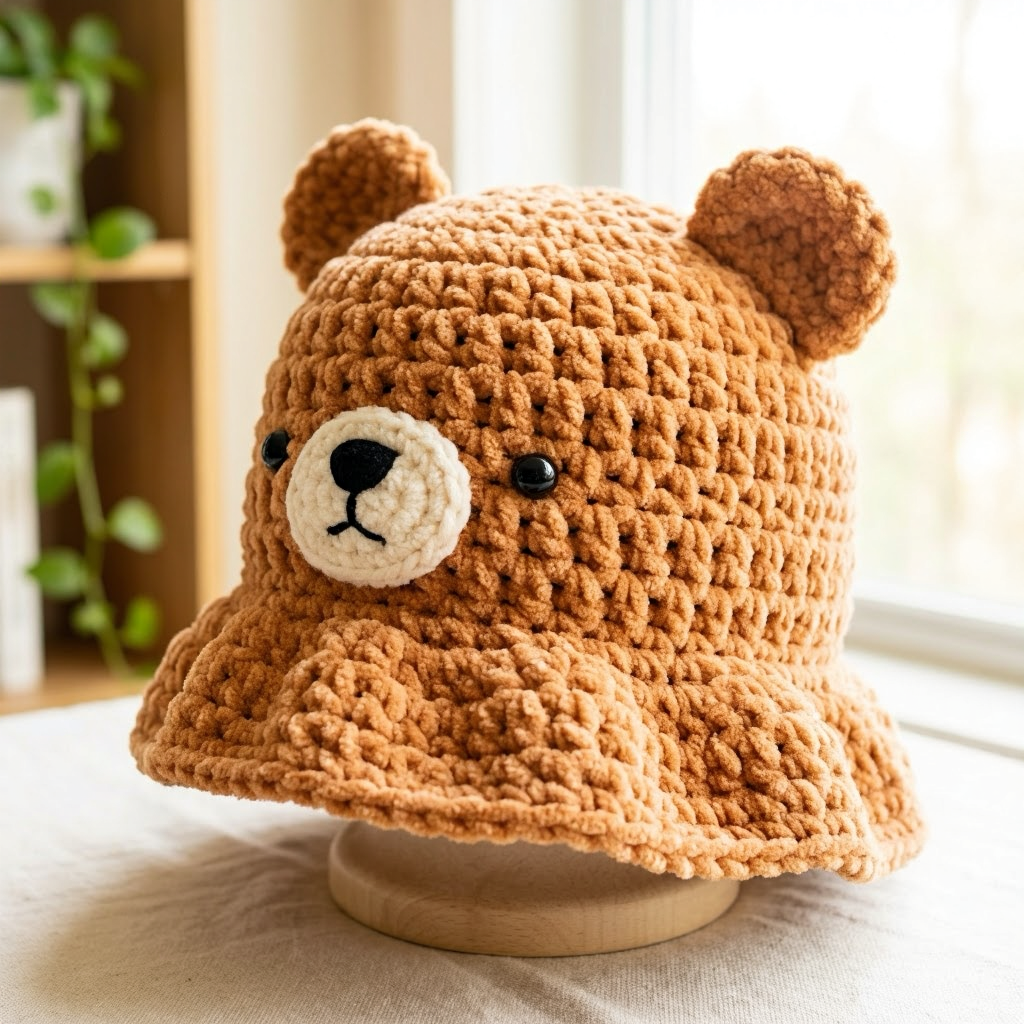
Cute Crochet Bear Bucket Hat Pattern (Beginner Friendly)
If you love cute crochet accessories, this crochet bear bucket hat is the perfect project. The design features a soft bucket hat shape with adorable bear ears that give it a playful and cozy look.
This beginner-friendly crochet pattern is ideal for anyone who wants to create a stylish handmade hat. With chunky yarn and simple stitches, you can finish this hat quickly while creating something truly unique.
Materials Needed for the Crochet Bear Hat
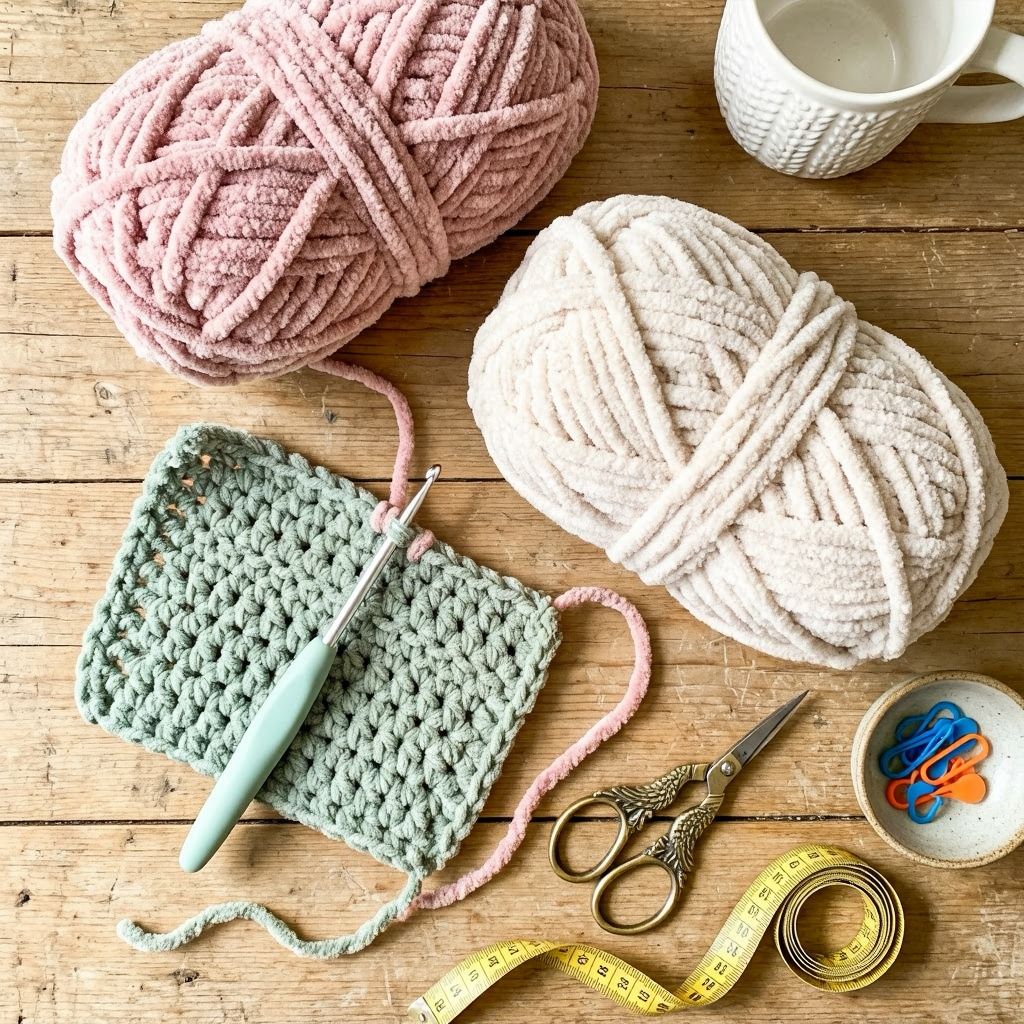
Before starting your crochet bear bucket hat, gather the basic crochet tools and yarn. This pattern uses super bulky plush yarn, which helps the hat work up quickly and creates a soft, warm texture.
Tools and Materials
- 5.0 mm crochet hook
- Yarn needle
- Tape measure
- Scissors
- Super bulky polyester yarn
You’ll need about 100g of main color yarn and less than 20g of secondary color yarn for the inner ears.
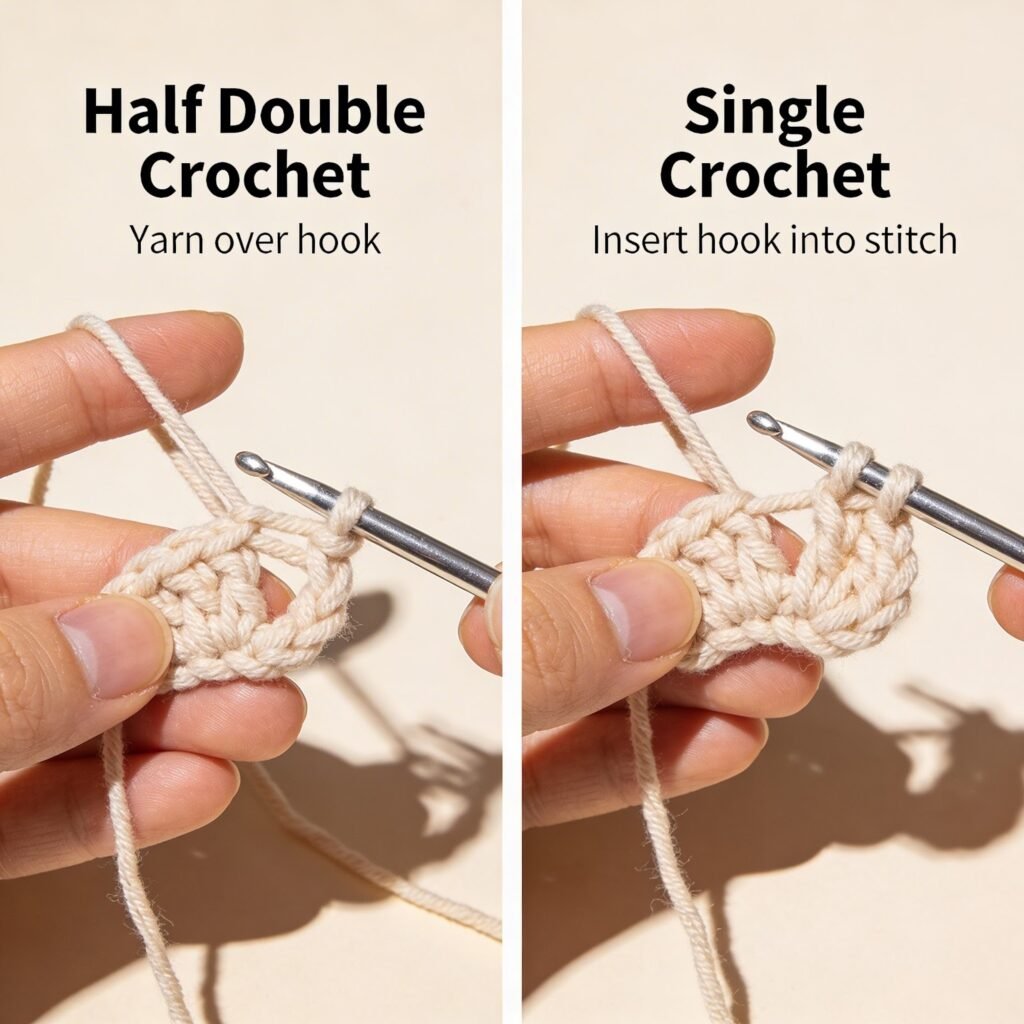
Crochet Abbreviations Used in This Pattern
This crochet hat uses simple stitches that beginners can easily learn. Understanding the abbreviations will make following the pattern much easier.
Crochet stitches used
- ch – chain stitch
- sc – single crochet
- hdc – half double crochet
- inc – increase
- slst – slip stitch
- st – stitch
- sk – skip stitch
These stitches help create the rounded hat shape and the cute bear ears.
Step 1: Crochet the Hat Base
The crochet bear hat begins at the top using half double crochet stitches. Start with 10 half double crochet stitches in a circle, then gradually increase stitches in each round.
The first five rows include increases that expand the circle until the hat top reaches about 16.5 cm in width. This forms the crown of the bucket hat.
Working with super bulky yarn makes this step fast and beginner-friendly.
Step 2: Create the Hat Body
Once the crown is finished, crochet six rows of half double crochet around without increases. This creates the body of the hat and gives it the classic bucket hat shape.
At this stage, the hat begins to form its recognizable structure and will start fitting comfortably around the head.
The finished hat body should measure around 20 cm in length.
Step 3: Crochet the Bucket Hat Brim
The brim gives the hat its trendy bucket style. To create it, the pattern includes several rounds of increases.
Each row gradually adds stitches to expand the brim outward. This creates the soft, slightly flared edge typical of bucket hats.
The final brim row is worked evenly around to stabilize the shape.
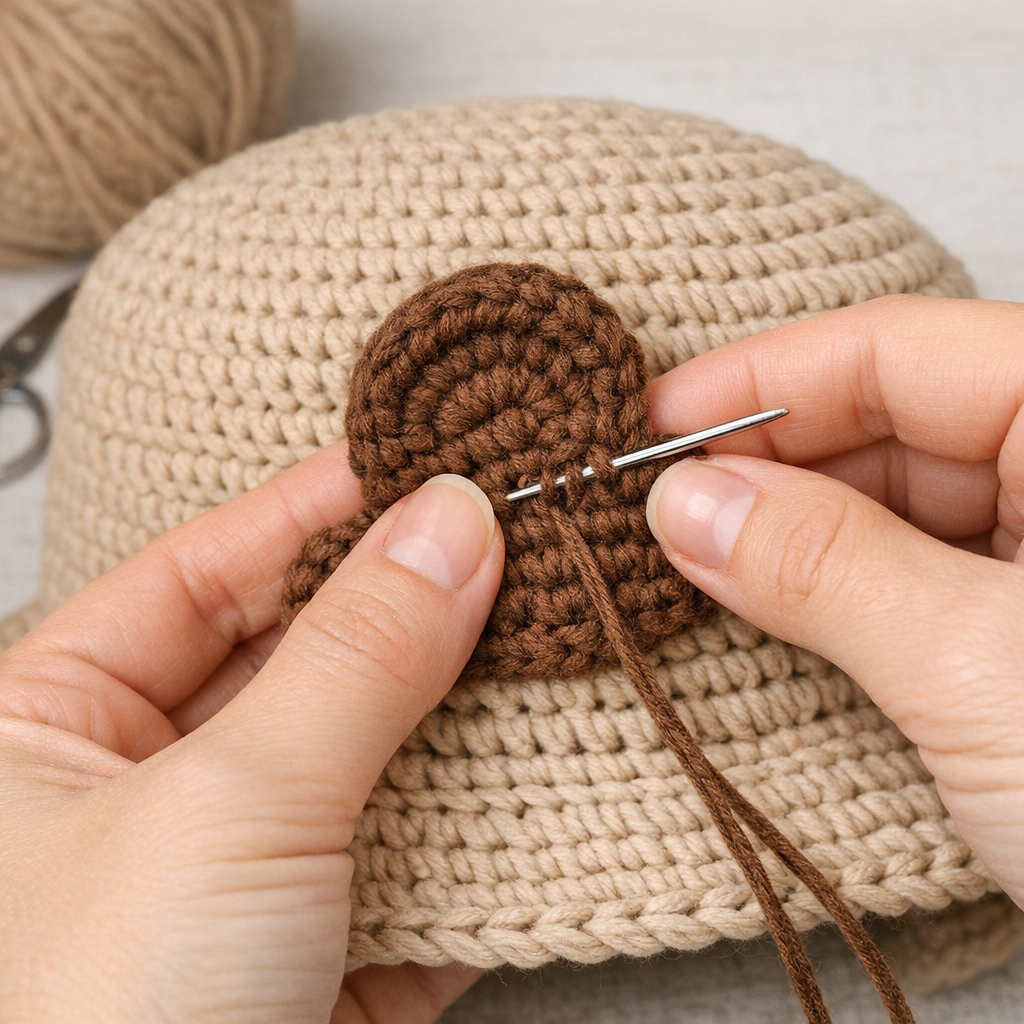
Step 4: Make the Bear Ears
The cutest part of this crochet hat is the bear ears. These are made separately and then sewn onto the hat.
Each ear includes two parts:
- Inner ear using the secondary yarn color
- Outer ear using the main yarn color
The pieces are crocheted together along the edges to create a slightly curved 3D ear.

Step 5: Attach the Bear Ears to the Hat
After crocheting the ears, it’s time to attach them to the hat.
Place the ears between rows 4 and 8 of the hat body. Sew the inner ear first, then attach the outer ear edges slightly curved to give the ear a three-dimensional effect.
Repeat the process on the other side to create a balanced bear look.
Finishing the Crochet Bear Bucket Hat
The final step is weaving in all yarn ends and trimming excess yarn. Once finished, you’ll have a cozy handmade crochet bear bucket hat ready to wear.
This hat fits most adult head sizes (approximately 54–58 cm circumference). The plush yarn makes it soft, warm, and perfect for colder seasons.
Your adorable crochet bear hat is now complete!

Why This Crochet Bear Hat is Perfect for Beginners
This crochet hat pattern is ideal for beginners because it uses simple stitches and chunky yarn. The design is easy to follow, and the bear ears add a fun creative element.
It also makes a fantastic handmade gift idea or crochet market product. Once you master the pattern, you can create hats in different colors and styles.