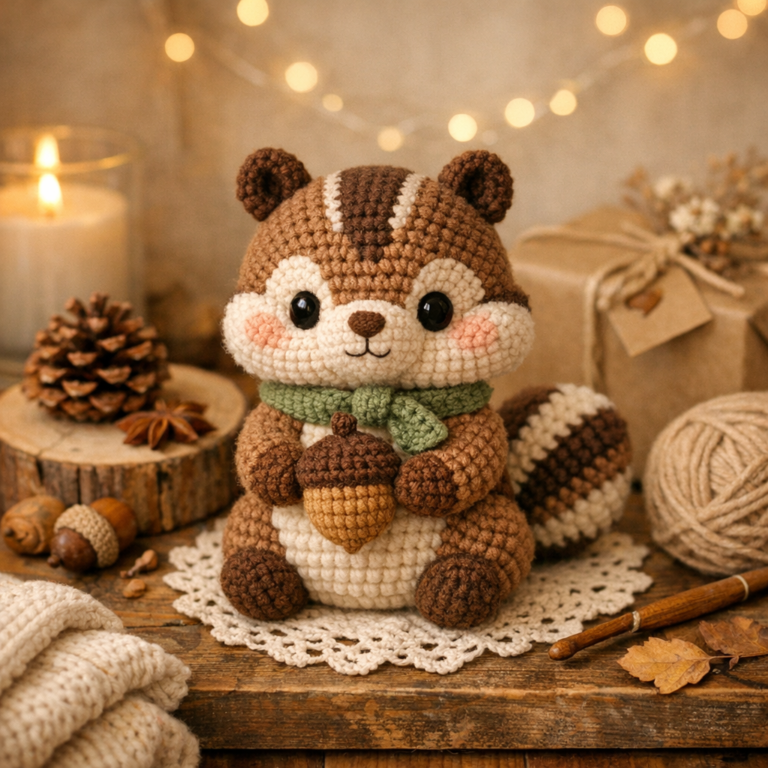
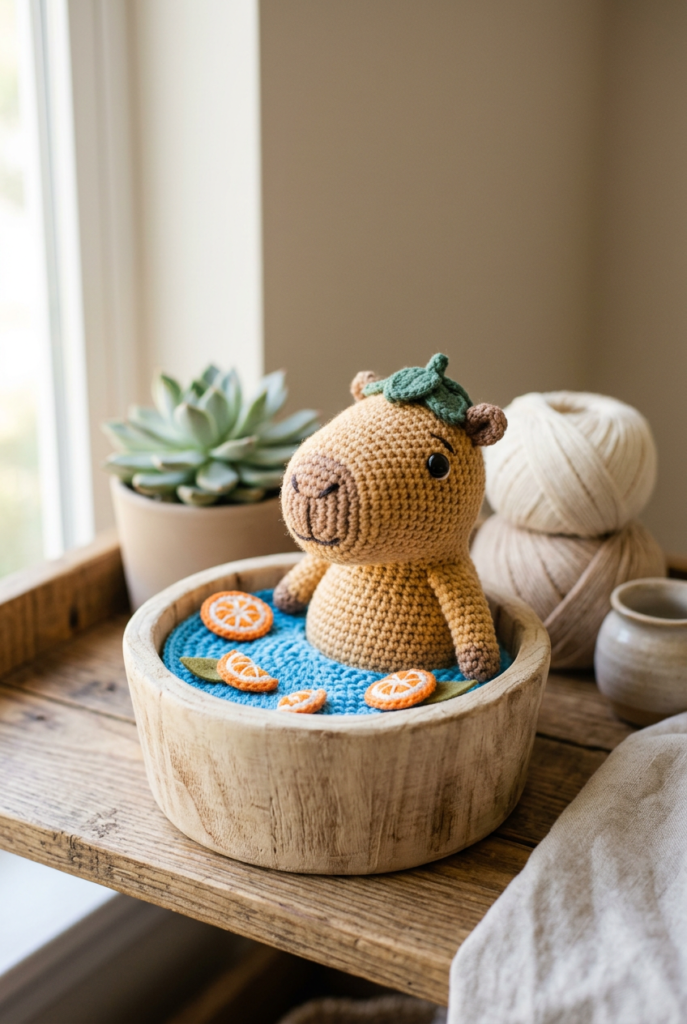
Crochet Capybara in a Tub (Amigurumi) + Printable PDF Pattern
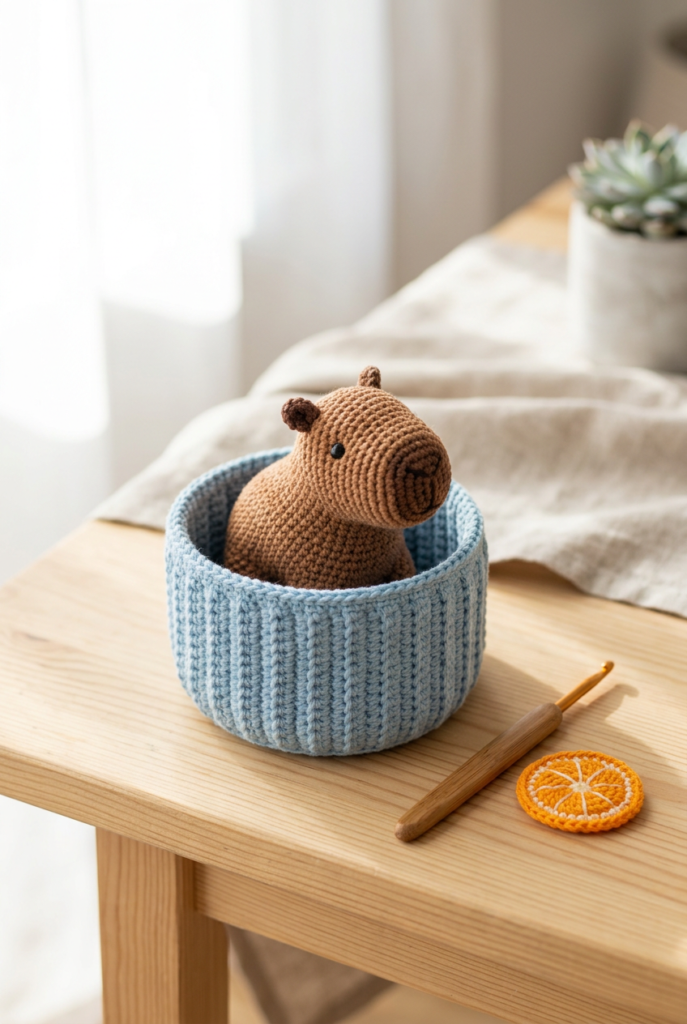
If you love cute amigurumi, this crochet capybara in a tub is a fun, Pinterest-worthy make with cozy details (water, wooden tub, and even citrus). The finished toy is about 9 cm (3.5 in) when made with the same supplies listed in the pattern. Grab the printable instructions below so you can crochet without scrolling.
Materials & Tools (Yarn Colors + Hook Size)
The PDF pattern uses YarnArt Begonia (169 m/50 g) and a 1.5 mm crochet hook to create a tight, clean amigurumi fabric. You’ll need yarn in brown, orange, beige, blue, and black, plus a small bit of green for the orange leaf detail. Keep stuffing, a needle, and a small piece of cardboard handy for structure (listed in the PDF materials section on page 2).
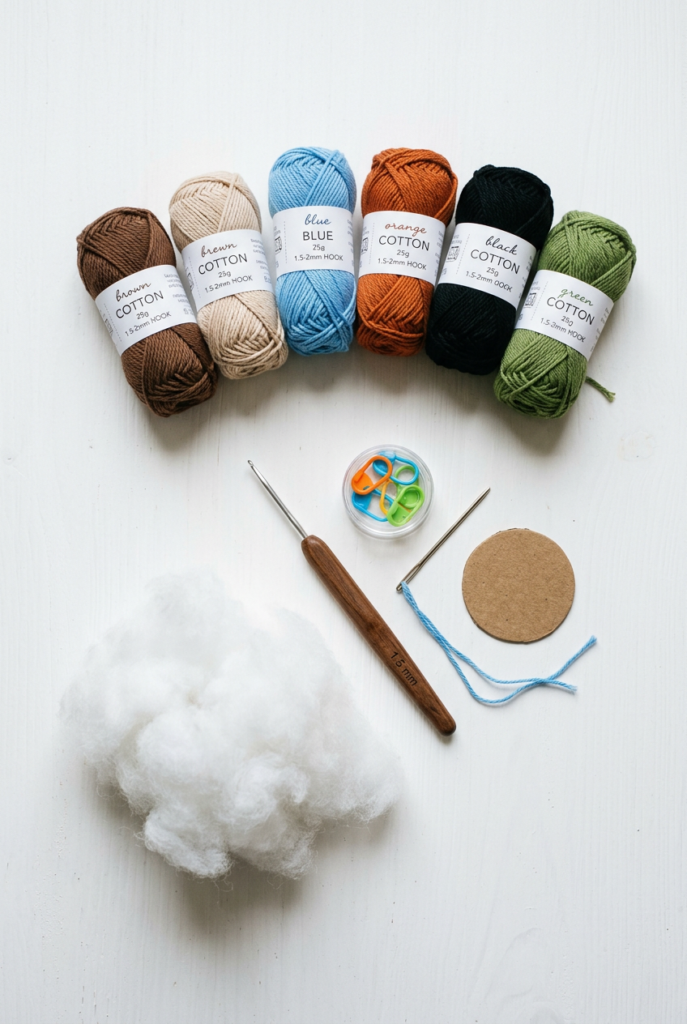
Crochet Abbreviations + Must-Know Amigurumi Tips
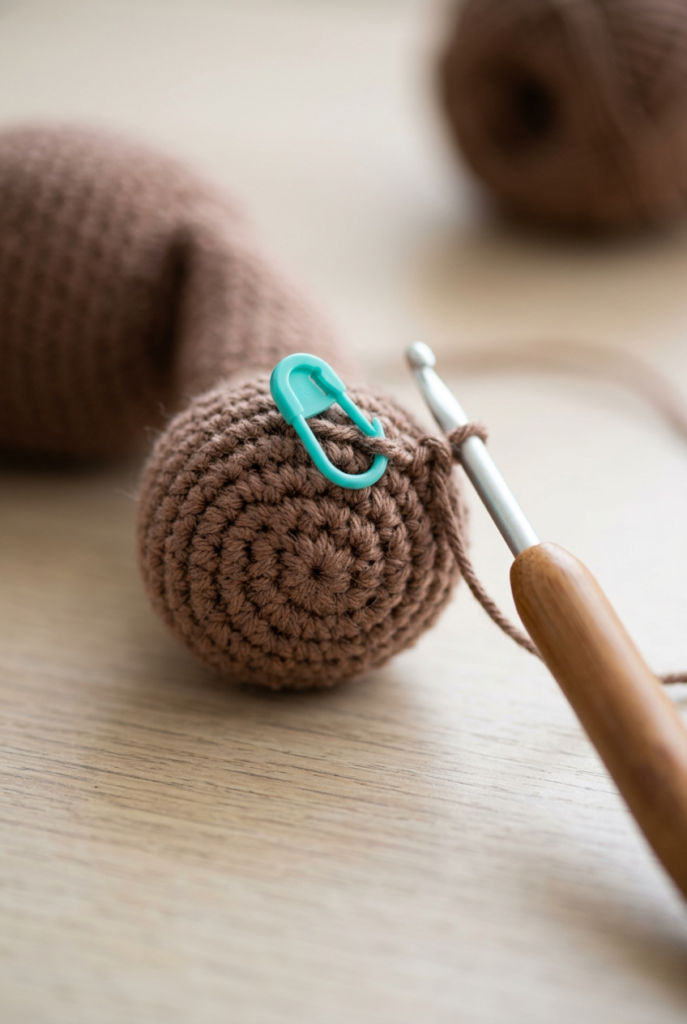
This pattern uses common amigurumi stitches like MR (magic ring), sc (single crochet), inc (increase), invdec (invisible decrease), hdc, sl st, and a few shaping helpers like inc3, sc3tog, and ex st (see the abbreviations list on page 3). For the neatest result, crochet with tight stitches to avoid holes, work most pieces in a spiral, and use a stitch marker so you don’t lose the start of your rounds. The PDF also recommends finishing details with a slip stitch for smoother edges.
What You’ll Crochet (Pieces Included in the PDF)
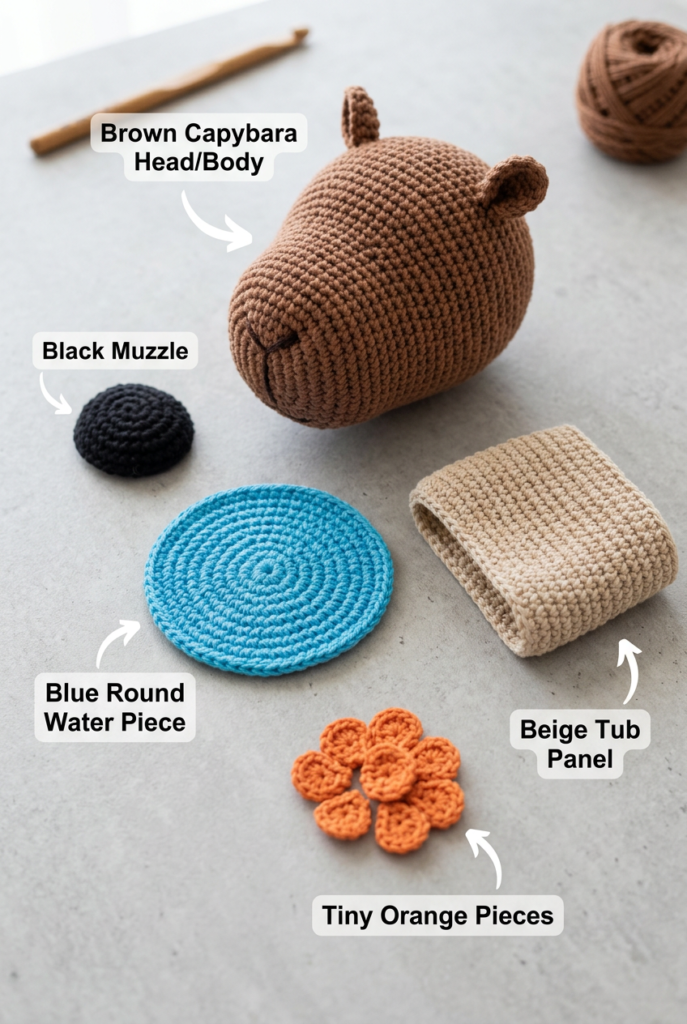
In the downloadable pattern, you’ll crochet a capybara head/body, a small black muzzle, and cute ears added directly onto the head placement area. You’ll also make a flat, round water piece in blue and a textured wooden tub in beige, plus tub hoops in brown for that classic barrel look. To finish the scene, there’s a stuffed orange plus orange halves/slices (pattern pieces shown on pages 10–11).
Key Construction Notes (So It Looks Like the Photos)
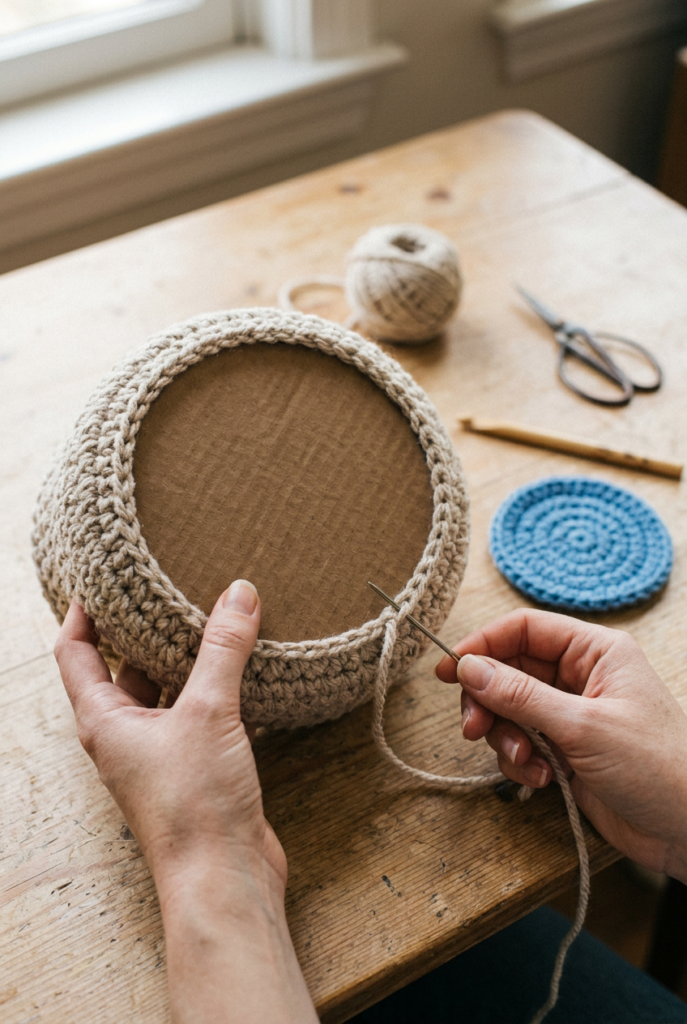
The capybara head is shaped with smooth increases and decreases, and the pattern uses a clean, amigurumi-friendly construction that minimizes visible seams. The tub is designed with back-loop-only texture to mimic wood grain, then shaped and stabilized using a cardboard circle inside the base (cardboard tips appear in the PDF on pages 8 and 11). You’ll also build dimension by stuffing firmly, then sewing pieces so the waterline sits slightly below the tub edge (assembly note on page 12).
[PDF Download Button: Download the PDF for Round-by-Round Shaping]
Assembly Checklist (Eyes, Waterline, and Cute Citrus)
For the face, the pattern places the eyes using black French knots between rounds (noted on page 11), then adds simple brown eyelids for extra expression. After stuffing the capybara, you’ll sew on the muzzle, attach the capybara to the blue water piece, and add the orange and orange slices near the tub scene. Finally, stuff the tub, sew the water into place, and add the brown hoops to finish the “bathtime” look (final steps on page 12).
Download the Printable Pattern + Pin for Later
If you want the full round-by-round crochet instructions, the printable PDF is the easiest way to follow along while you crochet (and it’s perfect for saving to your craft folder). Download it now, then Pin this tutorial so you can come back when you’re ready to make a second capybara in a different color theme.