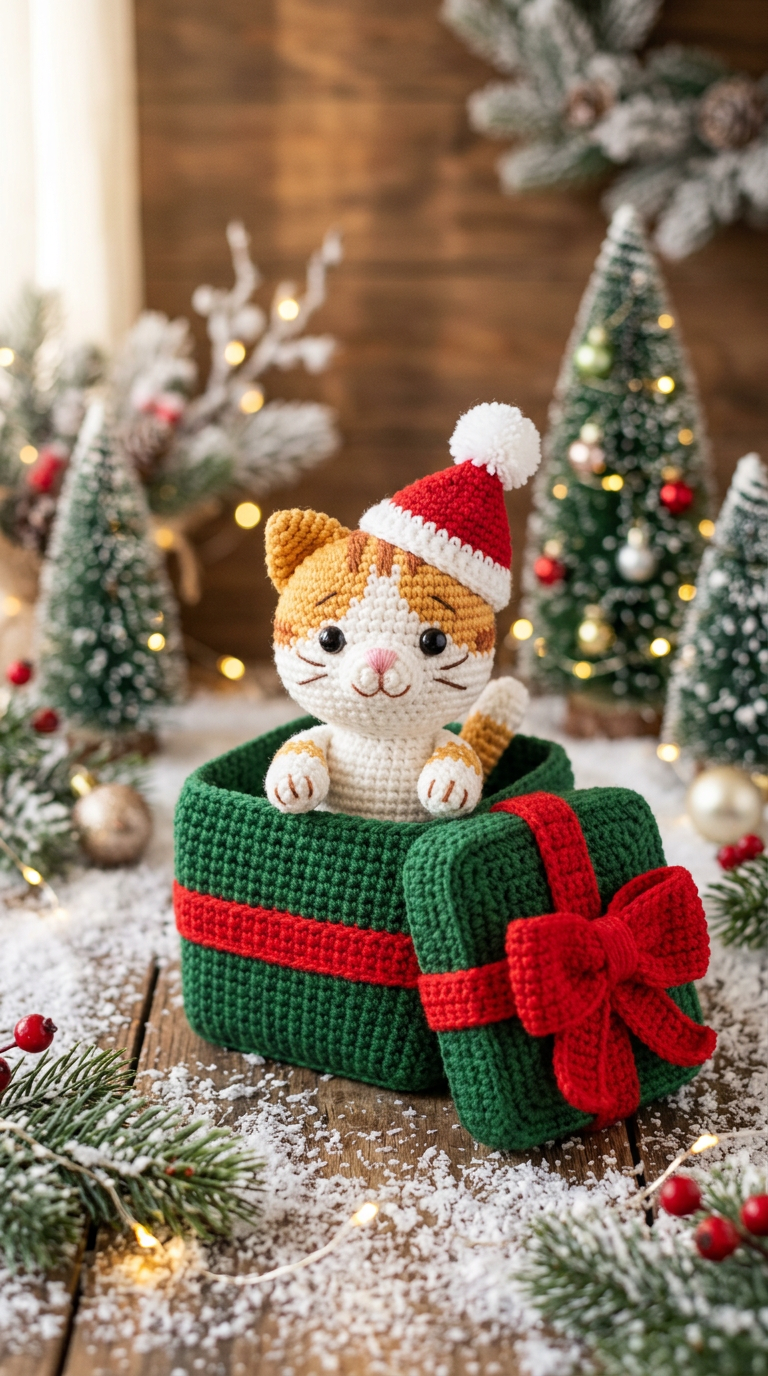
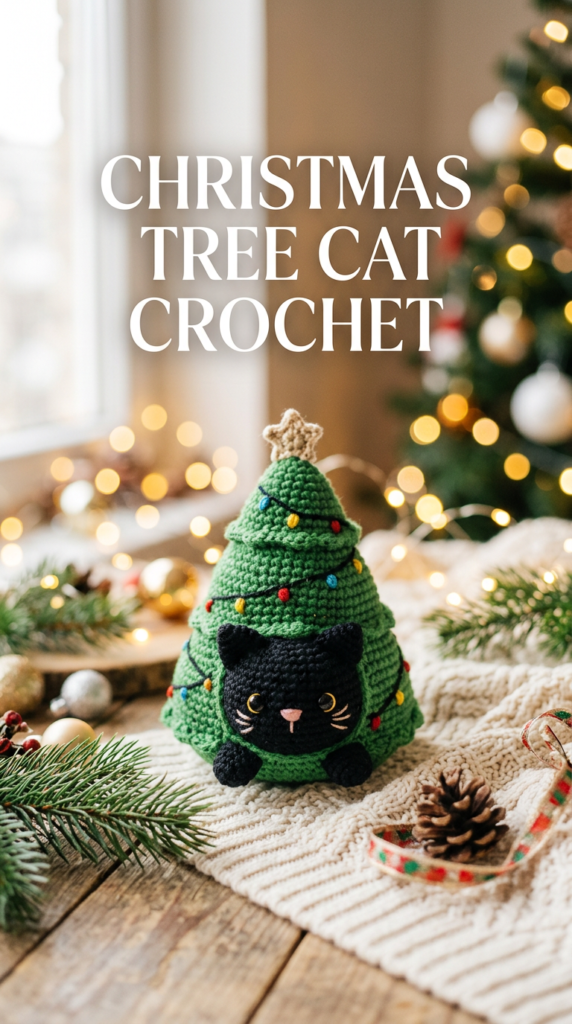
Crochet Christmas Tree Cat Amigurumi (with PDF Pattern)
This festive crochet Christmas tree cat amigurumi is a tiny, giftable make that doubles as a cute holiday décor (about 10 cm / 4 in tall with the recommended yarn and hook). You’ll crochet the tree in continuous rounds with an oval base, then sew a two-sided “peekaboo” cat onto the front and back for that irresistible amigurumi look. Design credit: this project is based on the “Christmas Tree Cat” pattern by toffoletta—please respect the designer’s terms and use an authorized PDF for the full pattern details.
Materials + Crochet Abbreviations (Beginner-Friendly)
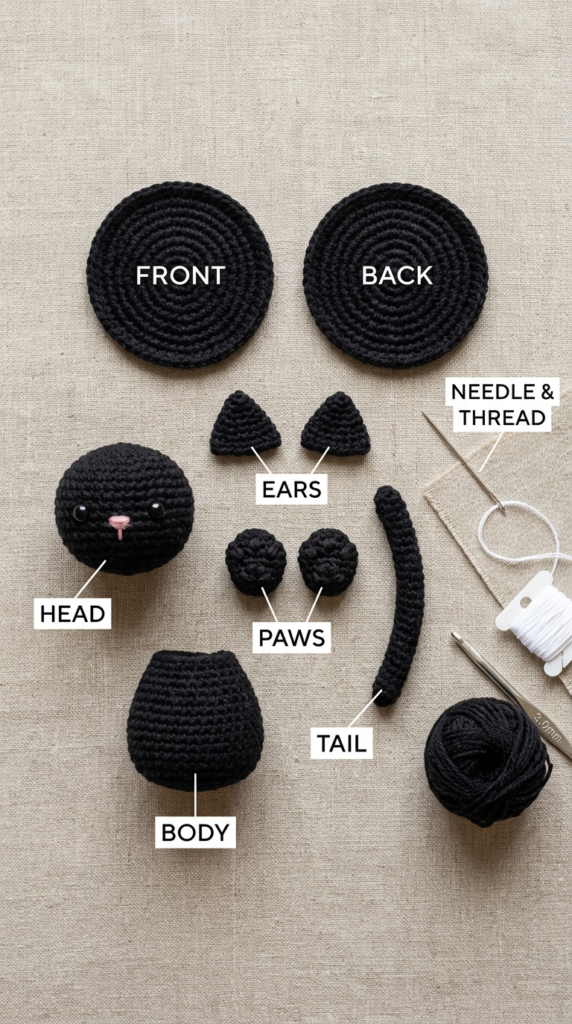
For a crisp amigurumi shape, cotton yarn works beautifully (the original uses Schachenmayr Catania) with a 2.75 mm crochet hook and fiberfill stuffing. You’ll also want a yarn needle, stitch marker, pins, scissors, a little gray thread/yarn for the light “wire,” and small scraps of color for the bulbs and eye details. Common US terms you’ll see in the PDF: MR (magic ring), ch, sc, inc, dec, st(s), R (round).

Step 1: Crochet the Tree Base + Shape (Oval Start, Continuous Rounds)
The tree is crocheted as one piece starting with a short chain that becomes an oval base, then you build height in single crochet rounds. To get that smooth tree silhouette, you’ll place increases at the two ends of the oval early on, then later use evenly spaced decreases to taper the top. Stuff as you go so the tree stays firm and stands nicely on a shelf or desk.
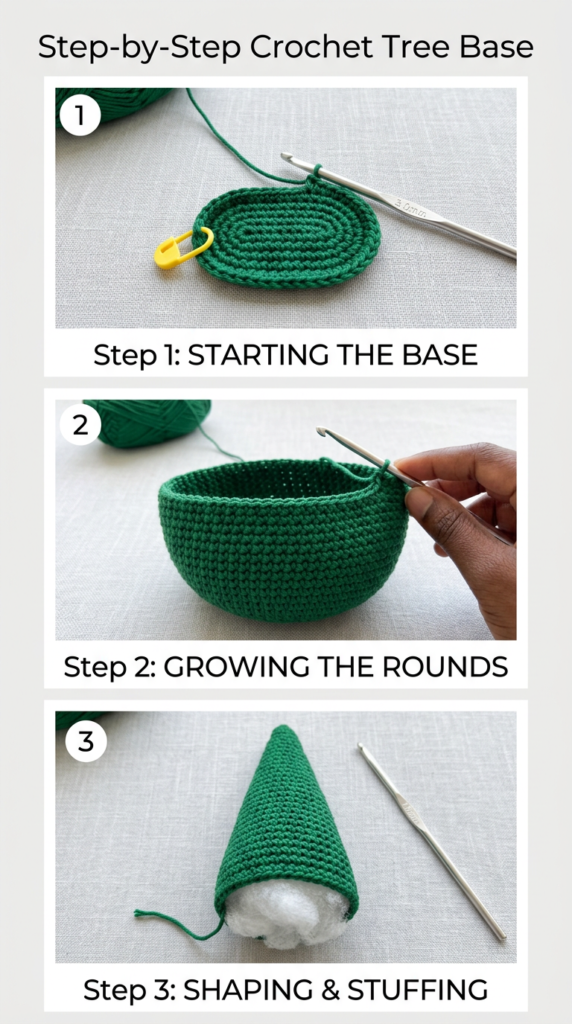
Suggested alt text: “Crochet tree base shaping from oval to cone in continuous rounds.”
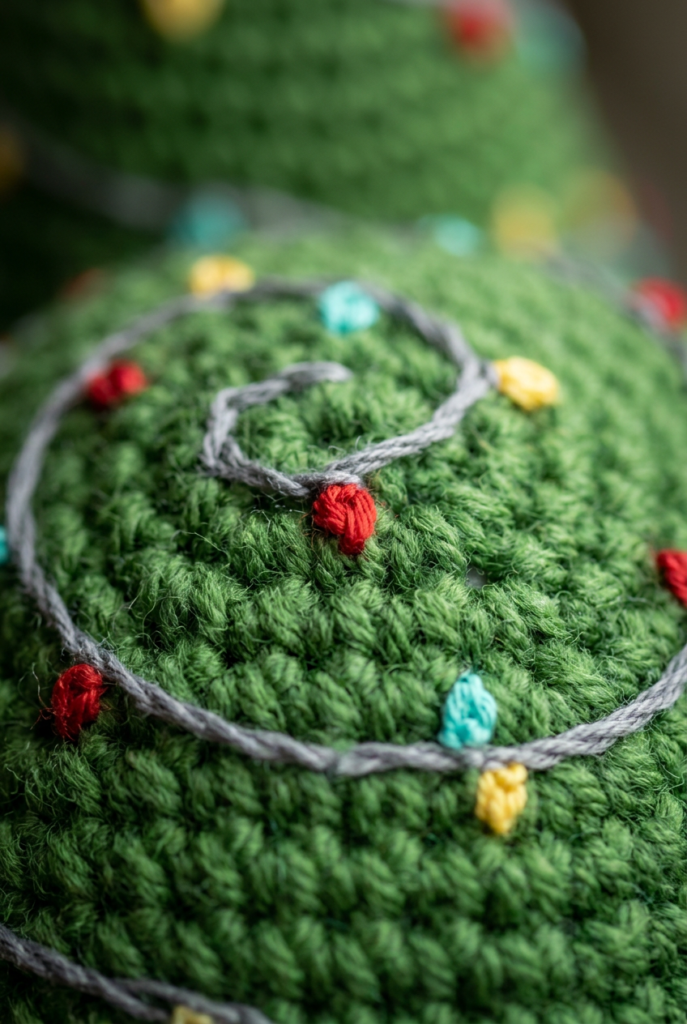
Step 2: Add the Embroidered Wire + Fairy Lights
This is the detail that makes the project pop on Pinterest: embroider a gray spiral ‘wire’ wrapping around the tree, then stitch small fairy light bulbs over it in 2–3 colors. Keeping the center area a little less crowded makes it easier to sew on the cat pieces cleanly. Take your time here—neat embroidery instantly upgrades the finished amigurumi.
Step 3: Crochet the Cat Pieces (Front + Back) and Face Details
The cat is made in separate pieces so it can “hug” the tree—one rounded piece for the front and one for the back, plus small parts like ears, paws, and tail. The face comes alive with simple embroidery: snout lines, eyebrows, a tiny mouth, and whiskers, plus small color accents for the eyes. If you’re newer to amigurumi, this is great practice for clean sewing and expressive embroidery without needing safety eyes.
Assembly + Finishing Tips (So It Looks Polished)
Sew the paws and tail onto the back piece first, then attach the back to the center of the tree and add light stuffing right before closing. Finally, align and sew the cat front on the opposite side so the face sits straight and centered, then weave in ends securely (a firm finish matters for ornaments and gift toppers). When you’re done, snap a bright window-lit photo—this crochet Christmas ornament idea performs especially well as a vertical pin with a simple text overlay.
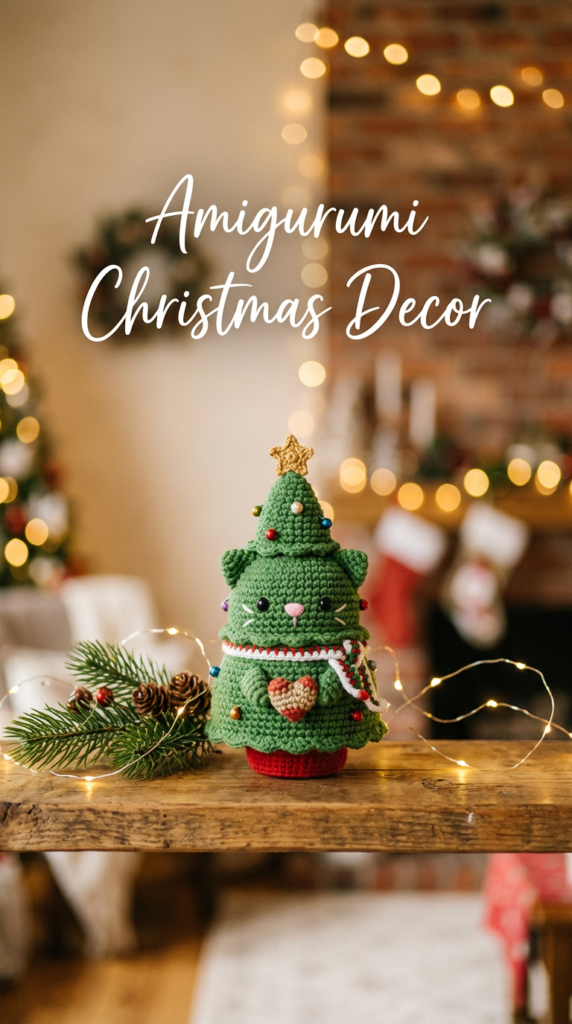
Make a cute crochet Christmas tree cat amigurumi! Get supplies, stitch tips, and embroidery guidance—then grab the full step-by-step PDF pattern download.