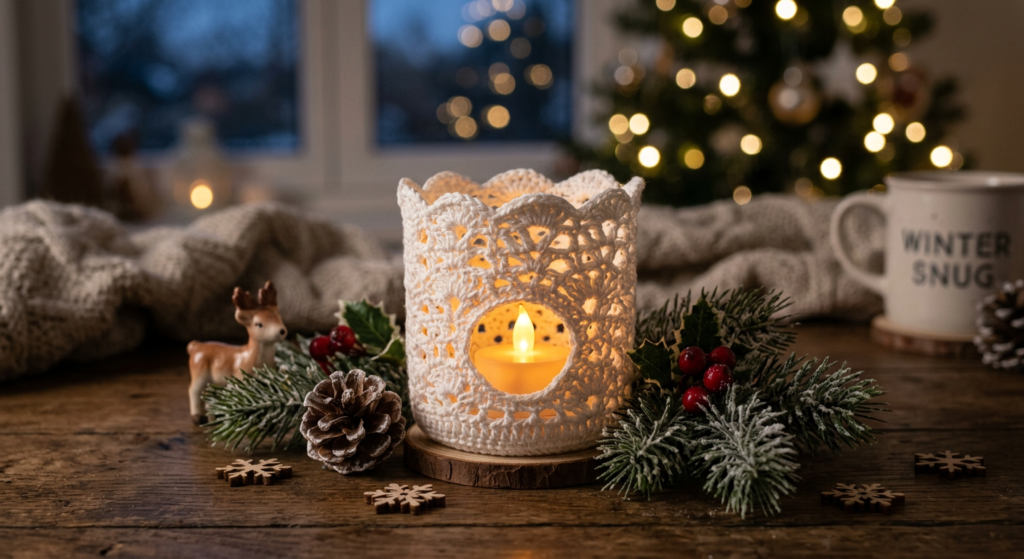
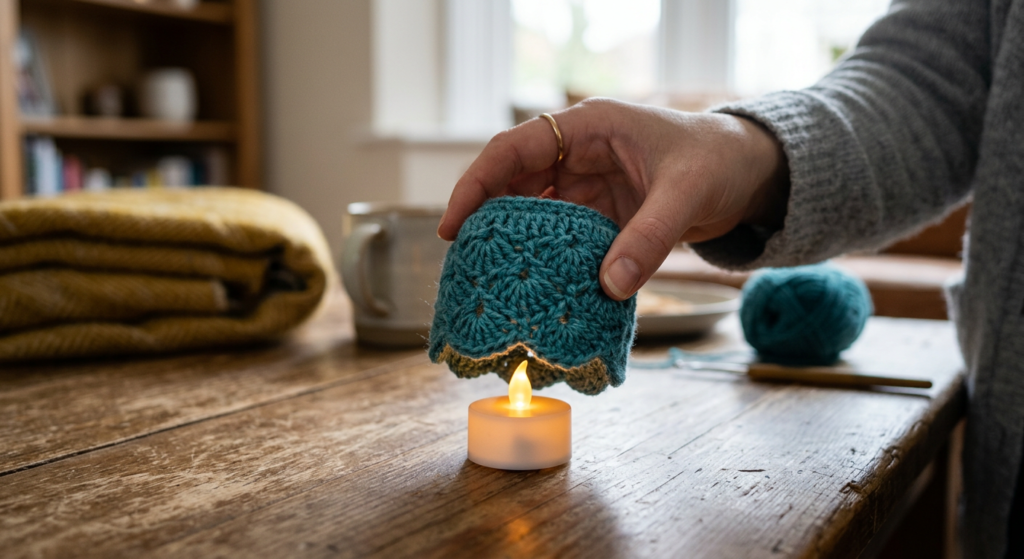
Crochet LED Tealight Holder Pattern – “Let It Snow”
Looking for a cozy winter crochet project that’s quick, decorative, and perfect for gifts? This crochet LED tealight holder pattern creates a delicate snowflake-style cover designed to fit standard LED tealights (approx. 11 cm diameter).
With textured puff stitches, front post details, and a beautiful lacy edge, this intermediate crochet pattern adds instant hygge to your home décor.
Materials & Tools You’ll Need
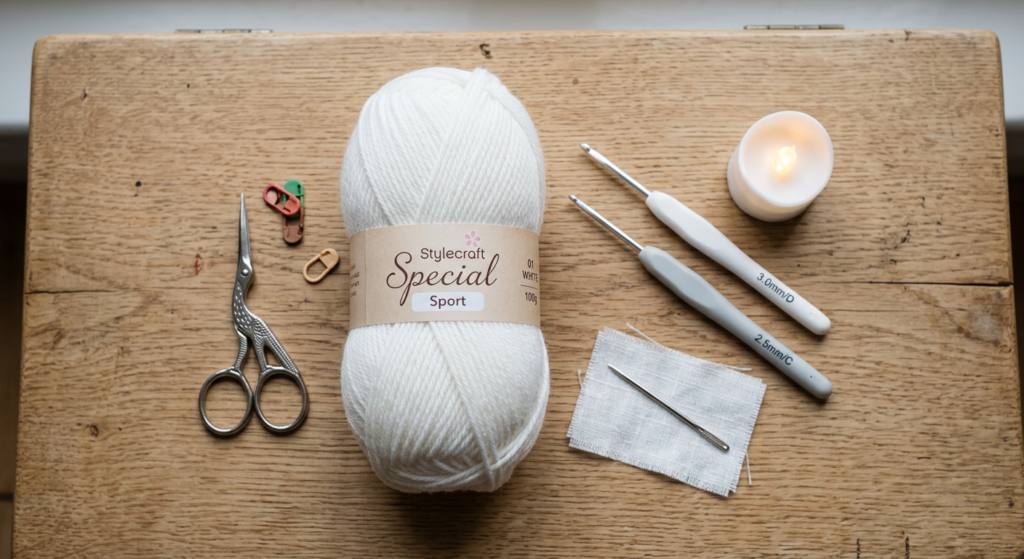
According to the materials list on page 1 of the PDF, this pattern uses sport/fine weight yarn such as Schachenmayr Catania (approx. 10g per holder). You’ll need a 3.0 mm hook for the main body and a 2.5 mm hook for the edge.
You’ll also need a yarn needle and LED tealights (real candles are not recommended for safety).
Skill Level: Intermediate
Finished Size: Approx. 11 cm diameter
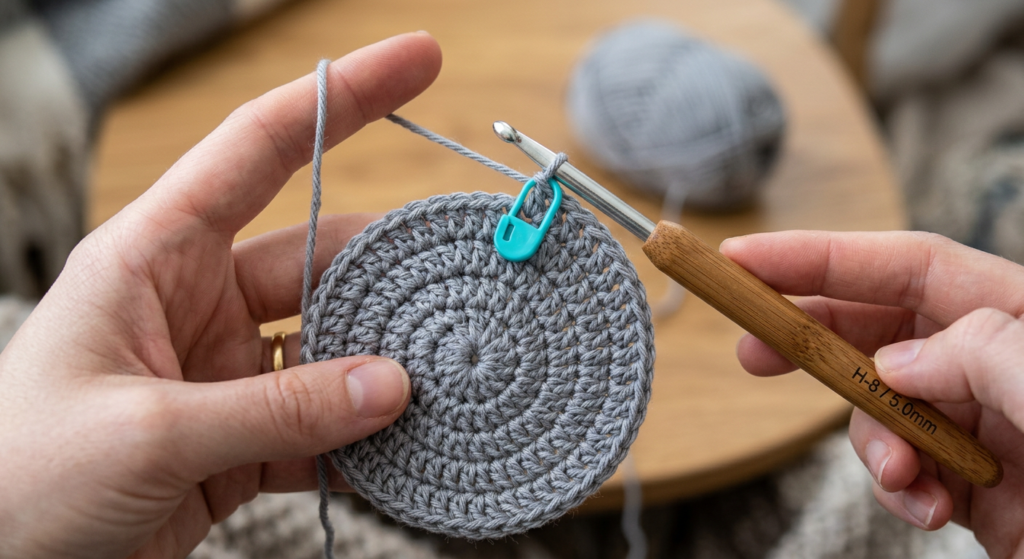
How to Start the Tealight Holder (Rounds 1–6)
As shown on page 2, the pattern begins with a magic ring using a 3.0 mm hook. You’ll increase evenly from 6 single crochet up to 36 stitches by Round 6.
These increased rounds create a perfectly flat circular base that forms the foundation of your crochet candle holder.
The final stitch of Round 6 is joined using a slip stitch in the back loop only (BLO), preparing the texture transition for the decorative rounds.
Creating the Textured Snowflake Design (Rounds 7–9)
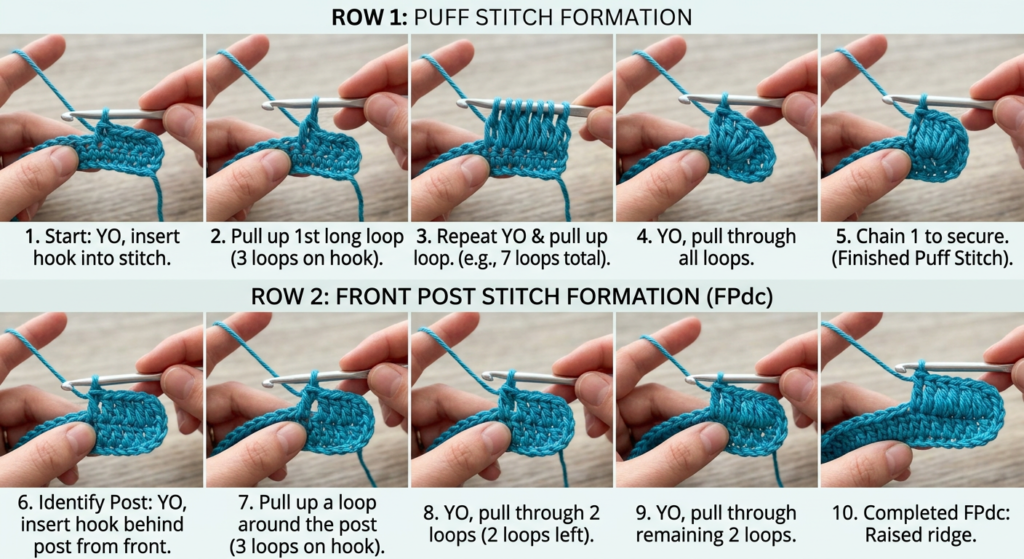
The magic happens in Rounds 7–9 (pages 3–5) where puff stitches and front post puff stitches create the raised snowflake effect.
Round 7 introduces puff stitches worked in the back loops only, giving the fabric depth and softness.
Round 8 adds front post puff stitches (FPpuff st) and front post slip stitches (FPslst), forming elegant arches around the circle.

Decorative Chain & Slip Stitch Motifs
Round 9 incorporates decorative sequences like [slst, ch 3, slst] worked into the same stitch. These small motifs create delicate snowflake-like peaks around the holder.
A special slip stitch technique (explained on page 5 and in the basic instructions on pages 9–10) connects sections between puff stitches for a seamless lace look.
This round is finished by sewing the final join for a clean invisible closure.
Crocheting the LED Tealight Edge (Rounds 1–3 Edge)
The final section (page 6) forms the snug edge that hugs the LED candle securely.
Switch to a 2.5 mm hook for tighter tension. All stitches are worked into the unused front loops of Round 6, creating a folded edge that fits neatly around the tealight.
The edge features puff stitches and chain spaces for stretch and decorative texture.
Finishing the Edge
Round 3 of the edge is worked in single crochet and chain spaces to smooth and stabilize the opening.
Fasten off and sew the round closed neatly using a yarn needle.
Once complete, your crochet tealight holder will gently stretch over your LED candle and hold its shape beautifully.
Stitch Techniques Used in This Pattern
The basic instructions on pages 9–10 clearly explain how to work:
- Magic Ring
- Single Crochet (sc)
- Double Crochet (dc)
- Puff Stitch (puff st)
- Front Post Puff Stitch (FPpuff st)
- Front Post Slip Stitch (FPslst)
These textured stitches are what give this winter crochet project its elegant, dimensional look.
If you’re comfortable with puff stitches and working in front/back loops, you’ll enjoy this pattern.
Why You’ll Love This Crochet Candle Holder Pattern
This LED tealight holder is:
- A perfect winter crochet decoration
- A thoughtful handmade Christmas gift
- A quick stash-busting project (uses ~10g yarn)
- Beautiful for wedding or table décor
- Ideal for craft fairs
It’s delicate, elegant, and safe when used with LED candles.

Download the “Let It Snow” Crochet PDF Pattern
Want the full round-by-round written instructions plus crochet diagram (see page 8)?
The printable PDF includes:
- Detailed stitch instructions
- Step-by-step round breakdown
- Crochet diagram (Rounds 1–9)
- Stitch tutorials with photo references
Click below to download and start crocheting your own snowflake LED tealight holders today.