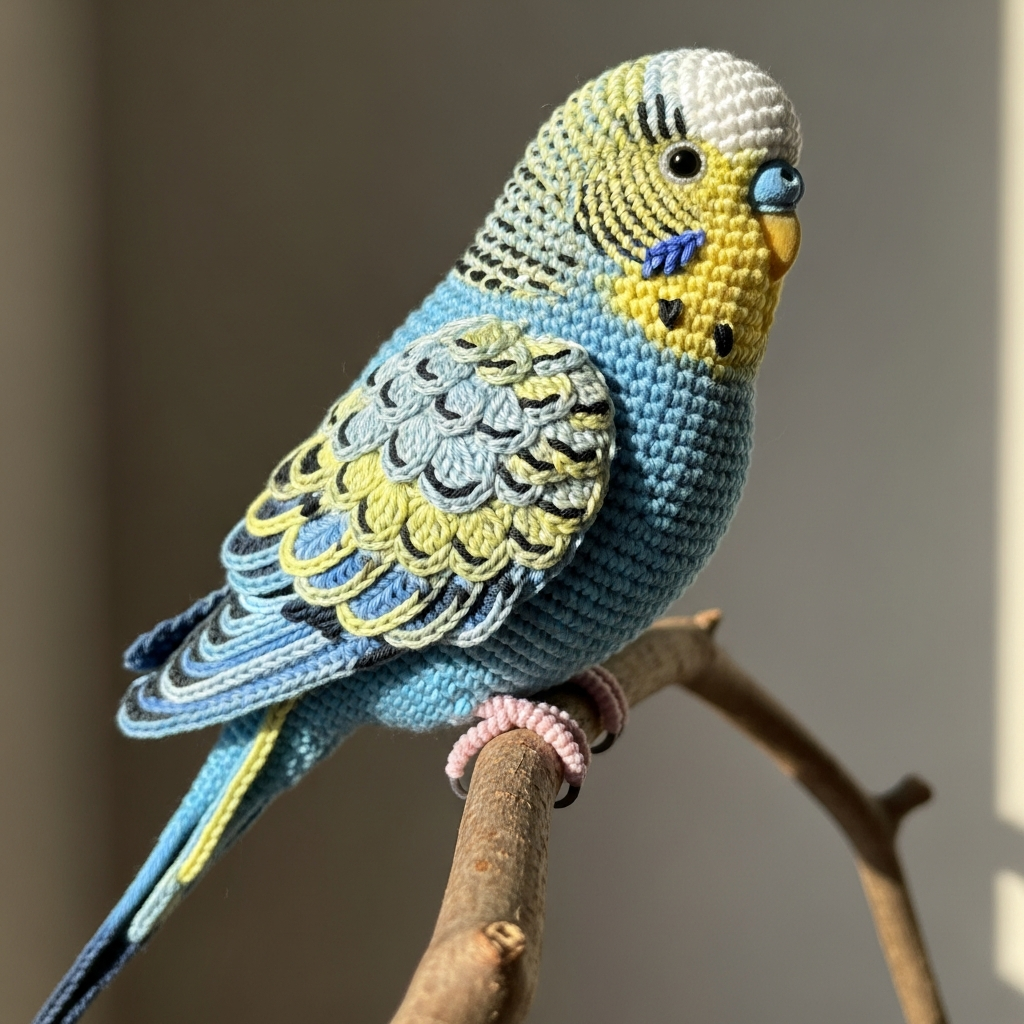
🐦 Crochet Budgerigar Pattern – Realistic Amigurumi Bird DIY
Create a stunning handmade bird with this crochet budgerigar pattern! This detailed amigurumi project helps you craft a lifelike parrot with beautiful colors, textured feathers, and realistic shaping.
Perfect for intermediate crocheters, this project is ideal for gifts, decor, or adding to your amigurumi collection.
🧶 Materials & Tools You’ll Need
To achieve a realistic finish, this pattern uses fine yarn and detailed tools. Choosing the right materials ensures tight stitches and a polished look.
- Fine acrylic yarn in multiple colors
- 1.25 mm crochet hook
- Fiberfill stuffing
- Wire for frame (legs & feathers)
- Beads for eyes & decorative details
These materials help create structure, shape, and lifelike features.
✨ Crochet Skills & Techniques Required
This pattern is best suited for intermediate crocheters who are comfortable with amigurumi techniques.
You’ll use:
- Magic circle (MC)
- Single crochet (sc), half double crochet (hdc), double crochet (dc)
- Increases & decreases
- Working in spirals
Understanding these techniques will make the process smooth and enjoyable.
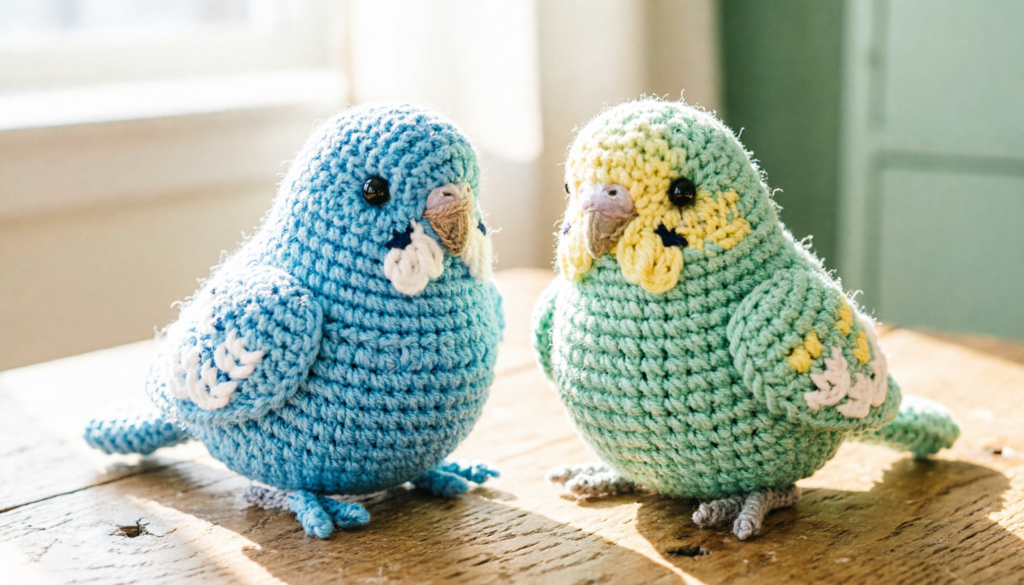
📏 Finished Size & Design Details
The finished crochet budgerigar measures approximately 9.5 × 13.5 cm, depending on yarn and hook size.
You can customize colors to create:
- Blue budgerigar
- Green budgerigar
- Unique custom variations
This flexibility makes the pattern perfect for creative expression.
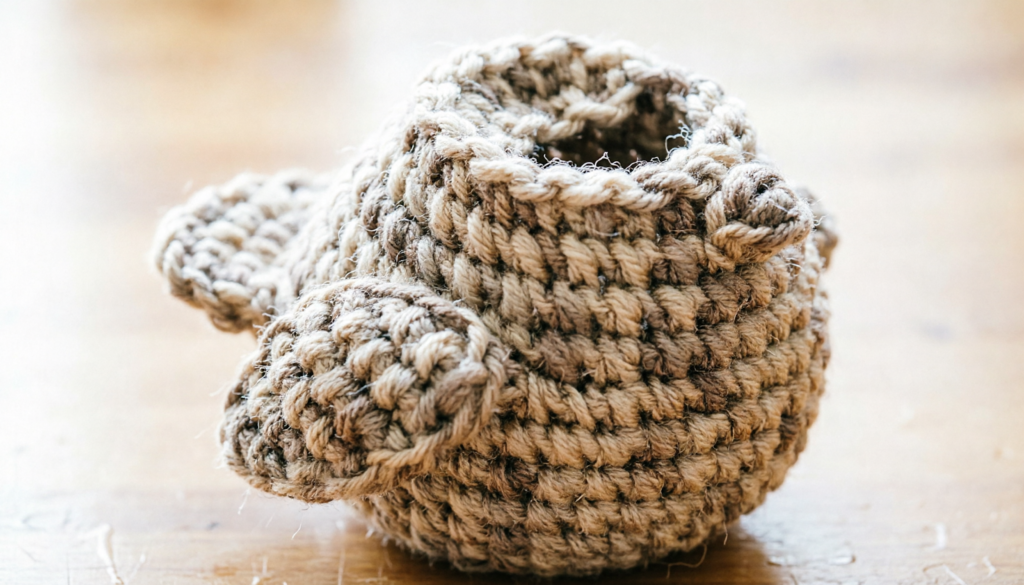
Make the Legs with Wire Frame
The legs are created first and include a wire frame for structure. This allows the bird to stand and hold its shape.
Wrap yarn around wire to form toes and legs, then crochet around them to secure.
Crochet the Head & Body
The head and body are worked as one piece in continuous rounds. You’ll start with lighter yarn and switch colors as you go.
Gradual increases and decreases shape the bird’s rounded body and head.
Add Wings with Texture
The wings are crocheted separately using a mix of stitches to create a natural shape.
Layering and shaping give the wings a realistic look when attached to the body.
[PDF Download Button]
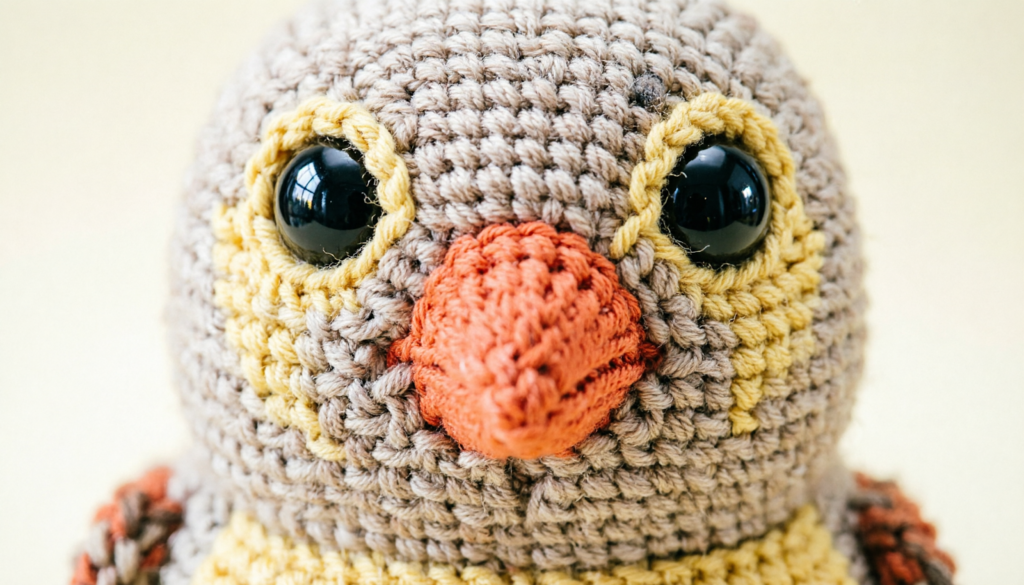
Crochet Face Details
The face includes:
- Forehead & cheeks
- Beak
- Cere (nose area)
These small details bring your budgerigar to life and give it personality.
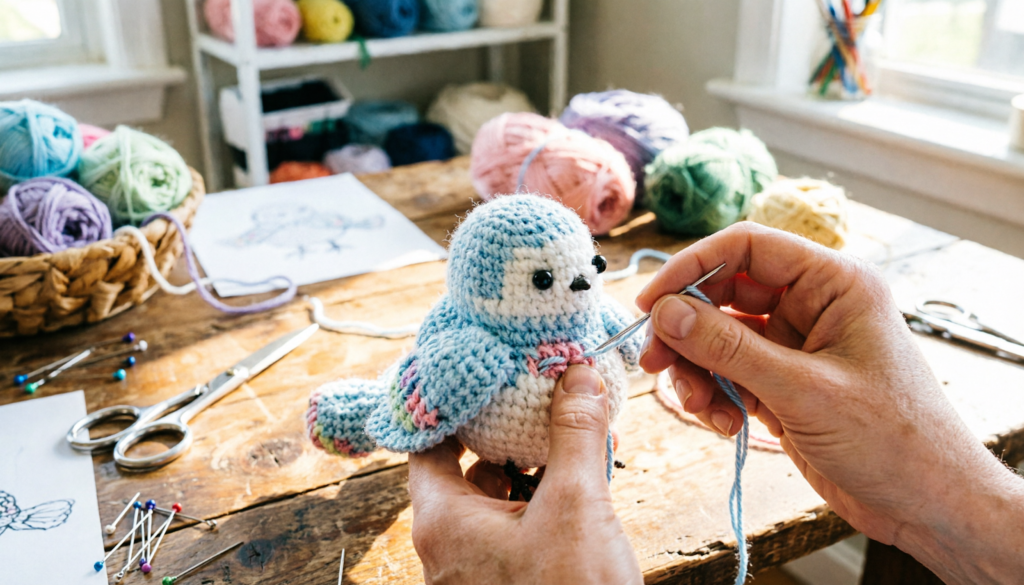
🪡 Step 6: Assemble Your Crochet Bird
Carefully sew all parts together:
- Attach wings and tail
- Position the face elements
- Glue or sew eyes in place
Take your time to ensure everything is aligned perfectly.
💡 Pro Tips for a Realistic Finish
- Use a smaller hook for tighter stitches
- Stuff evenly to avoid lumps
- Shape wire parts carefully
- Adjust colors for different bird styles
These tips will make your amigurumi bird look professional and lifelike.
🌸 Final Thoughts
This crochet budgerigar pattern is a beautiful and rewarding project for amigurumi lovers. The combination of shaping, colorwork, and detail makes it truly special.
Download the full PDF pattern and start creating your own adorable crochet bird today!