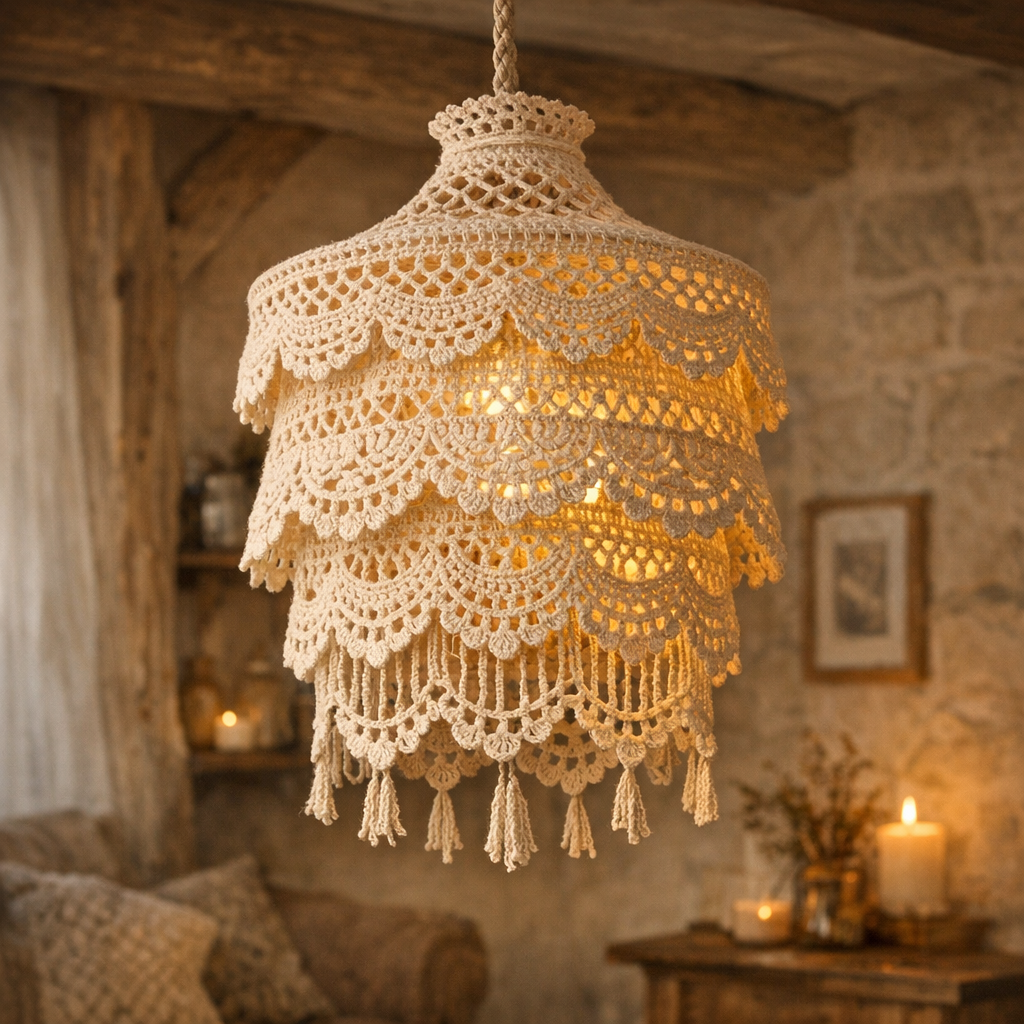
🕯️Crochet Chandelier Lamp Pattern (Rustic DIY Home Decor)
Looking to elevate your space with handmade charm? This crochet chandelier lamp pattern is a stunning DIY project that blends rustic aesthetics with modern crochet techniques.
Perfect for living rooms, patios, or cozy corners, this crochet lamp adds a soft, natural glow to your home decor.
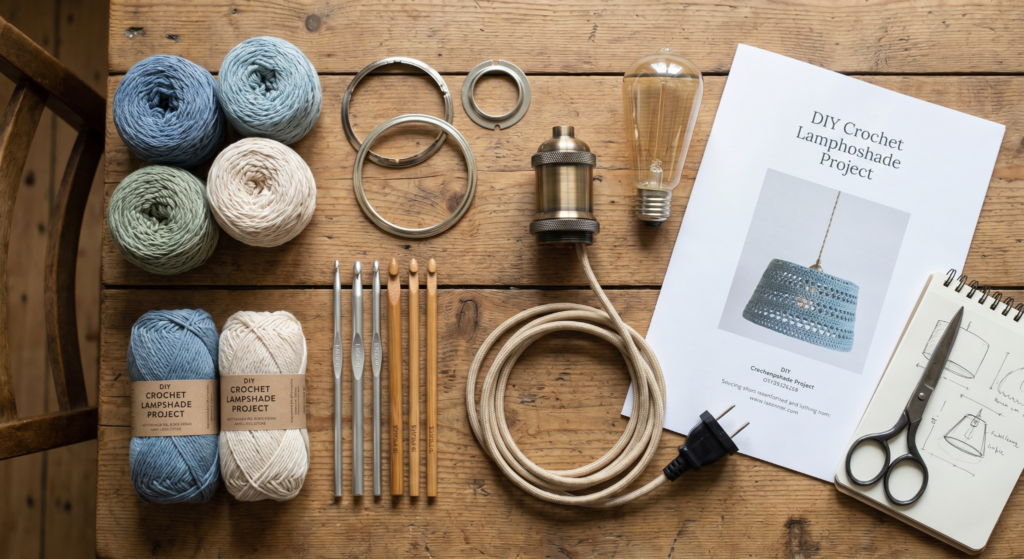
🧶 Materials You’ll Need for Your Crochet Lamp
Before you start, gather all the essential supplies to create your crochet lamp shade. This pattern uses lightweight cotton yarn and metal rings for structure.
Materials List:
- Cotton yarn (3 balls – neutral/sand color)
- 3 mm crochet hook
- Metal rings (30 cm and 15 cm diameter)
- Yarn needle, scissors
- Electrical cord, plug, lamp fitting
- E27 bulb (approx. 600 lumens)
Using neutral tones helps achieve that elegant, rustic look.
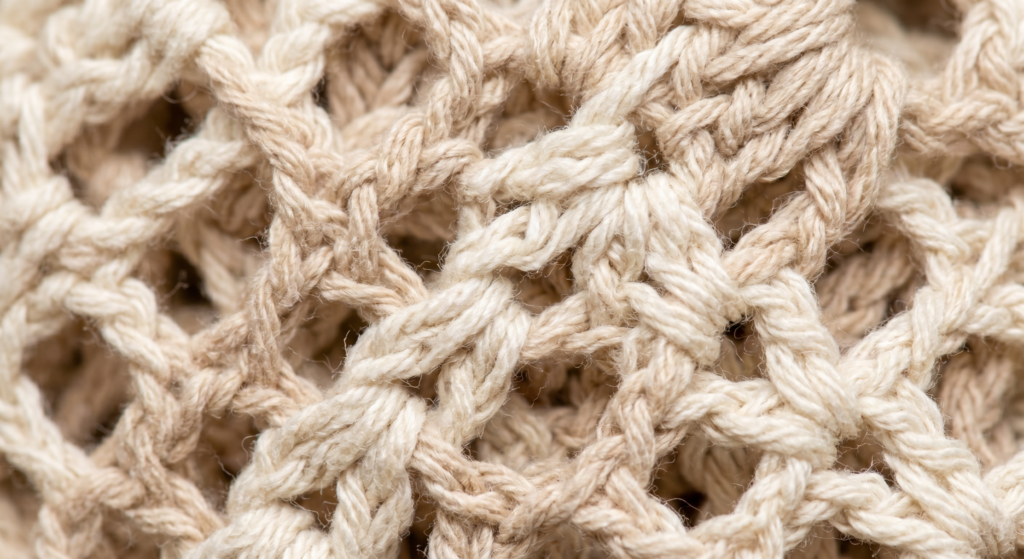
Crochet Stitches & Techniques Used
This pattern mainly uses a decorative rope stitch, which creates a lace-like texture perfect for lamps.
The base stitch pattern:
- Double crochet (dc)
- Chain stitch (ch)
- Rope stitch combination (dc + ch + dc)
Each round is joined with a slip stitch to maintain a circular structure.
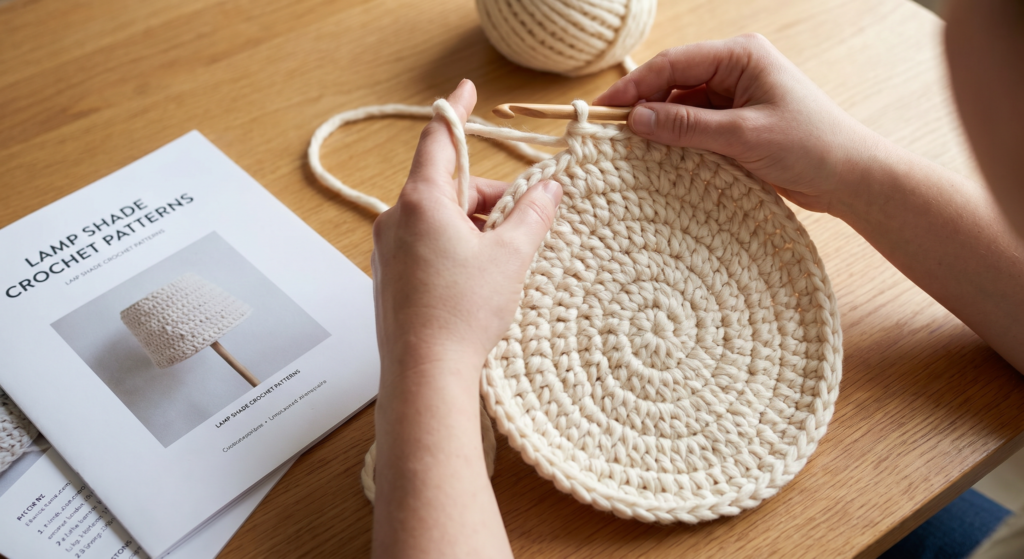
🔄 Starting the Crochet Lamp Base
Begin by crocheting a chain and joining it into a round. Then build the base using single crochet and rope stitch patterns.
As you progress through rounds, the pattern gradually expands to form the lamp’s shape.
Keep your stitches even for a symmetrical design.
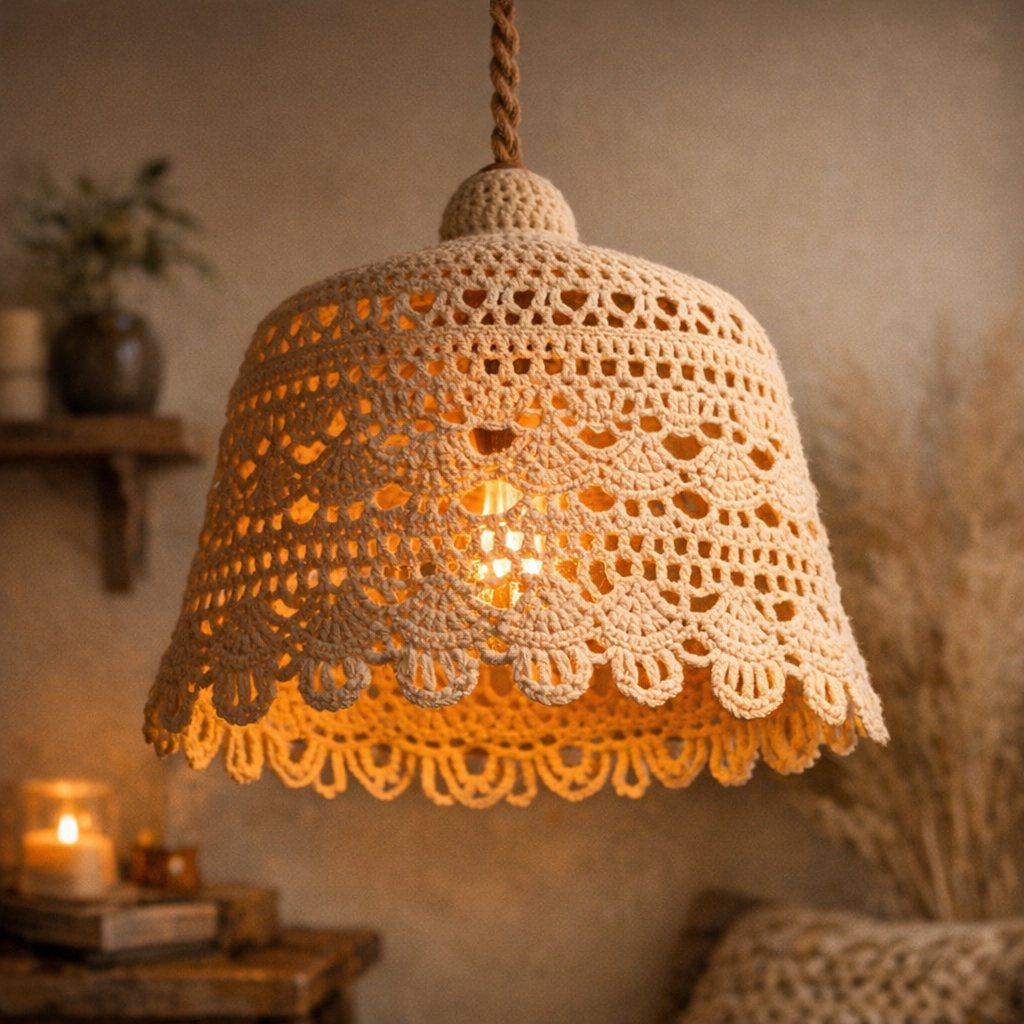
🌐 Building the Lace Lamp Structure
From rounds 5 to 17, you’ll repeat stitch patterns to create the open lace effect. This gives the lamp its airy, elegant appearance.
Gradually increase chain spaces to widen the design and allow light to pass through beautifully.
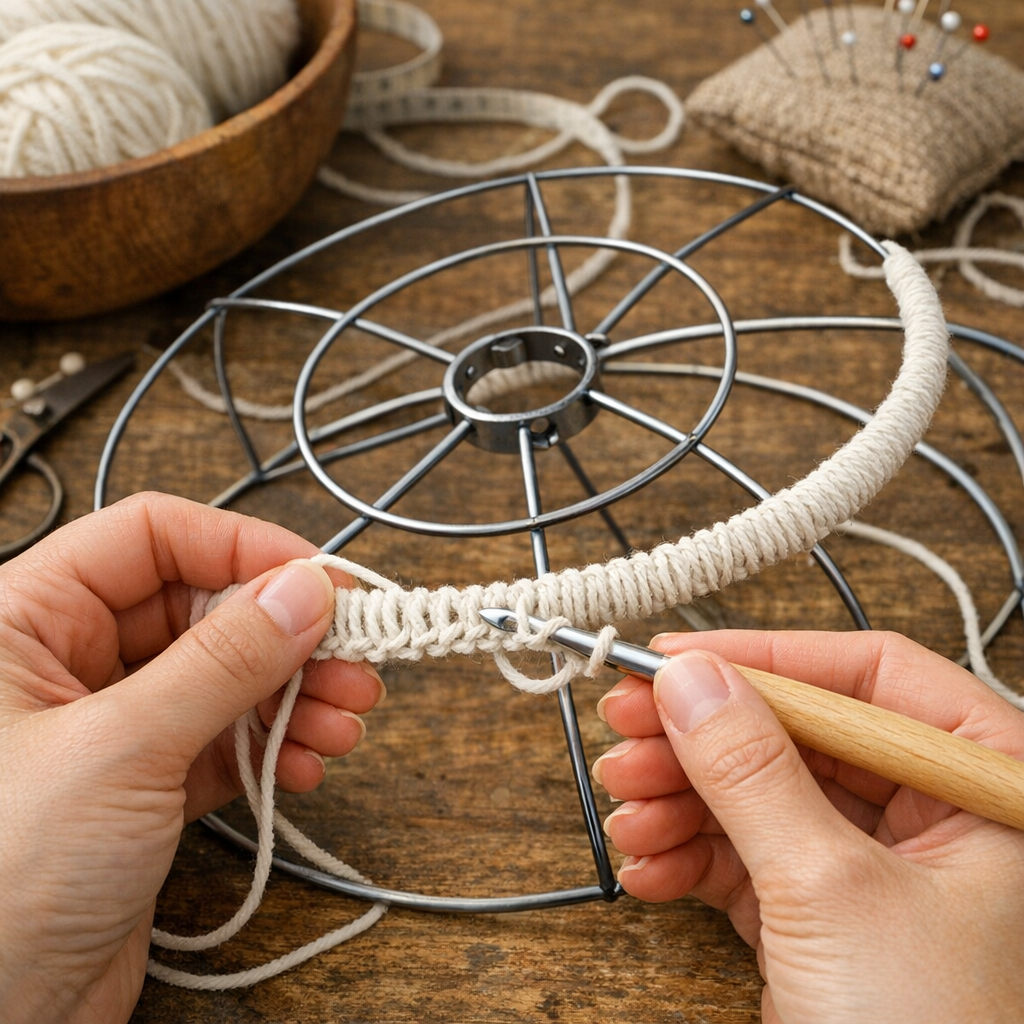
🔩 Attaching the Metal Rings
To give your crochet lamp structure, you’ll attach it to metal rings.
- Use the larger ring (30 cm) for the main body
- Use the smaller ring (15 cm) for the top closure
Crochet directly around the rings to secure them firmly in place.
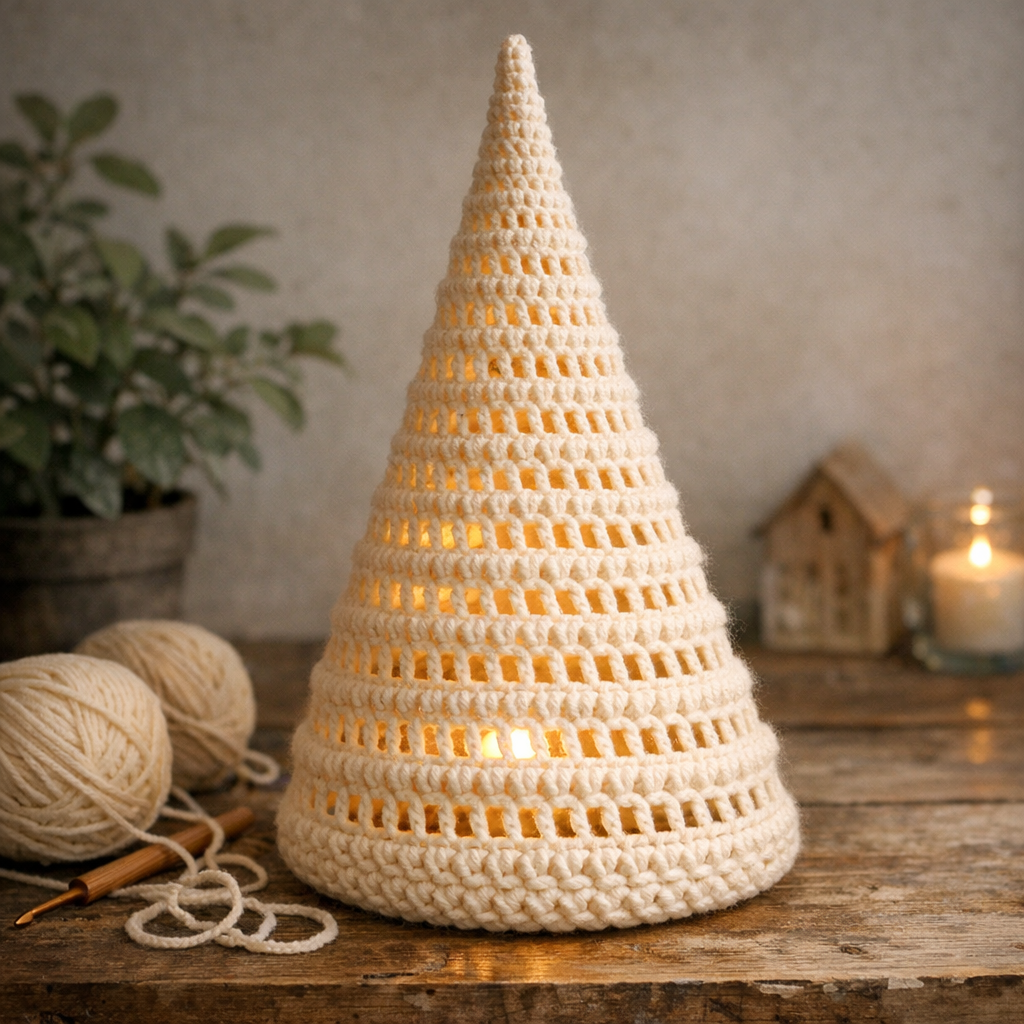
📉 Shaping & Decreasing the Lamp
After attaching the main ring, begin decreasing stitches to taper the lamp shape.
This step ensures your lamp narrows neatly toward the top, creating that classic chandelier silhouette.
Consistency in stitch tension is key here.
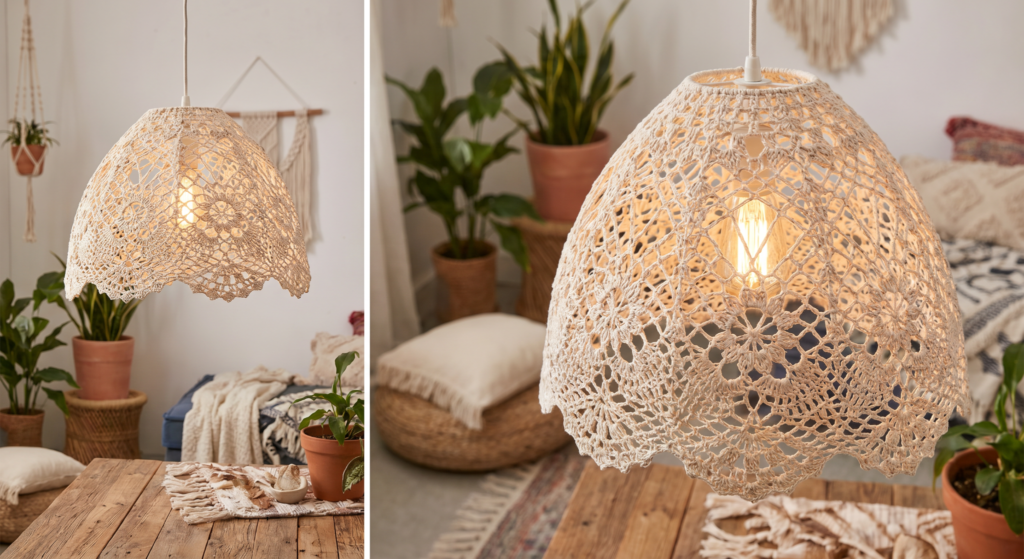
💡 Final Assembly & Electrical Setup
Once the crochet piece is complete, it’s time to assemble the lamp:
- Insert the electrical cord through the top
- Attach the plug and lamp holder
- Adjust the height of the bulb inside
Secure the top tightly with yarn to hold everything in place.
✨ Finishing Touches for a Professional Look
For extra durability, you can spray the lamp with fabric stiffener. This helps maintain its shape over time.
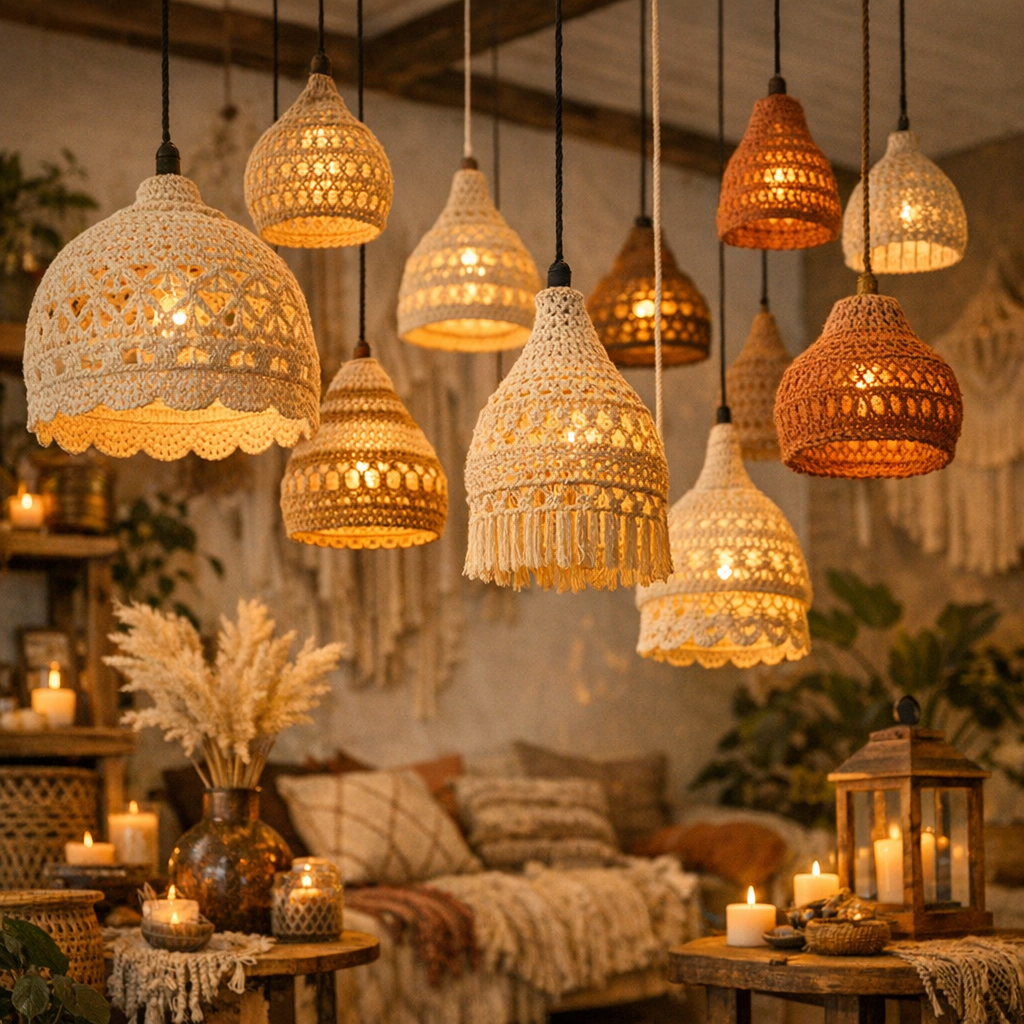
You can also hang multiple lamps at different heights for a trendy, Pinterest-worthy setup.
🌿 Final Thoughts
This crochet chandelier lamp pattern is a perfect mix of creativity and functionality. It’s ideal for anyone who loves handmade home decor with a rustic touch.
Whether you’re decorating your home or creating items to sell, this crochet lamp is sure to stand out.