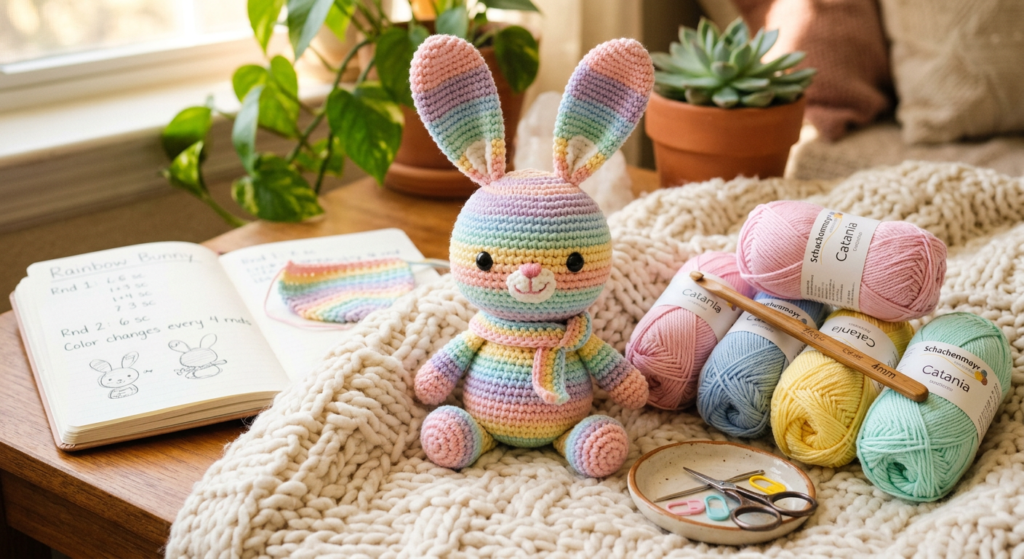
Cute Rainbow Bunny Amigurumi Crochet Pattern for Beginners
If you love colorful crochet projects, this adorable rainbow bunny amigurumi is the perfect handmade toy to add to your collection. With its soft pastel stripes, floppy ears, and cute tiny tail, this crochet bunny pattern is beginner-friendly and ideal for gifting, nursery décor, or selling at craft fairs. Based on the original PDF crochet pattern, this tutorial breaks the process down into simple, easy-to-follow sections.
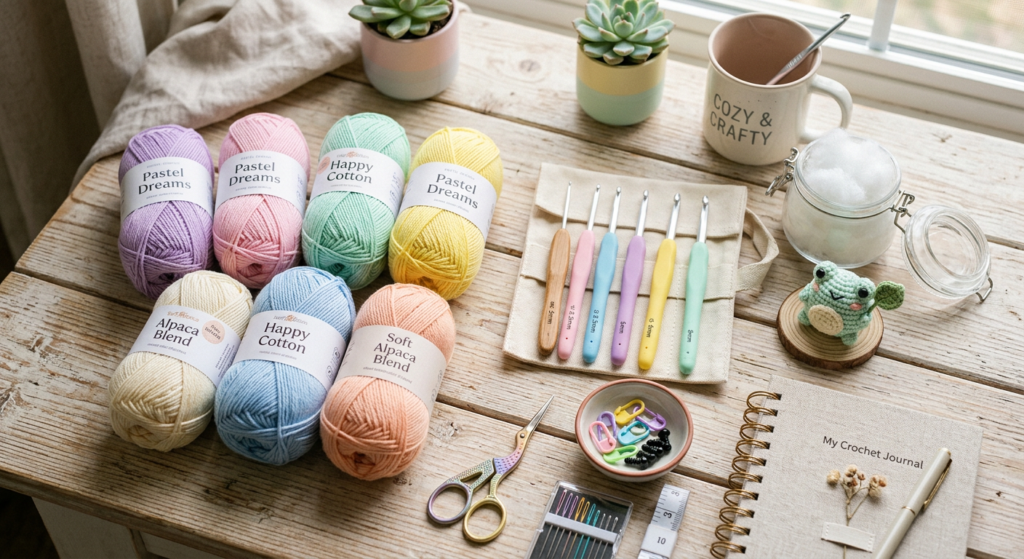
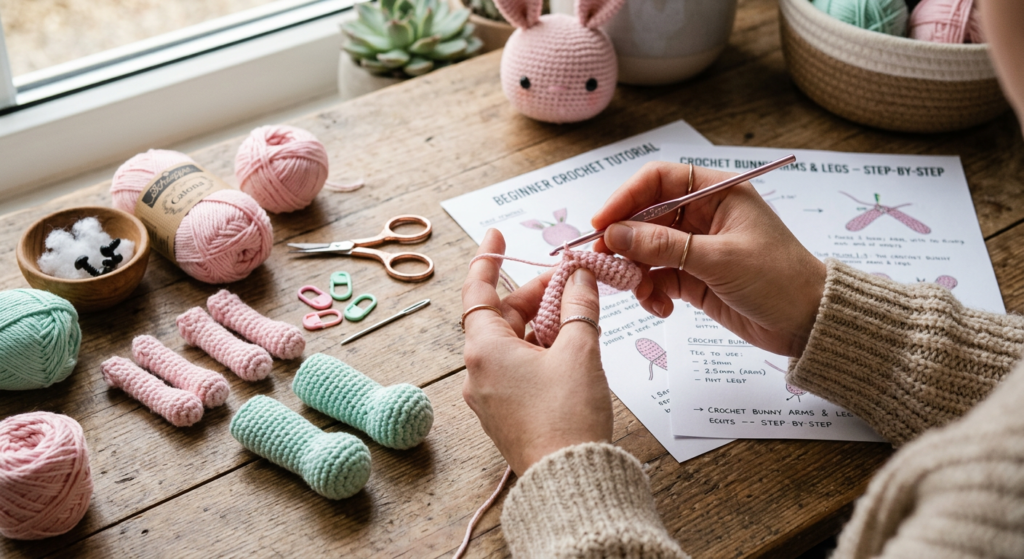
Crochet Supplies You’ll Need
Before starting your rainbow bunny crochet pattern, gather all the essential materials. You’ll need colorful yarn in rainbow shades, a crochet hook, stuffing, safety eyes, scissors, and a yarn needle for sewing the pieces together.
Using soft cotton or velvet yarn gives the bunny a plush and cuddly look. Beginners can also choose acrylic yarn for an easier and more affordable option.
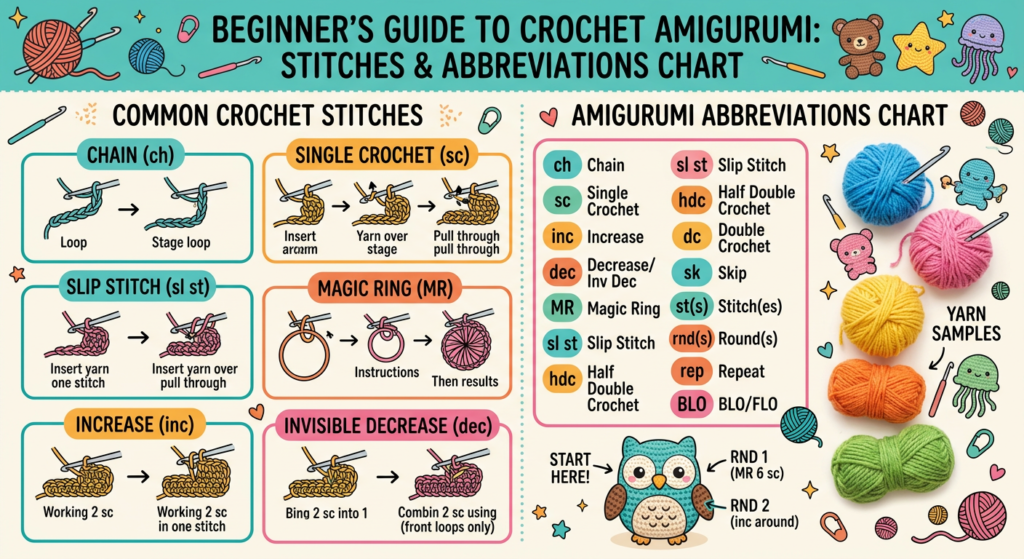
Understanding Basic Crochet Abbreviations
The PDF pattern uses standard amigurumi abbreviations that every crocheter should know. Common stitches include single crochet (sc), increase (inc), decrease (dec), magic ring (MR), and slip stitch (sl-st).
Learning these abbreviations before starting will make the bunny pattern much easier to follow. If you are new to crochet amigurumi, practicing these stitches first can help improve your confidence and stitch consistency.
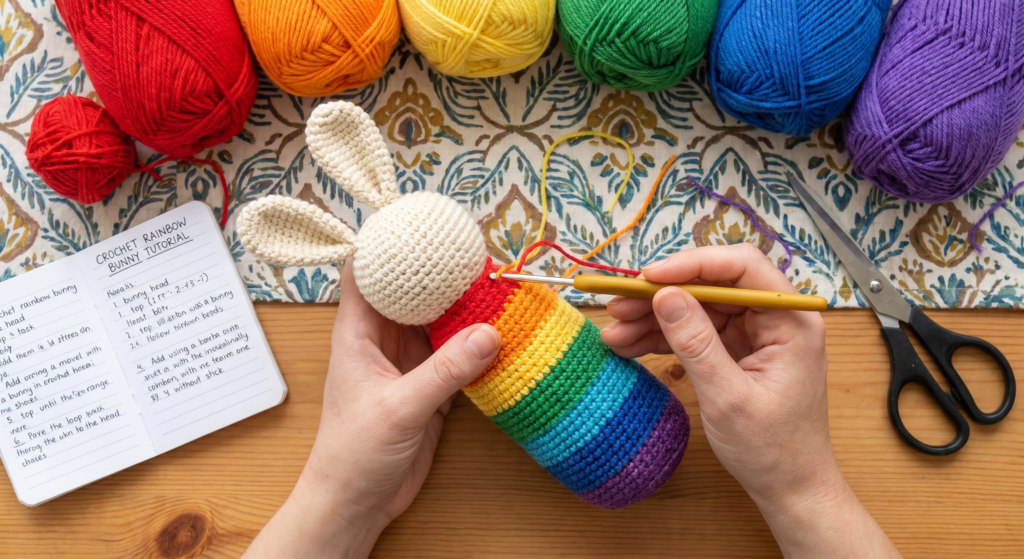
How to Crochet the Bunny Head
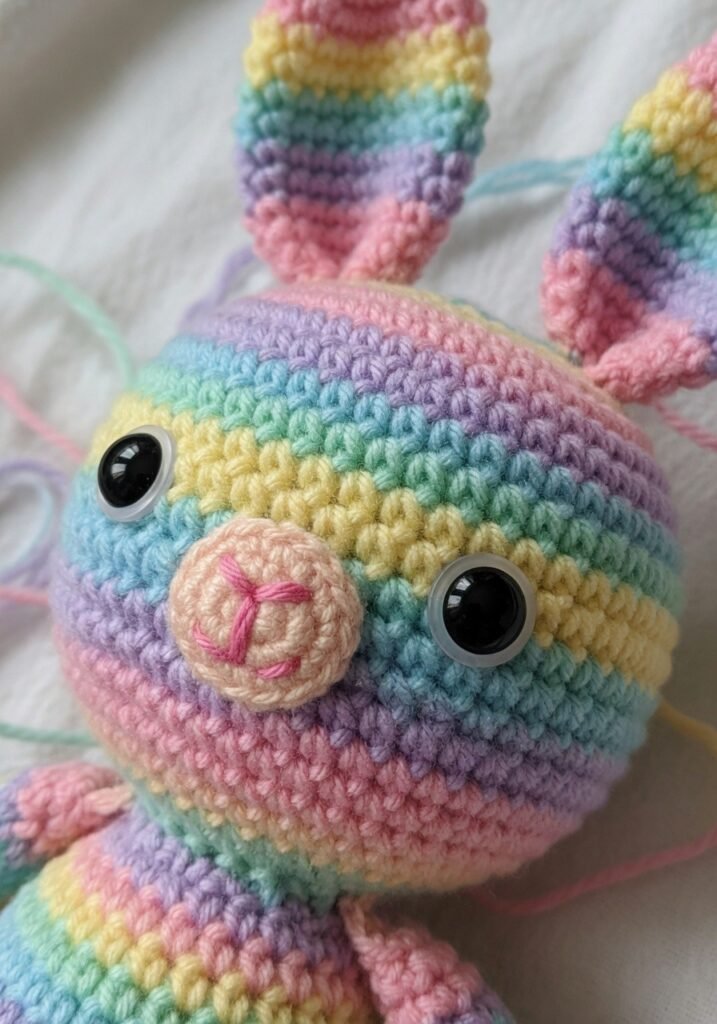
The bunny head starts with a magic ring and gradually increases to create a rounded shape. The pattern expands row by row until reaching the desired width, then decreases to form the soft rounded head shape.
One of the cutest details is the rainbow color transition. The pattern recommends changing yarn colors every three rows starting from row five, creating the signature rainbow effect. Safety eyes are placed between rows 15 and 16 for an adorable facial expression.
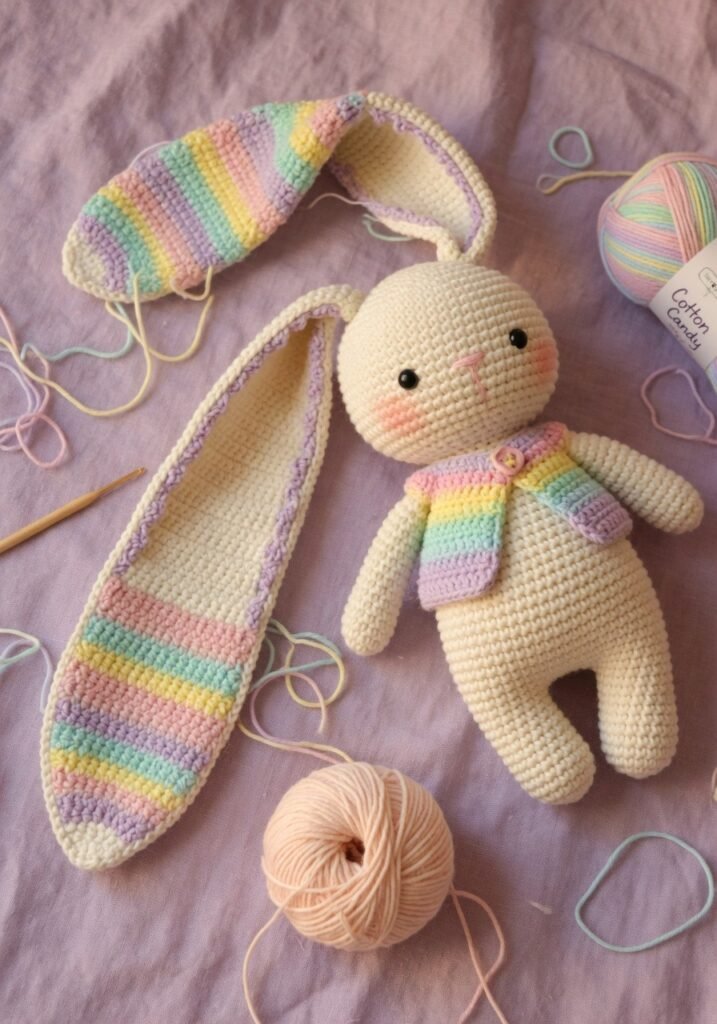
Making the Long Bunny Ears
The floppy bunny ears are crocheted separately and attached later. The pattern gradually increases the stitches to give the ears a soft curved shape while maintaining flexibility and movement.
Changing colors from the fifth row creates matching rainbow stripes that perfectly coordinate with the head and body. Folding the ears before stitching helps them hold their shape beautifully.
Crocheting the Bunny Arms and Legs
The arms and legs are made individually using simple rounds and gradual decreases. These pieces are lightly stuffed before being folded and crocheted closed for a neat finish.
The legs are attached around the 11th row of the body, while the hands are added later during assembly. This method gives the bunny a balanced and professional appearance even for beginner crocheters.
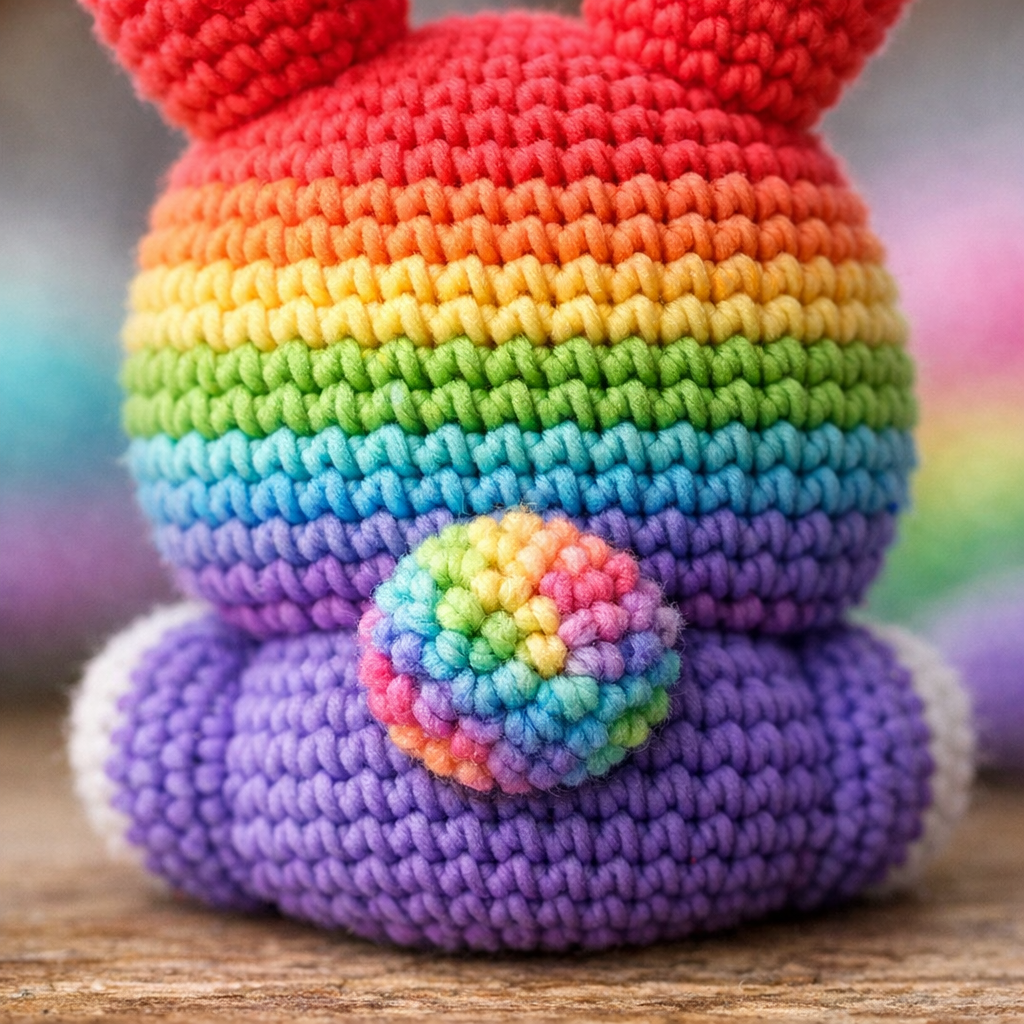
Assembling the Rainbow Bunny Body
The body is worked in continuous rounds and follows the same rainbow stripe pattern as the head. Smooth increases and decreases create a rounded plush bunny shape that looks soft and cuddly.
As you crochet, attach the legs and arms directly into the body rows according to the pattern instructions. This technique keeps the bunny sturdy and secure for play or decoration.
Adding the Cute Bunny Tail
The final step is creating the tiny crochet tail. This small detail adds charm and completes the overall bunny design beautifully. The tail is made with a few simple rounds, making it a quick finishing touch.
Once sewn onto the back of the bunny, your colorful crochet rabbit is complete and ready for display, gifting, or photography for your Pinterest boards.
Tips for a Perfect Amigurumi Bunny
- Use stitch markers to keep track of rounds
- Stuff the bunny firmly but evenly
- Sew pieces securely for durability
- Use pastel rainbow yarn for a trendy Pinterest-style look
- Take progress photos for Pinterest and social media sharing
This rainbow bunny crochet pattern is perfect for beginners who want to practice amigurumi techniques while creating an adorable handmade toy. The colorful design makes it highly shareable on Pinterest and ideal for seasonal craft collections.
Final Thoughts
This cute rainbow bunny amigurumi pattern combines simple crochet techniques with playful rainbow colors to create an eye-catching handmade project. Whether you’re making it for yourself, a child, or your crochet business, this bunny is guaranteed to stand out.
Don’t forget to save this tutorial to your Pinterest crochet board and download the full printable PDF pattern for step-by-step guidance.