Giant Plush Bunny Crochet Pattern – Colorful Ears & Bow Tutorial
Learn how to crochet an adorable giant plush bunny with two-tone colorful ears! Includes materials list, step-by-step pattern, assembly guide & image prompts.
📥 [Download PDF]
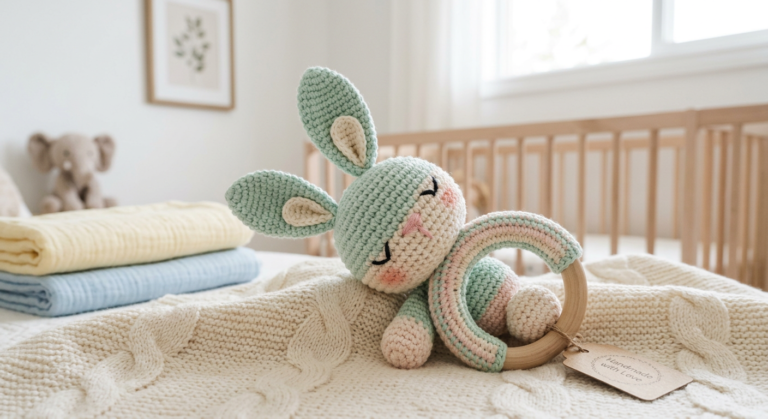
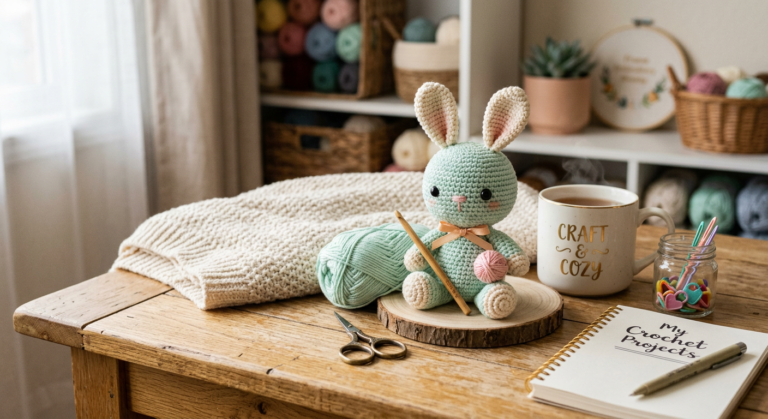
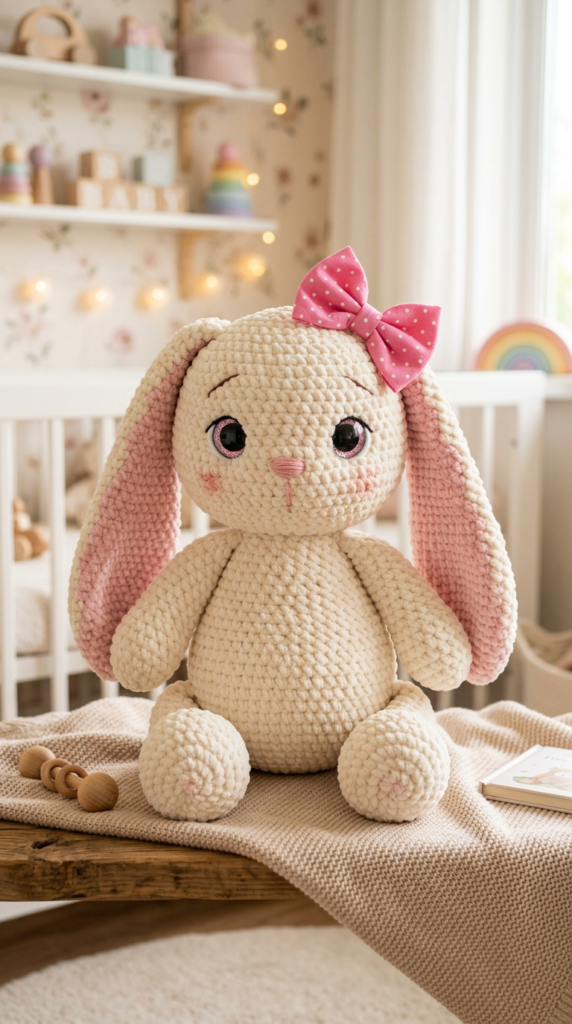
Create the most huggable handmade gift with this adorable giant plush bunny! This beginner-friendly pattern features stunning two-tone ears, sparkling safety eyes, and a charming pink bow. Perfect for nursery decor, baby showers, or Easter gifts.
Finished Size: Approximately sixty-five centimeters tall
Skill Level: Confident beginner
Time: Weekend project
What You’ll Need
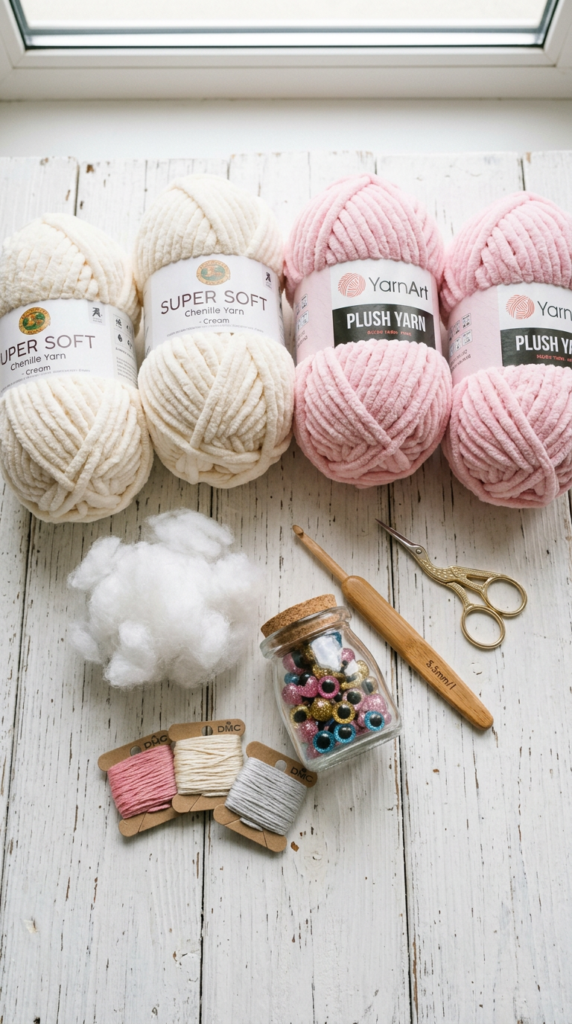
### Materials
– **Yarn:** Himalaya Dolphin Baby plush yarn or similar (cream, light pink, bright pink)
– **Hook:** Size four millimeter
– **Eyes:** Nine millimeter glitter safety eyes
– **Nose:** Nineteen millimeter wide nose
– **Extras:** Black embroidery thread, soft stuffing, tapestry needle, crystal glue, scissors, stitch markers
**💡 Safety Tip:** For babies under three years, embroider eyes instead of using safety eyes.
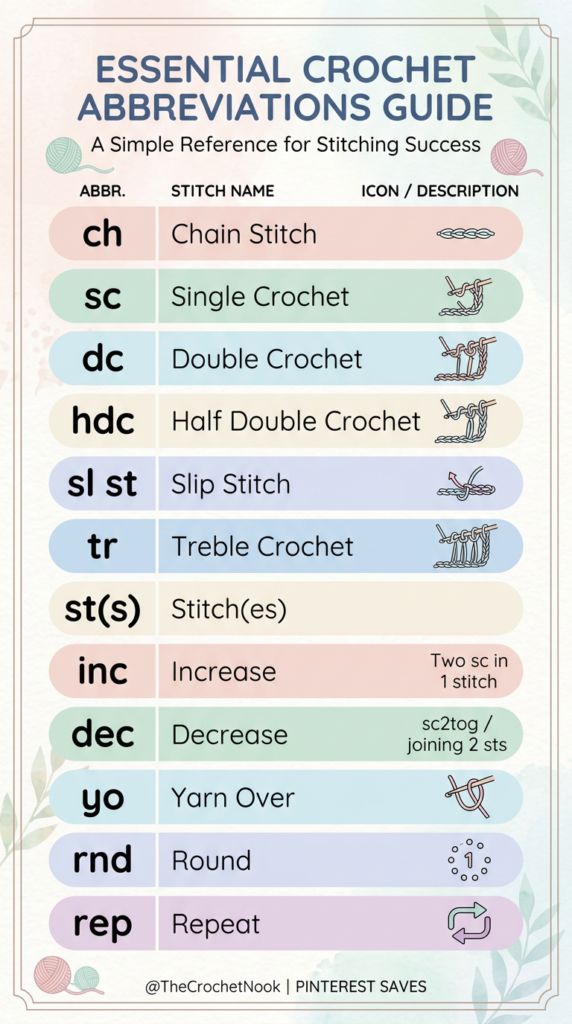
Crochet Abbreviations
– **ml** = magic loop
– **ch** = chain
– **sc** = single crochet
– **hdc** = half double crochet
– **inc** = increase
– **dec** = decrease
– **slst** = slip stitch
– **[…] x…** = repeat instructions
Pro Tips for Plush Yarn Success
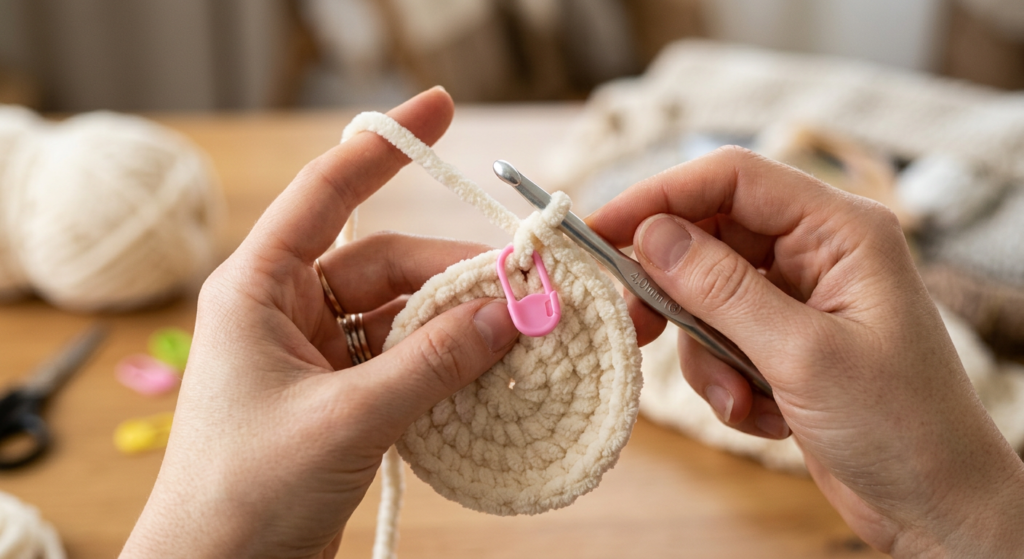
✓ Use stitch markers every round
✓ Stuff neck area firmly to prevent wobbling
✓ Crochet slightly tighter than normal
✓ Stuff as you go for even distribution
Save This Pattern to Pinterest →
The Pattern
Body & Head (One Piece)
Work in continuous rounds with cream yarn. Stuff as you go.
Body Section:
Start with six sc in a magic loop, then increase rounds progressively. Work belly shaping at round nineteen (place marker between third and fourth decrease for muzzle placement later). Continue with decrease rounds to create a neck at round twenty-six.
Head Section:
Begin increases from round twenty-seven. Stuff neck area very firmly. Continue with gradual increases to create a large round head. Place eyes between rounds thirty-five and thirty-six, spacing seven to eight stitches apart. Finish with decreasing rounds and fasten off.

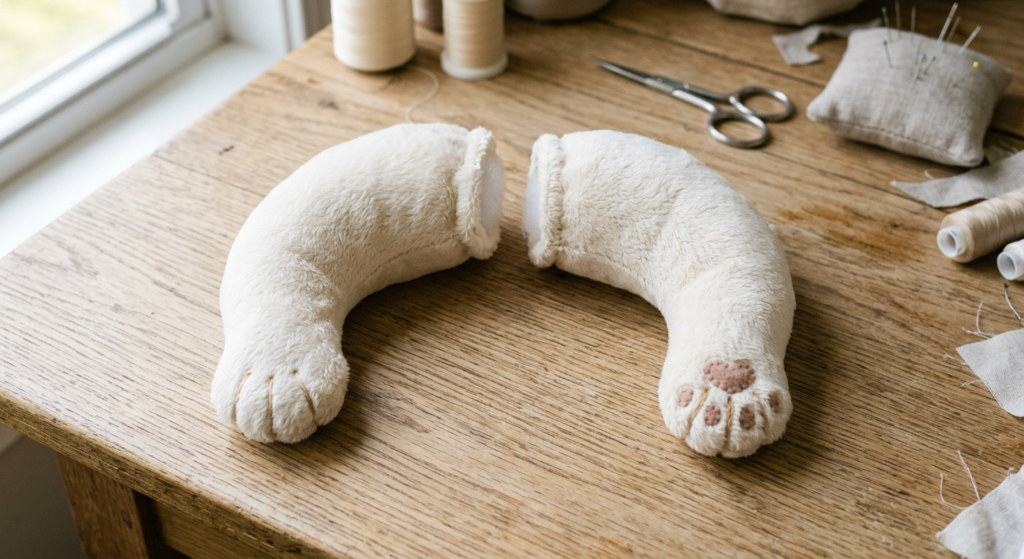
Legs (Make Two)
Start with light pink yarn for colorful feet, then switch to cream.
Begin with the foundation chain, work the oval base in rounds. At round six, work through back loops only before switching to cream. Continue with shaping decreases. Fold top and close with stitches through both edges.
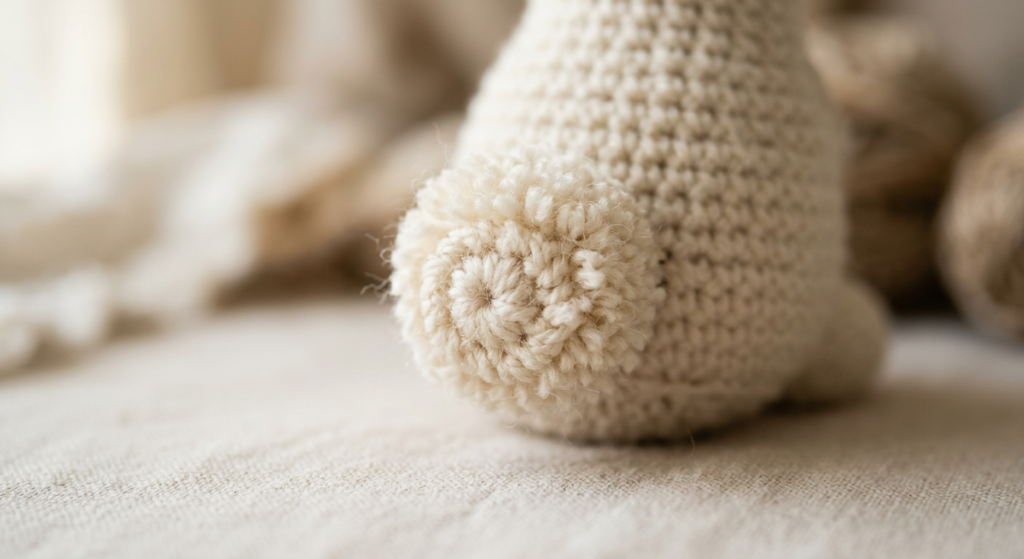
Arms (Make Two)
Work entirely in cream yarn. Start with a small oval base, continue in rounds with minimal shaping. Fold top and close.
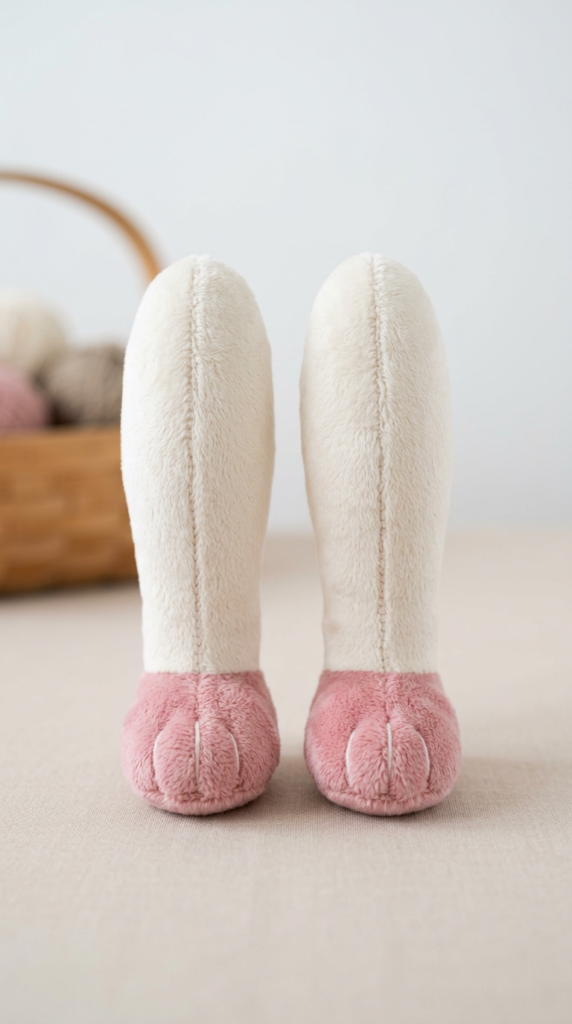
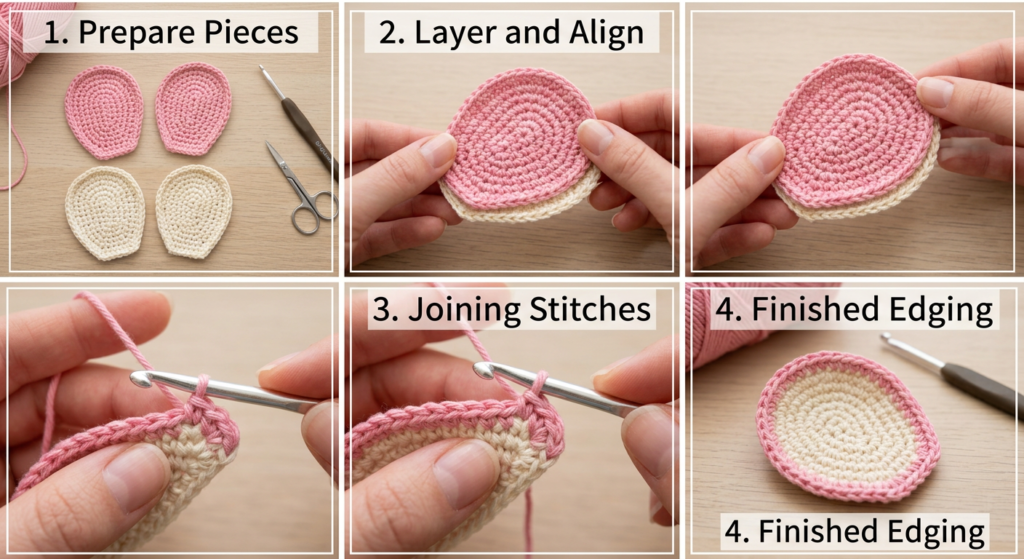
Colorful Ears (Make Four Pieces)
Create two light pink and two cream ear pieces. Work in **turning rows** using half double crochet.
Start with foundation chain, work increases to widen, then shape with strategic decreases to create elongated bunny ear shape. Layer pink piece on top of cream piece and single crochet edges together with cream yarn.
Fluffy Tail
Small round piece in cream. Start with a magic loop, increase, then decrease quickly. Stuff lightly.
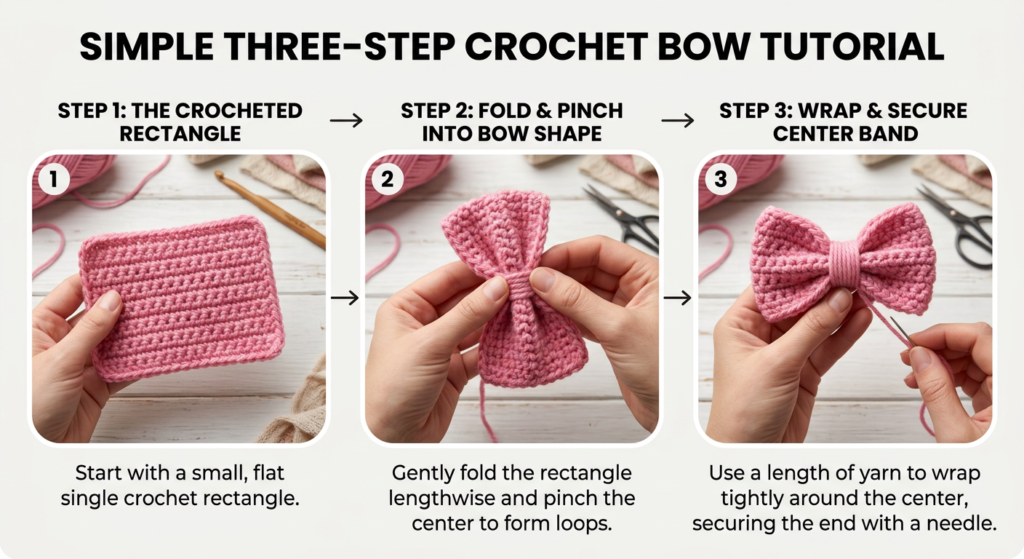
Bright Pink Bow
Work in turning rows with bright pink yarn. Create a rectangular strip for bow body and smaller strip for center band. Fold, bow into pleats, wrap with a band, and secure.
Assembly & Face Details
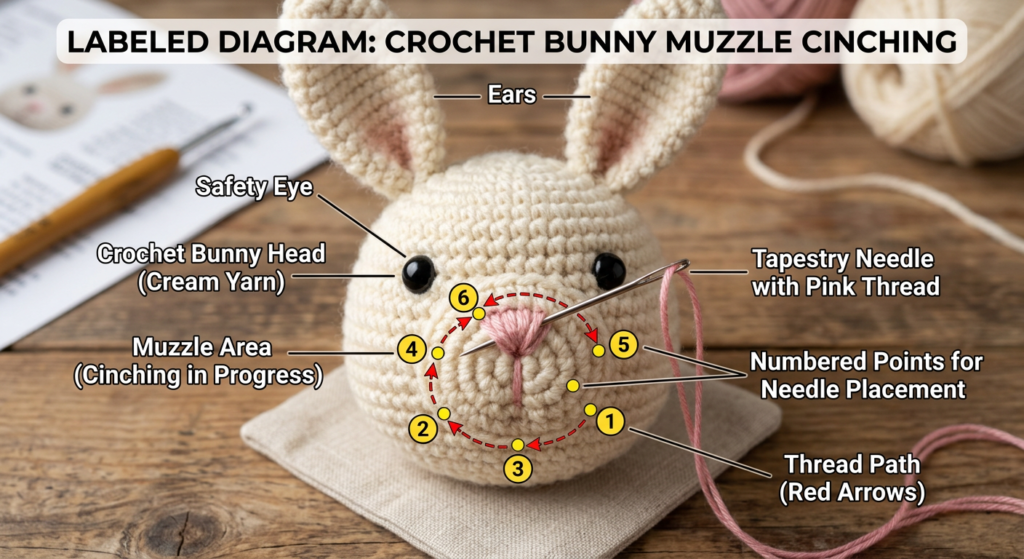
Muzzle Cinching Technique
Use cream yarn and tapestry needles. Insert needle at neck base (between rounds twenty-six and twenty-seven at Point one) and thread through to eye areas creating eye sockets. This sculpting technique creates definition.
Final Assembly Steps
1. Embroider eyebrows and nose-to-mouth line with black thread
2. Attach nose with glue
3. Sew arms between rounds twenty-six and twenty-seven
4. Sew legs directly under arms at round seven
5. Attach ears to head top with four to five stitches spacing
6. Sew bow near ear
7. Add belly button detail with pink yarn
Download Complete Assembly Guide PDF →
Your Bunny Is Ready!

*Happy crocheting! Share your finished bunnies in the comments below!* 🐰💕